Dashboard — overview & how to use it
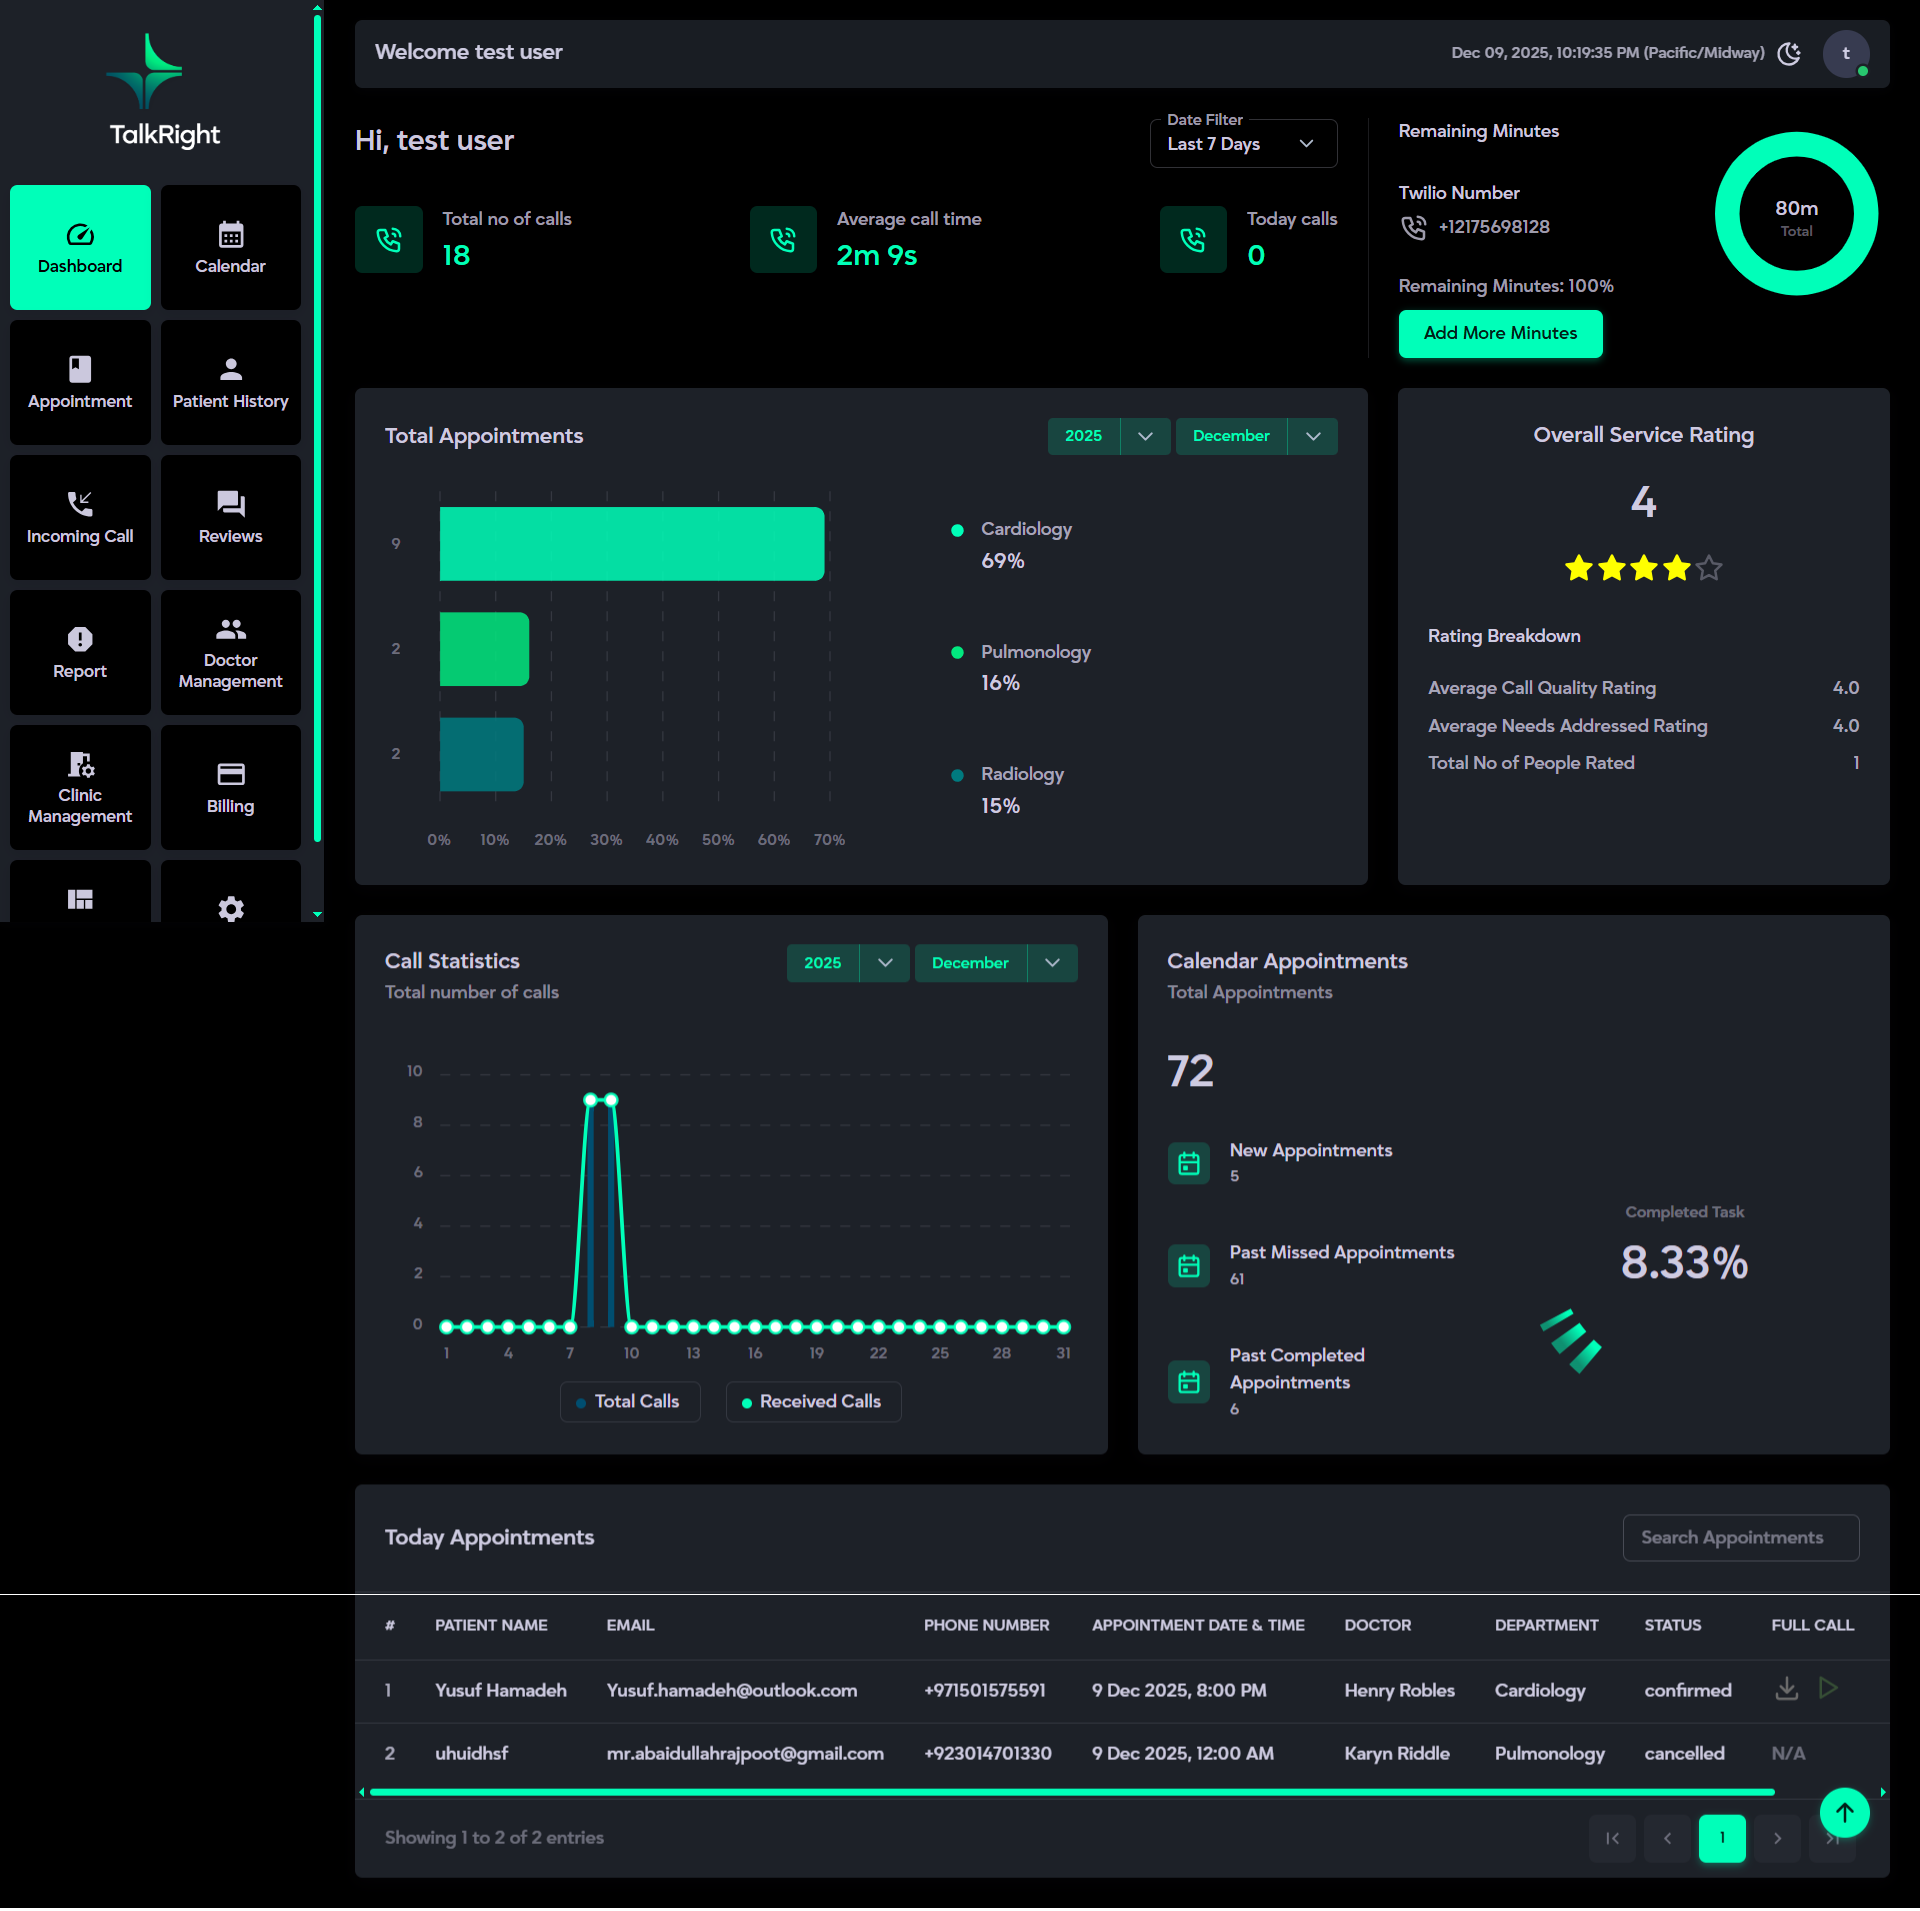
The Dashboard serves as the central control hub of your web-application, a single, organized screen that offers an overview of calls, appointments, and key performance statistics, along with quick access to detailed tools through the main menu. The following sections will guide you through each visible component, explaining its purpose and the actions you can perform. Designed for clarity and efficiency, the Dashboard ensures smooth navigation and instant access to essential information, helping you manage hospital operations effortlessly.
Account & Call
What it is:
This section provides a clear overview of your call activity, remaining minutes, and Twilio number details, allowing you to easily track and manage your package usage.
Description:
- Displays a personalized greeting with your username (e.g., “Hi, User”).
- Platform Time Zone displays the current date and time according to the time zone you selected during account setup (e.g., "Asia/Dubai"). This ensures all timestamps for appointments and reports are standardized to your selected time zone.
- Includes a date filter to review Call Activity, and Survey Overview within selected ranges (Last 7 Days, Last 15 Days, Last 30 Days, or a Custom Range). The default time filter is set to Last 7 days.
- Shows the total number of calls made for quick performance insight.
- Displays the average call duration, helping you understand typical call lengths.
- Highlights today’s call count separately (e.g., 9 calls made today).
- Displays remaining AI call minutes via a circular progress bar for intuitive tracking of your available balance. The green segment represents remaining minutes, while the red segment indicates used minutes. Total minutes are prominently shown in the center. On hover, exact remaining and used values appear in numbers for precise insight. Additionally, remaining minutes are displayed separately in percentage (e.g., 78% remaining) outside the circular visual for quick reference.
- Shows your Twilio number, the dedicated phone number linked to your account.
- Includes an “Add More Minutes” button that redirects to thePackages page, where you can upgrade your plan by canceling the current subscription and purchasing a new package with additional minutes.
Total Appointments
What it is:
The Total Appointments card displays the total number of appointments booked. By default, it shows appointments for the current month, but you can use the monthly filter to view previous months. This helps track scheduling activity and identify trends.
Description:
- Automatically counts all appointments created in the system.
- Updates in real-time as new appointments are added, regardless of their status.
- Shows a visual graph with color-coded segments for each department.
- The top 5 departments with the highest number of appointments are displayed individually. All other departments with fewer appointments are grouped under Others for a clear, focused view.
- Default filter: Current Month.
Survey Overview
What it is:
The Survey Overview card presents a summary of feedback ratings, offering insights into overall service quality and patient satisfaction.
Description:
- Displays the overall average rating (e.g., 4.35) for a quick performance snapshot.
- Breaks down ratings into key categories:
- Average Call Quality Rating – feedback from patients or callers after interacting with the AI call system (e.g., 4.5).
- Average Needs Addressed Rating – feedback collected from patient responses during the call about how well their needs were understood and addressed by EVA (e.g., 4.2).
- Shows the total number of users who submitted ratings (e.g., 300 respondents), providing a clear measure of engagement and satisfaction.
Call Statistics
What it is:
The Call Statistics card tracks all calls made through the system on a monthly basis, helping you analyze overall calling performance and response trends in that duration.
Description:
- Displays two key metrics through interactive progress charts:
- Total Calls – the total number of calls made, represented by solid vertical bars on the chart.
- Received Calls – the number of successfully answered calls, shown as a highlighted progress line for easy comparison.
- Includes a dropdown filter that allows you to view and compare call data for any specific month as needed.
Calendar Appointments
What it is:
The Calendar Appointments card provides a quick overview of all scheduled appointments, giving instant insight into booking activity.
Description:
- Shows the total number of appointments in the system.
- Separates counts into:
- New Appointments – upcoming scheduled bookings
- Past/Missed Appointments – cancelled or expired bookings
- Completed Appointments – all successfully completed bookings
- Includes a circular progress indicator to visualize the percentage of completed appointments.
- Updates automatically as appointments are added or completed, ensuring real-time accuracy.
Today Appointments
What it is:
The Today Appointments' section provides a comprehensive overview of all patient appointments scheduled for the current day. It enables hospital staff to efficiently monitor, manage, and track appointment activities in real time, ensuring smooth operations and timely patient handling throughout the day.
Description:
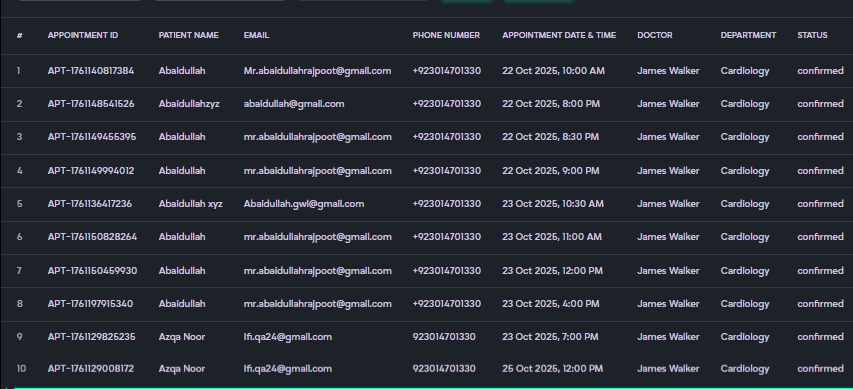
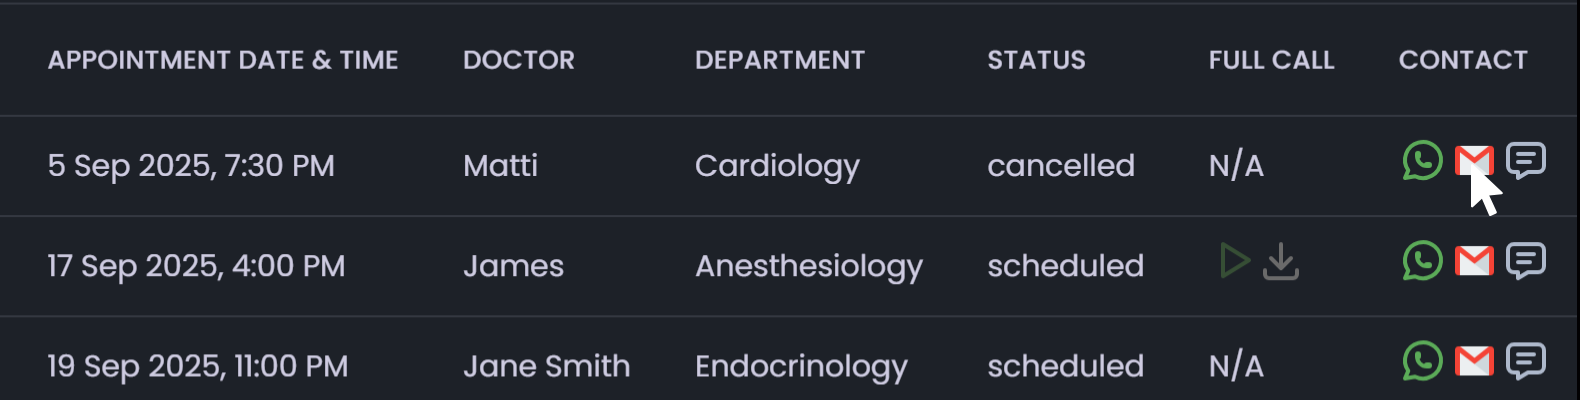
Each record represents a patient appointment with complete details, including:
- Patient Name, Email, and Contact Number (e.g., Jack Smith, jack@gmail.com, +92 99939393).
- Appointment Date and Time (scheduled slot).
- Assigned Doctor and Department (e.g., Dr. John Dae – Cardiology).
- Appointment Status (e.g., Confirmed, Completed, or Canceled).
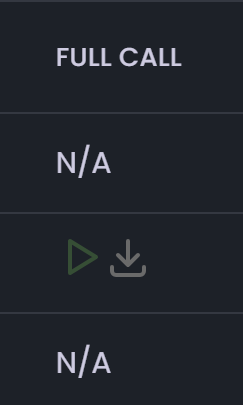
- Call Record (displayed if available, otherwise shown as N/A).
- Contact Field for quick communication via email, WhatsApp, or direct call.
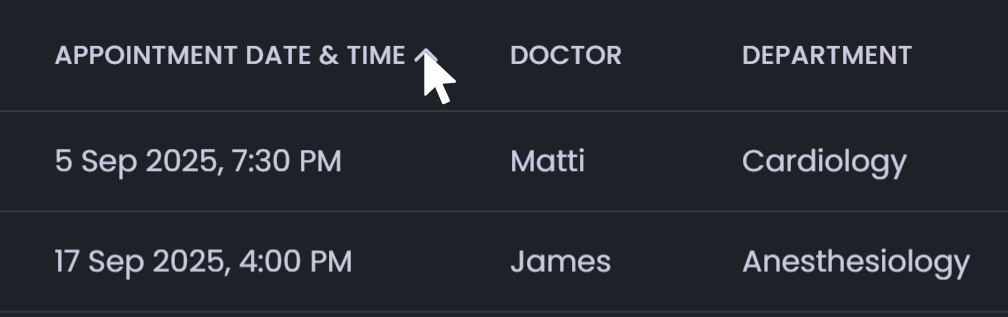
The table supports searching by patient name, email, contact number, or status and allows sorting based on selected fields (patient name, email, contact number, or status). Data is displayed in a paginated format (e.g., Showing 20 to 30 of 100 entries) to ensure smooth navigation through large datasets.
Side Menu
What it is:
The Side Menu serves as the main navigation panel of the TalkRight web-application. It remains visible on the screen at all times, allowing users to quickly access key sections without switching pages.
Description:
- Dashboard: Provides an overview of key metrics, including calls, appointments, and performance insights.
- Calendar: Allows staff to view and manage appointments based on doctor availability and department schedules.
- Appointment: Displays all booked appointments with filtering and sorting options for easy management.
- Incoming Call: Shows a complete log of all received calls with caller details and response status.
- Reviews: Contains patient and caller feedback, helping assess satisfaction and service quality.
- Report: Displays detailed appointment and call data for review and tracking.
- Doctor Management: Enables management of departments and managing doctor profiles, shifts, and leave schedules.
- Clinic Management: Manages clinic timings, weekly offs, and special leave days.
- Billing: Provides subscription details, package management, and purchase history & allows to purchase twillio number once.
- Templates Management: Allows editing and configuring Email, WhatsApp, and Poll templates for communication.
- System Settings: Offers access to system configurations such as WhatsApp setup, cron job scheduling, and branding options.
- Profile Menu: The Profile Menu provides quick access to all account-related settings and personal information. It allows users to view their profile, update personal and business details, change their password, and securely log out. This centralized menu ensures easy management of user data and account preferences.
Profile Menu
What it is:
The Profile Menu provides quick access to all account-related settings and personal information. It allows users to view their profile, update personal and business details, change their password, and securely log out. This centralized menu ensures easy management of user data and account preferences.
The detailed description and usage instructions for the Profile Menu are provided at the end of the System Features section. You can refer to it for a quick review and better understanding.
Calendar
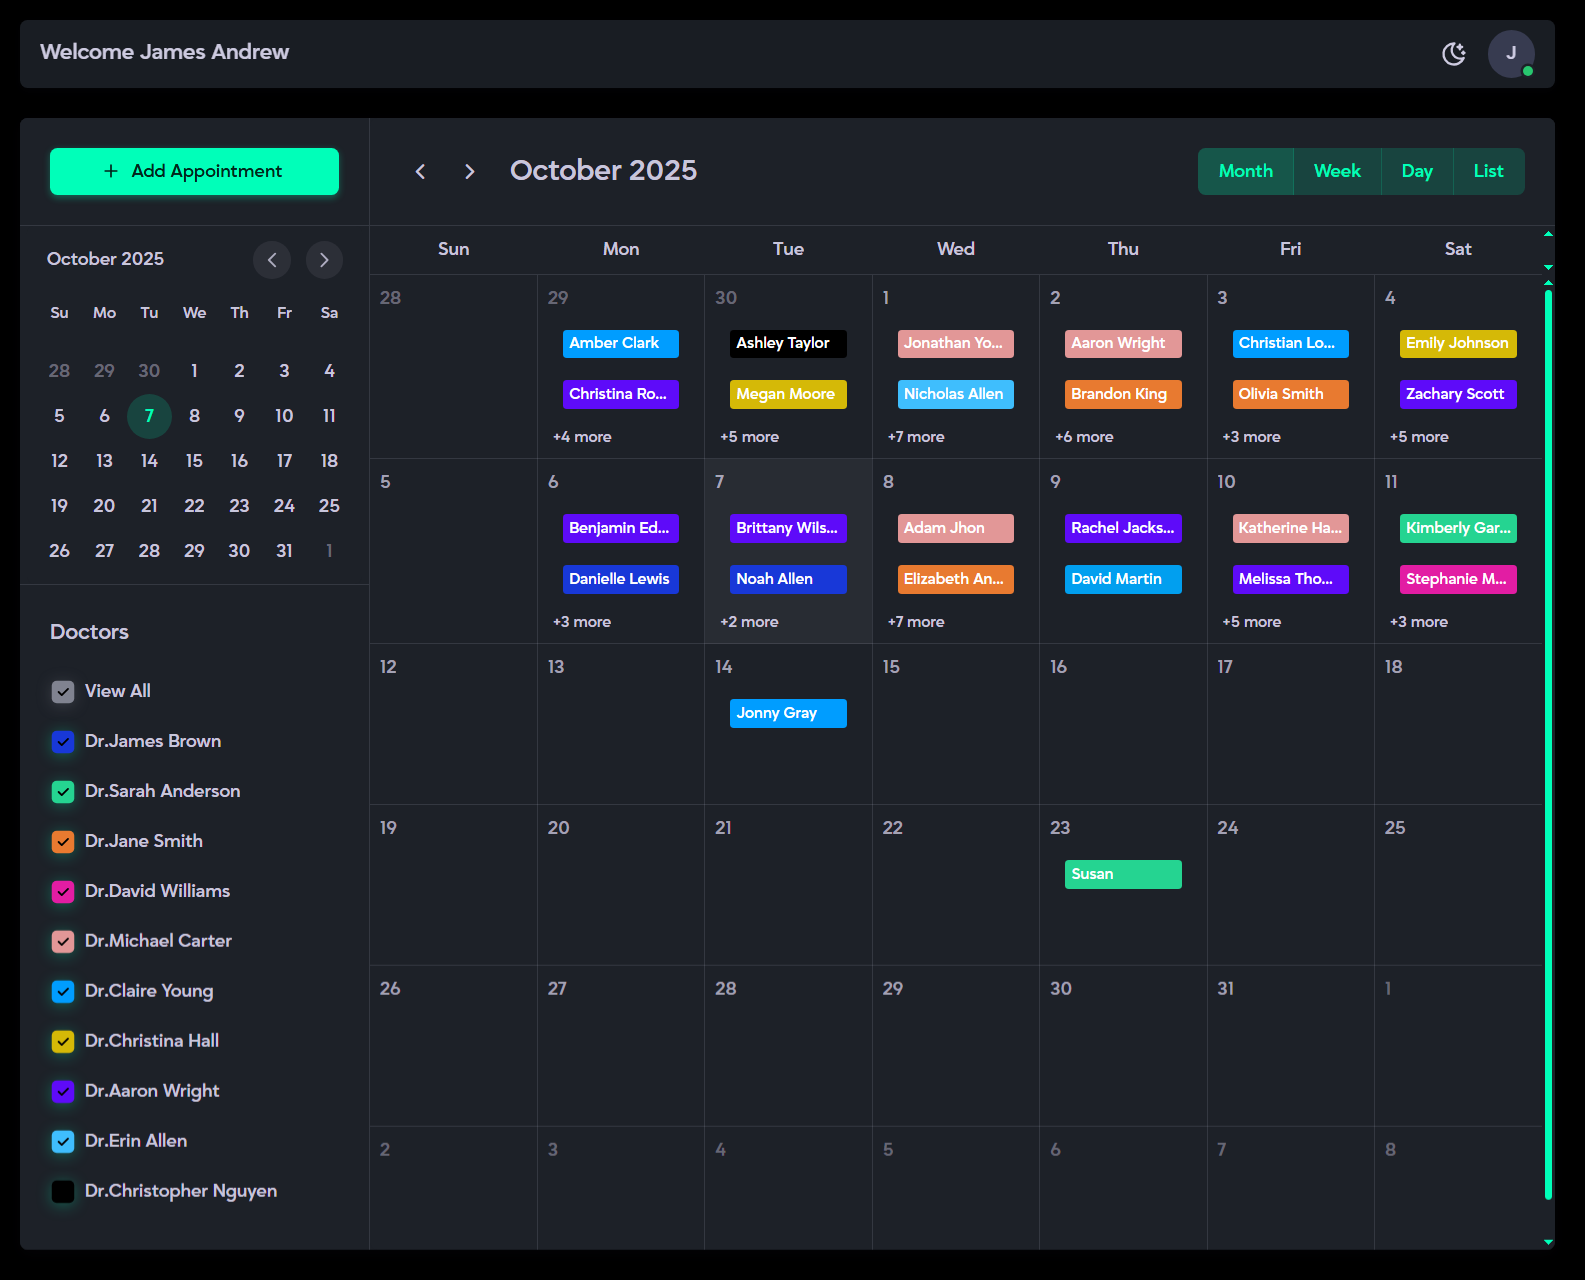
The Calendar provides a clear and organized view of all appointments, enabling hospital staff to manage schedules efficiently. New appointments can be added manually based on patient needs and doctor availability. Existing bookings can be easily updated, rescheduled, or deleted when changes occur, ensuring the timetable remains accurate and up to date.
What it is:
The Calendar is a centralized tool for managing all patient appointments. It allows you to view all the created appointments & to create a new appointment allows you to select any date, assign doctor and their departments, enter patient information, and further allows you to update or delete appointments as needed.
Description:
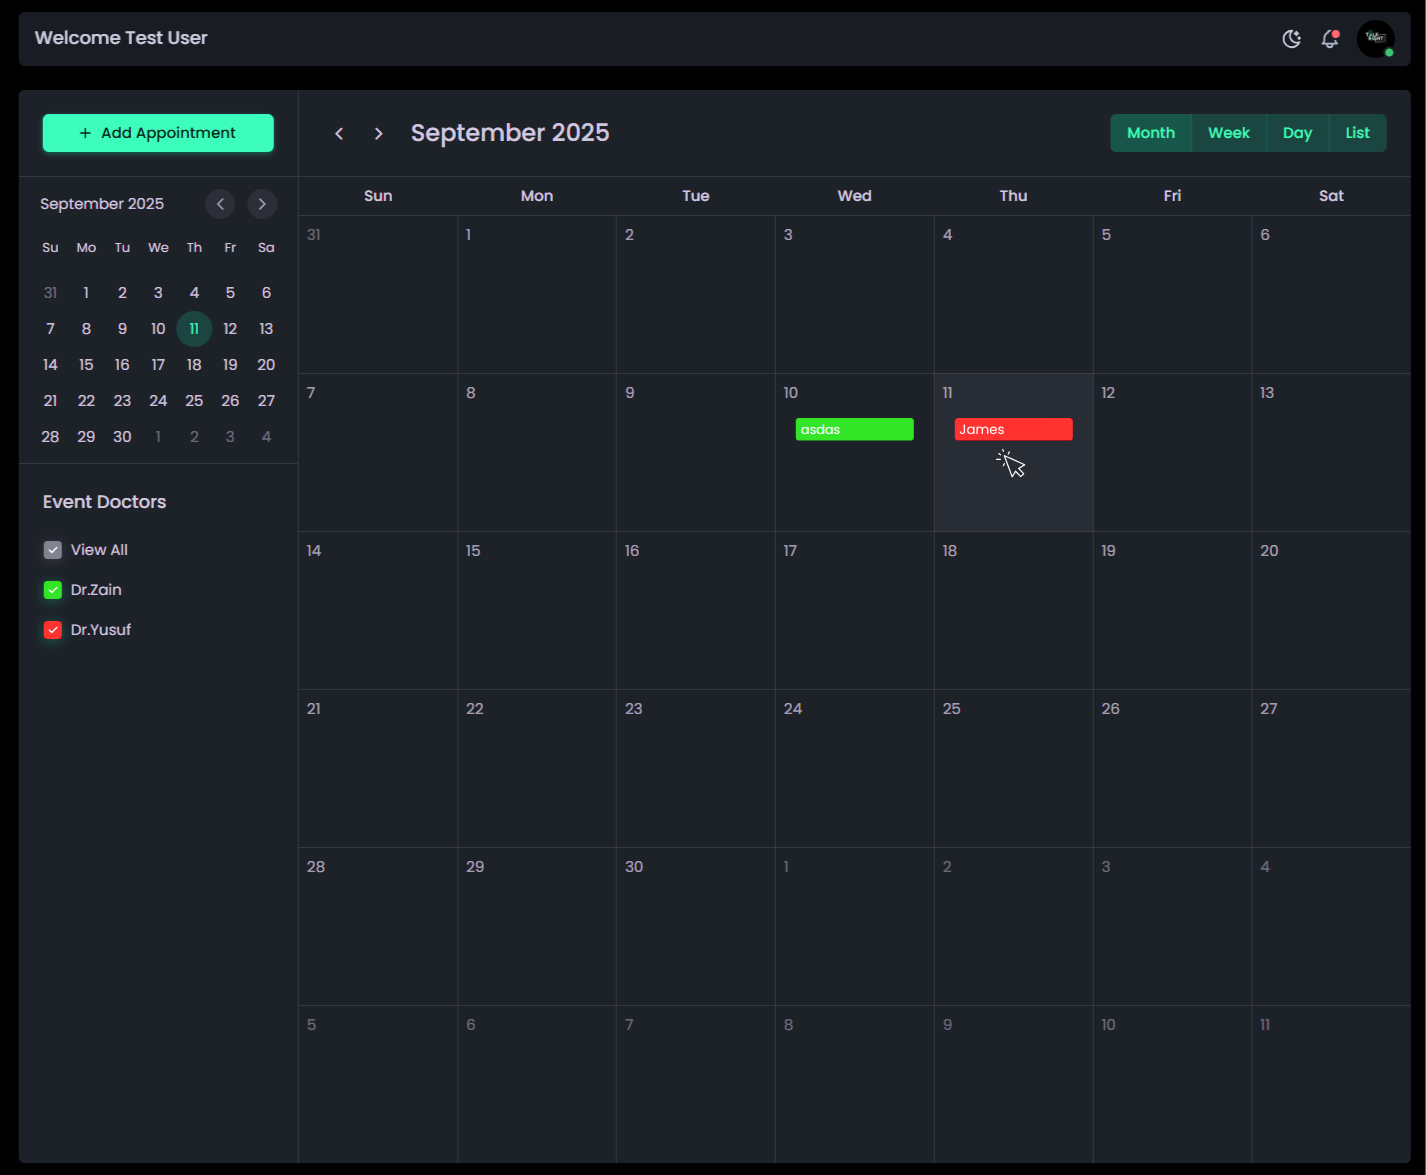
The Calendar offers a clear monthly view where all appointments are displayed by date.
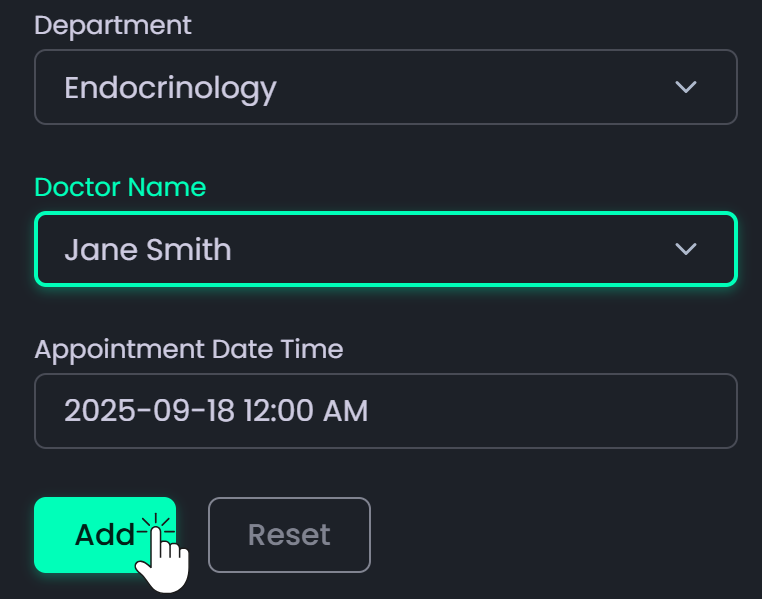
- Add Appointment → Opens a form to create a new booking by enteringpatient details, doctor information, and selecting the appointment date and time.
- Each booked slot shows the patient’s name and uses the doctor’s assigned color (from Doctor Management) for easy identification.
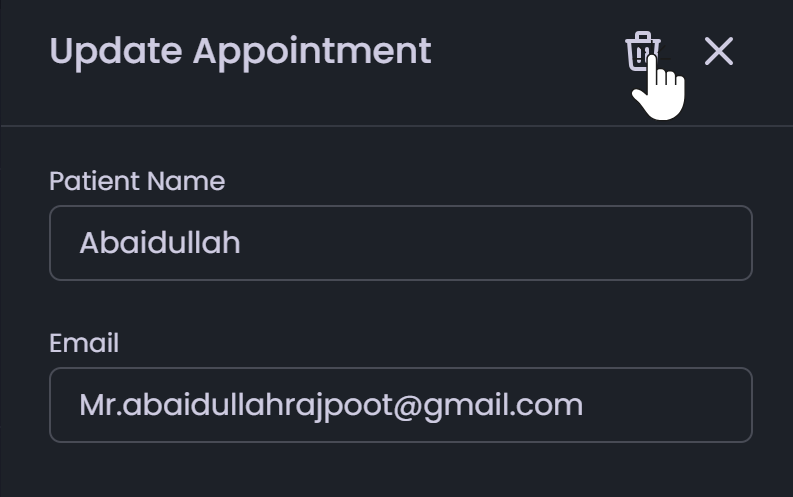
- Clicking on an appointment block displays detailed information with the following options:
- arrow_forwardUpdate: Save any modifications.
- arrow_forwardReset: Clear all the altered data and restore default values.
- arrow_forwardDelete (Trash Icon): Permanently remove the appointment.
- Mini Calendar: Lets you view or jump to a specific day or month.
Additional Features:
- Past Date Restriction: The system prevents creating appointments on past dates and displays a warning if attempted.
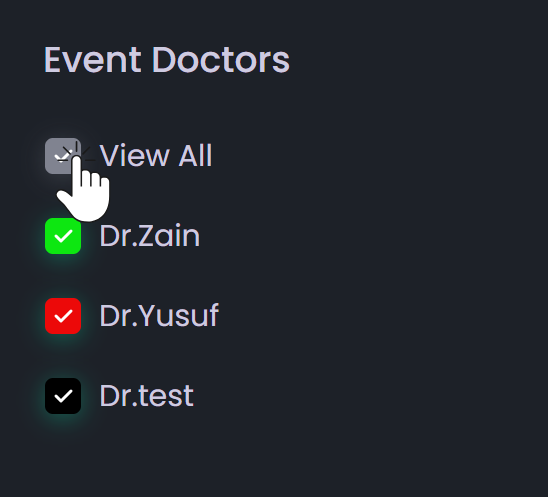
- Doctor Filtering: Checkboxes beside the calendar let you filter and view specific doctor's appointments, or use the View All option to display all appointments in the calendar.
- Calendar View Categories: Switch between Month,Week, Day, or List views for flexible schedule management.
- Drag and Drop Functionality: To update an appointment’s date, simply drag the appointment from the current date to the desired one. The system will automatically update it if the doctor’s slot is available on the new date.
How to Use It:
- Open the Calendar and click on your preferred date.
- Enter the doctor,department, and patient details.
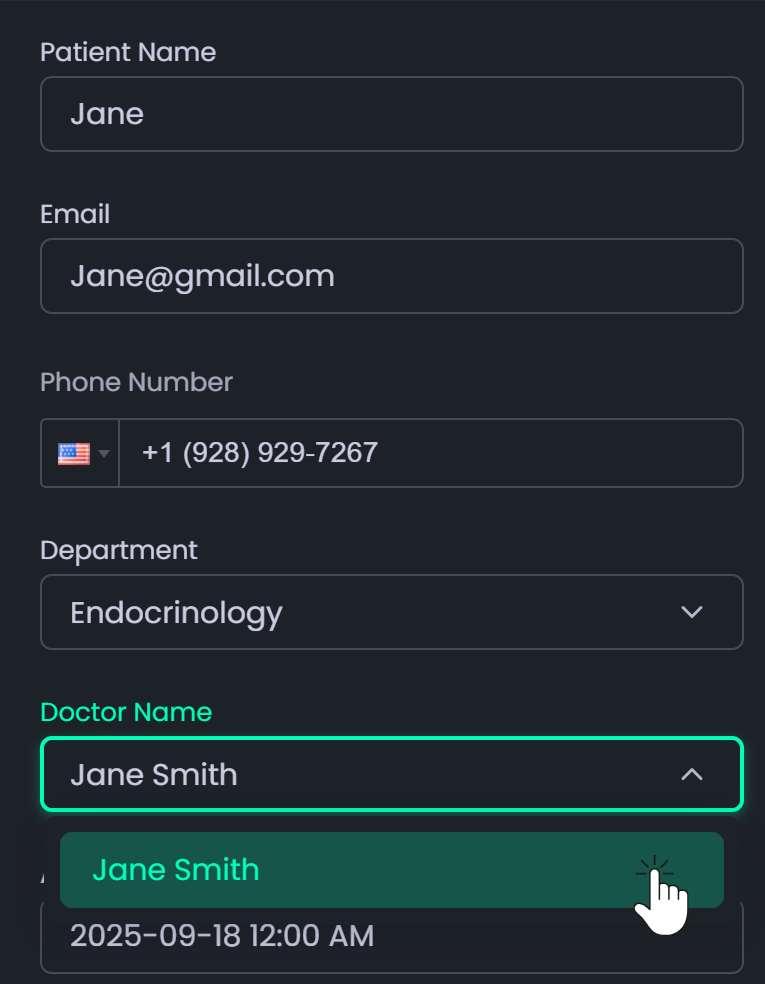
- Click Add Appointment to save it in the system.
- To view booked appointments, click the patient name (displayed in the doctor’s assigned color). A form will appear showing appointment details where you can:
- Click Update to save changes after updating data.
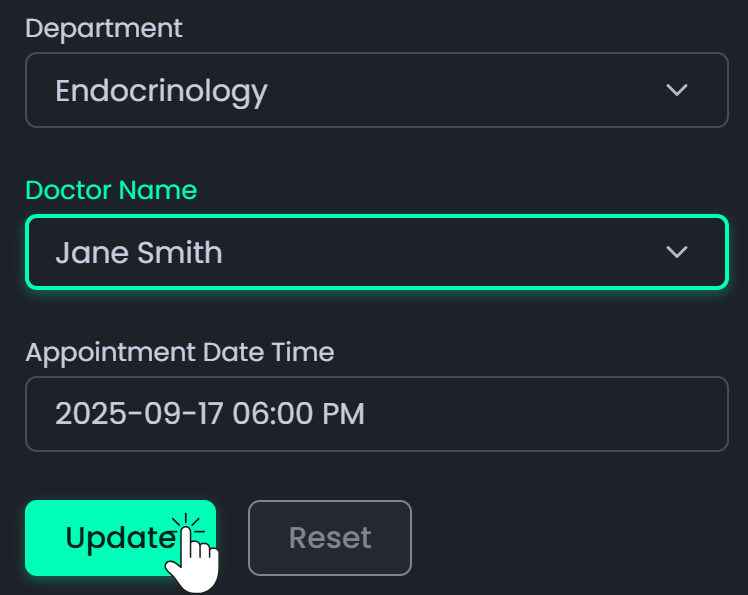
- Click Reset to restore default field values.

- Click Trash Icon at top right next to the exit button to delete the appointment.
- Click Update to save changes after updating data.
- To reschedule, drag and drop the appointment to the preferred date. The system will update it automatically if the slot is available.
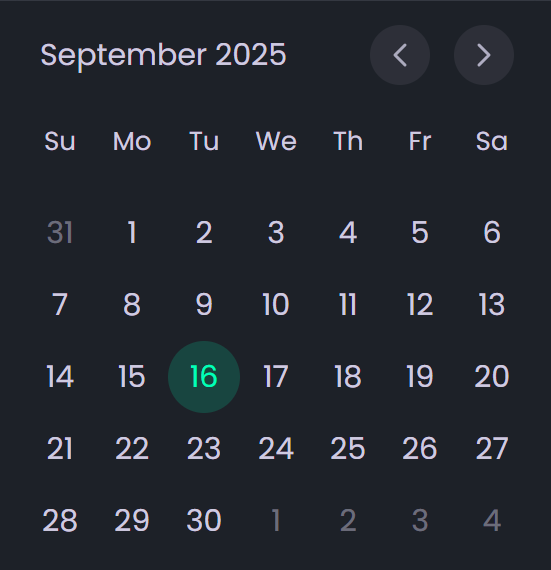
- Use the Mini Calendar on the right to jump to any date.
- Use Navigation Controls(left/right arrows or month title) to switch between months.

- Switch between Month,Week, Day, or List view as needed.
- Select Checkboxes having doctors' list beside calendar to view specific appointments, or choose View All to display all appointments on the calendar.


Appointments
The Appointments section provides a comprehensive view of all scheduled bookings in one place. It allows you to quickly view, search, and track appointment details, including the Appointment ID, department, doctor’s name, appointment creation date and time, appointment date and time, and patient information such as name, phone number, and email. You can also monitor the status of each appointment, whether it’s confirmed, completed, or canceled. This section ensures that all appointments remain well-organized, easily accessible, and efficiently managed for smooth clinic operations.department, doctor’s name, appointment date and time, andpatient information such as name, phone number, and email. You can also monitor thestatusof each appointment, whether it’s confirmed, completed, or canceled. This section ensures that all appointments remain well-organized, easily accessible, and efficiently managed for smooth clinic operations.
What it is:
The Appointments section provides a centralized view to manage and monitor all patient bookings. It displays appointment information in a clear, structured table, allowing hospital staff to quickly review, update, or filter schedules as needed.
Description:
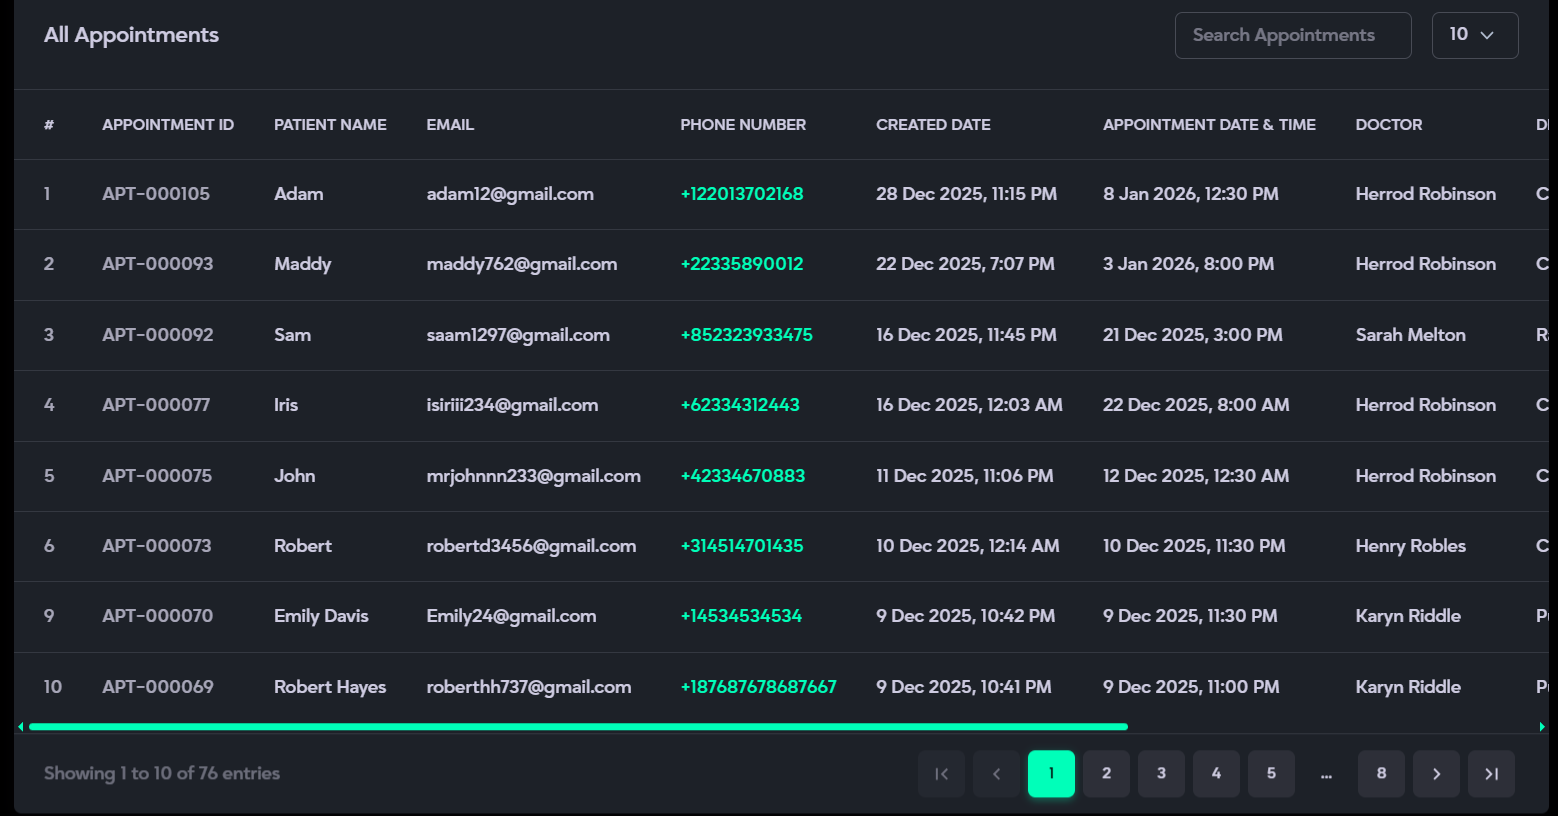
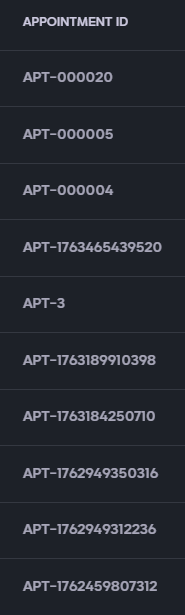
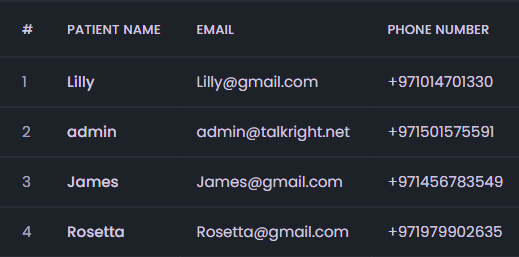
- Appointment Details: View all booked appointments in a single, organized interface, each displayed with a unique Appointment ID.
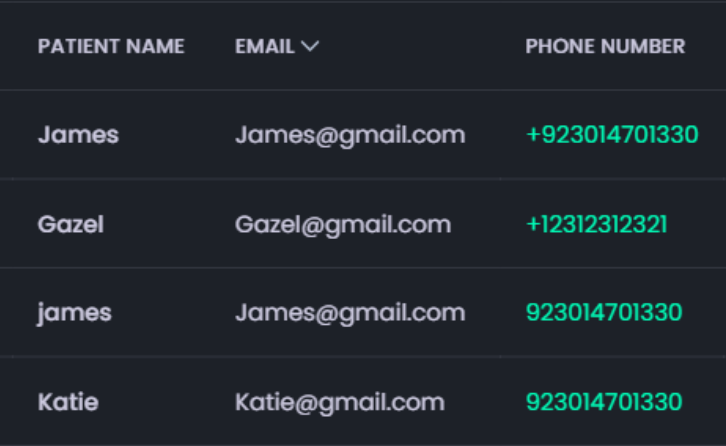
- Patient Information: Includes Name, Email, and Phone Number for easy identification and communication. Clicking the phone number instantly displays all relevant reservations linked to that patient (past, present, and upcoming).
- Appointment Timing: Displays both the booking date & time and the scheduled appointment date & time.
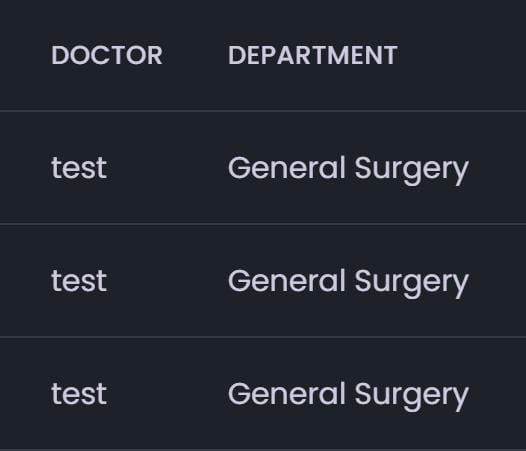
- Doctor & Department: Shows the assigned doctor and theirdepartment (e.g., Dermatology, Cardiology).
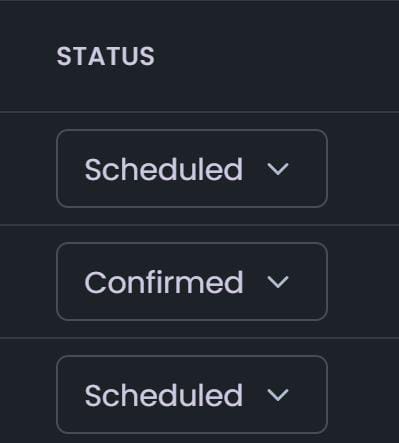
- Status: Indicates the current appointment status (Scheduled, Completed, Cancelled, or Confirmed).
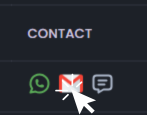
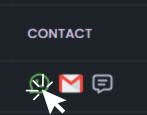
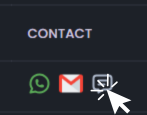
- Contact Options:
- Email Icon: Redirects to your email client to send an email directly.
- WhatsApp Icon: Opens WhatsApp to send a message to the patient.
- Message Icon: Opens a pop-up to choose another app from your system for sending messages.
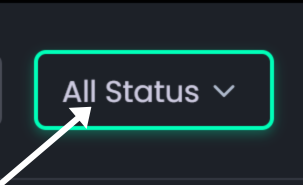
- Search & Filter:
- Use the Search Bar to find patients by name, phone number, mail.
- Use the Filter Dropdown to view appointments based on their status (Scheduled, Completed, Cancelled, or Confirmed).
- Pagination: Displays the total number of visible entries (e.g., “Showing 10 to 20 of 100 entries”) for organized navigation through records.
How to Use:
- Open the Appointments section to view all booked appointments in a single list, each displayed with its unique Appointment ID.
- Review patient details (name, email, and phone number).
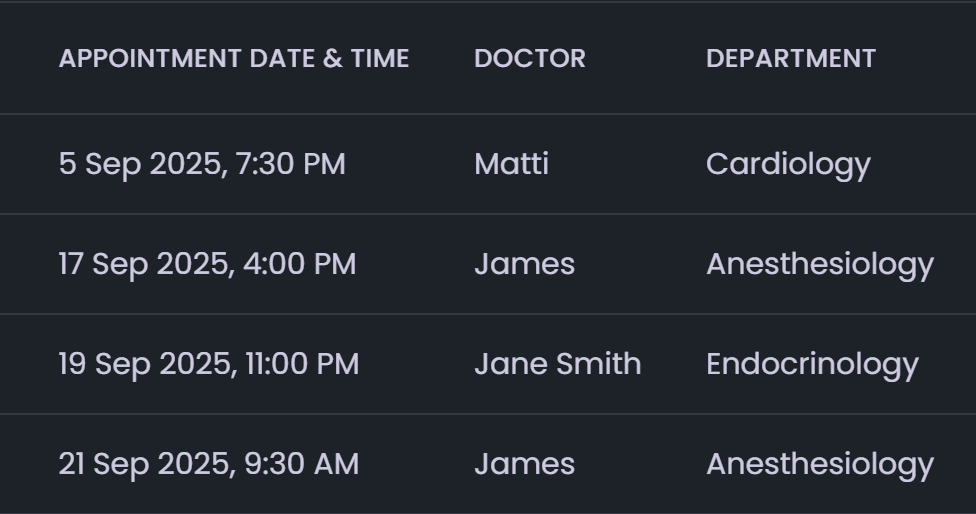
- Click the phone number listed in the Appointments to view all reservations linked to a patient (past, present, and upcoming).
- Check appointment timing, including both booking and scheduled date/time.
- View the assigned doctor and theirdepartment for each appointment.
- Update or verify the status(Confirmed, Completed, or Cancelled).
- Use the contact icons to communicate with patients:
- Email Icon: Send an email directly.
- WhatsApp Icon: Send a message via WhatsApp.
- Message Icon: Use another available messaging app from your system.
- Email Icon: Send an email directly.
- Use the Search Bar to find patients by name, email, phone number.

- Apply the Filter Dropdown to sort appointments by their status.
- Use the Pagination Controls (left/right arrows) at the bottom to navigate between entries and view the total number of records displayed.

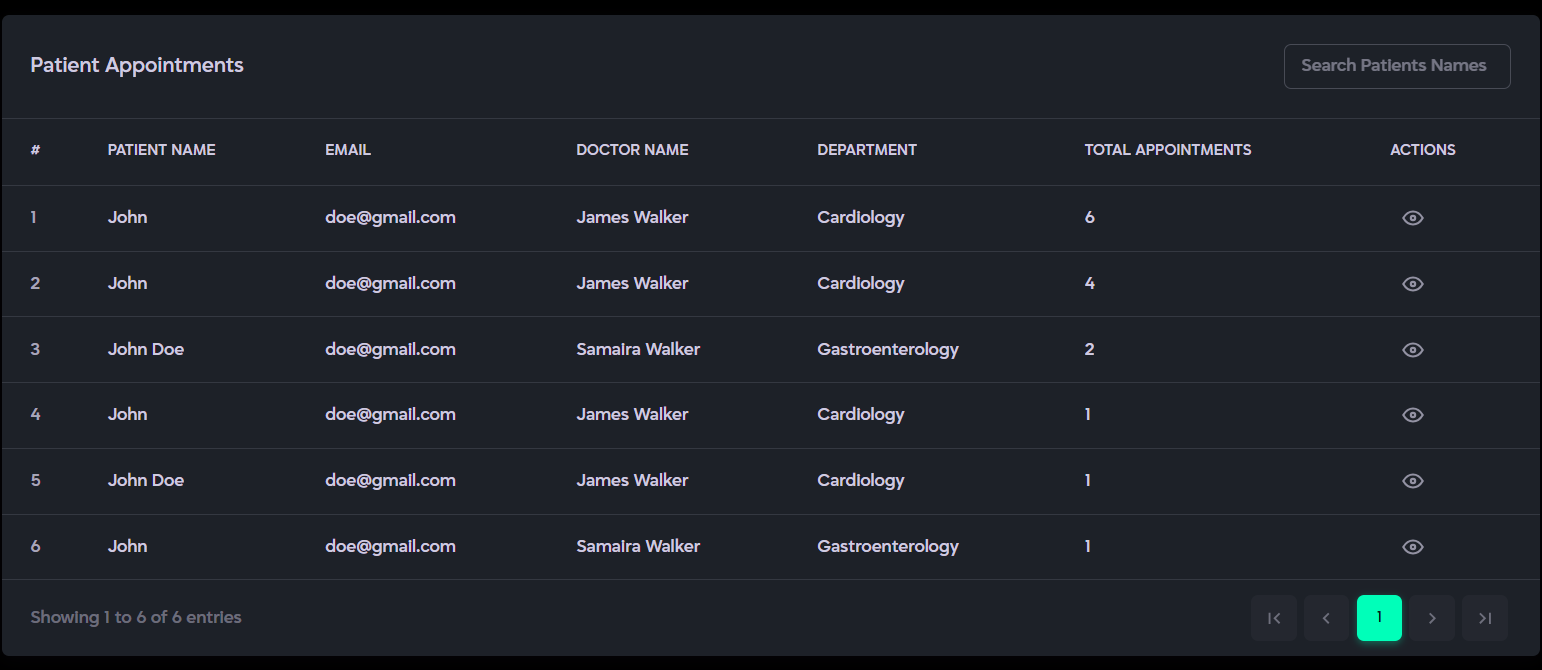
Patients
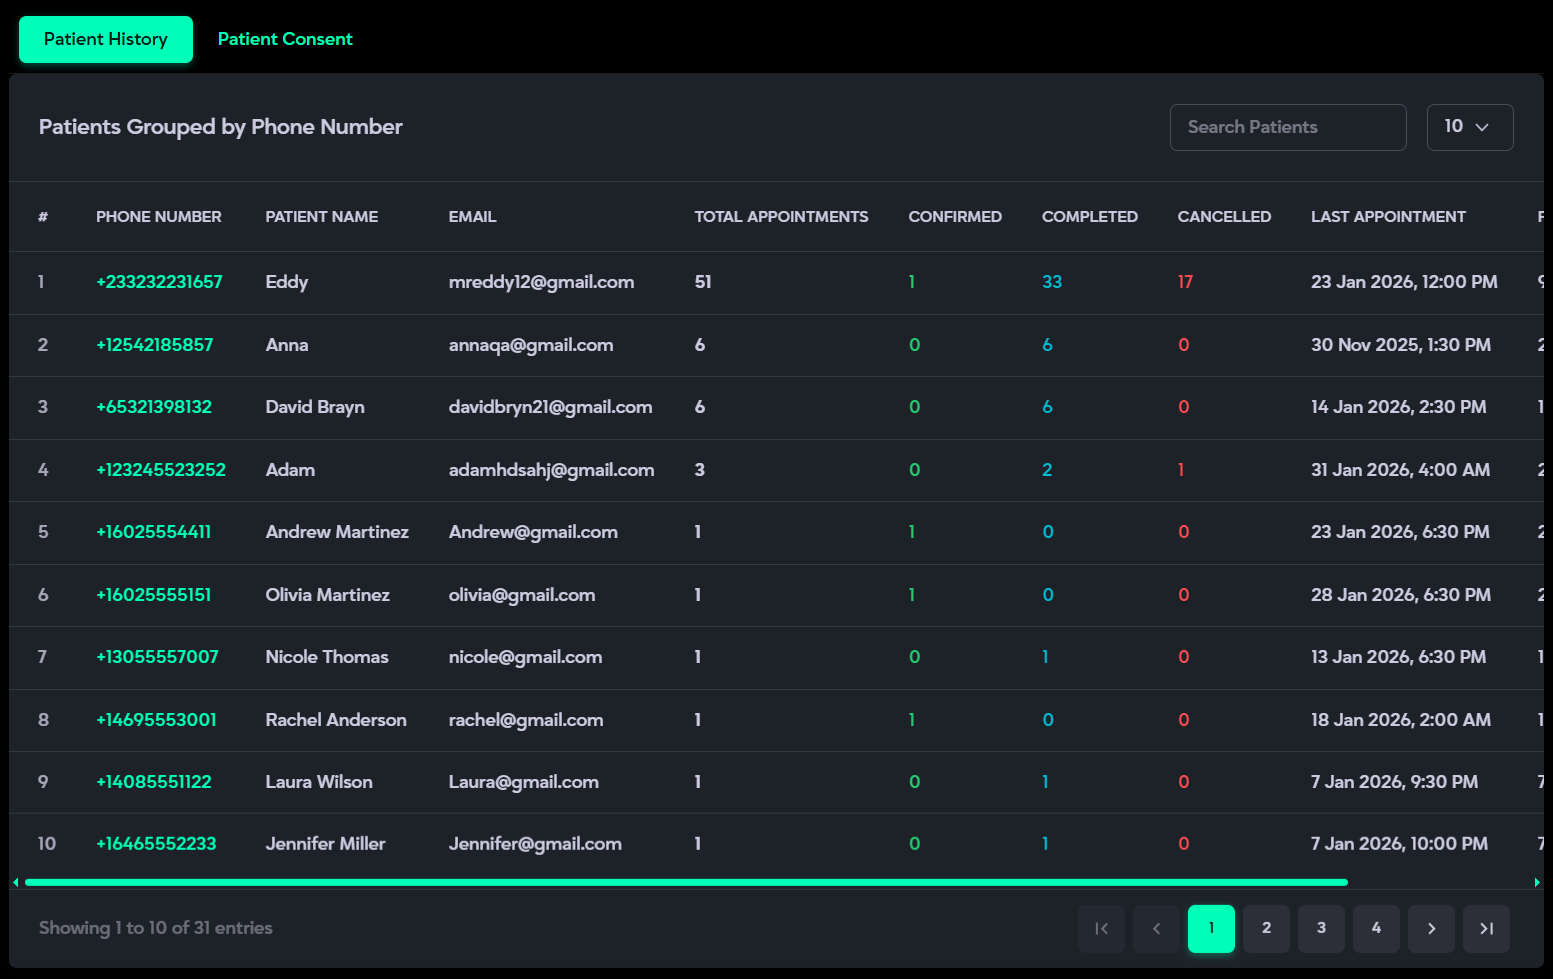
The Patients section allows administrators to manage and review patient-related information through two dedicated tabs:Patient History and Patient Consent. Patient History provides a consolidated view of patients grouped by phone number, along with their contact details and complete appointment records. The Patient Consent tab displays whether patients have granted permission to store and use their data. This section ensures organized record-keeping, transparency, and compliance with data protection requirements.
What it is:
The Patient History tab provides the view of all patients and their appointments, grouped by phone number. It helps administrators quickly review patient details, appointment trends, and booking history in one place.
Description:
- Displays patients grouped by phone number with their contact details, including name and email.
- Shows appointment statistics such as total appointments, confirmed, completed, and cancelled bookings.
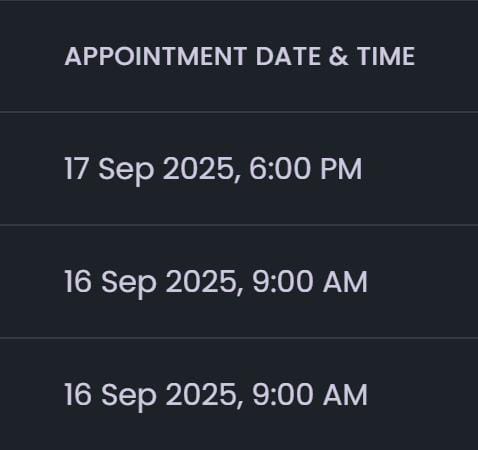
- Displays the first and last appointment dates for each patient.
- Clicking on a patient’s phone number opens a detailed view of all related appointments.
- Supports searching patients by phone number, name, or email for quick access.
- Enables sorting by phone number, patient name, email, & total appointments.
- Provides a clear, structured list for easy review and tracking.
- Pagination appears automatically when multiple patient records are available.
How to Use:
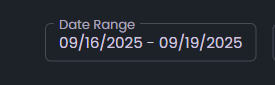
- Open Incoming Calls: When you open this section, it displays calls within the system’s default date range (e.g., 09/12/2025 – 09/13/2025).

- Set a Date Range: Click theDate Range control at the top-right to select your desired start and end dates. The table will automatically update to show only the calls made within that range.
- Search Calls: Use theSearch Calls bar to quickly find a caller by name, phone number, or email. Results appear instantly and support partial matches for faster lookup.
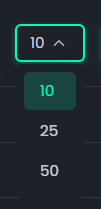
- Adjust Page Length: Use theRows per Page dropdown (options: 10, 25, 50, 100) to control how many call records are displayed on a single page.
- Sort Columns: Click on any column header (such as Date or Duration ) to sort the data in ascending or descending order. An arrow icon will indicate the current sort direction.
- Play or Download Call Recordings:In the Full Call column:
- Click the Play button to listen to a call recording directly.
- Click the Download icon to save the recording for later use.
- Contact the Caller: In the Contact column, you can reach out to the caller using:
- Email Icon: Opens your default email client to send an email.
- WhatsApp Icon: Starts a WhatsApp chat with the caller.
- Message Icon: Prompts a pop-up to choose a messaging app from your system.
- Email Icon: Opens your default email client to send an email.
- Navigate Pages: Use thepagination controls (First, Previous, Next, Last) at the bottom-right to move through pages. The summary at the bottom-left (e.g., “Showing 1 to 10 of 30 entries”) updates automatically based on filters and page selection.
Incoming Calls
The Incoming Calls section displays a complete log of all received calls with caller details such as name, email, number, date, time, duration, and assigned doctor. You can filter calls by date range, search specific entries, play or download call recordings, and adjust the pagination from the top-right dropdown to manage how many records are shown per page.
What it is:
The Incoming Calls section provides a complete, searchable record of all inbound calls received through the system. It includes caller identity and contact details, call timing and duration, and the internal staff or department the call was routed to. You can quickly filter calls by date range or use thesearch bar to find specific entries by name, email, or phone number. Each entry also offers quick actions to listen to or contact the caller directly.
Description:
- Header and Controls:
- Date Range Picker: Located at the top-right to filter calls within a specific time frame.
- Search Calls: Search box for quick filtering by caller name, email, or phone number.
- Page Length Dropdown: Adjust how many records are displayed per page (options include 10, 25, 50, or 100).
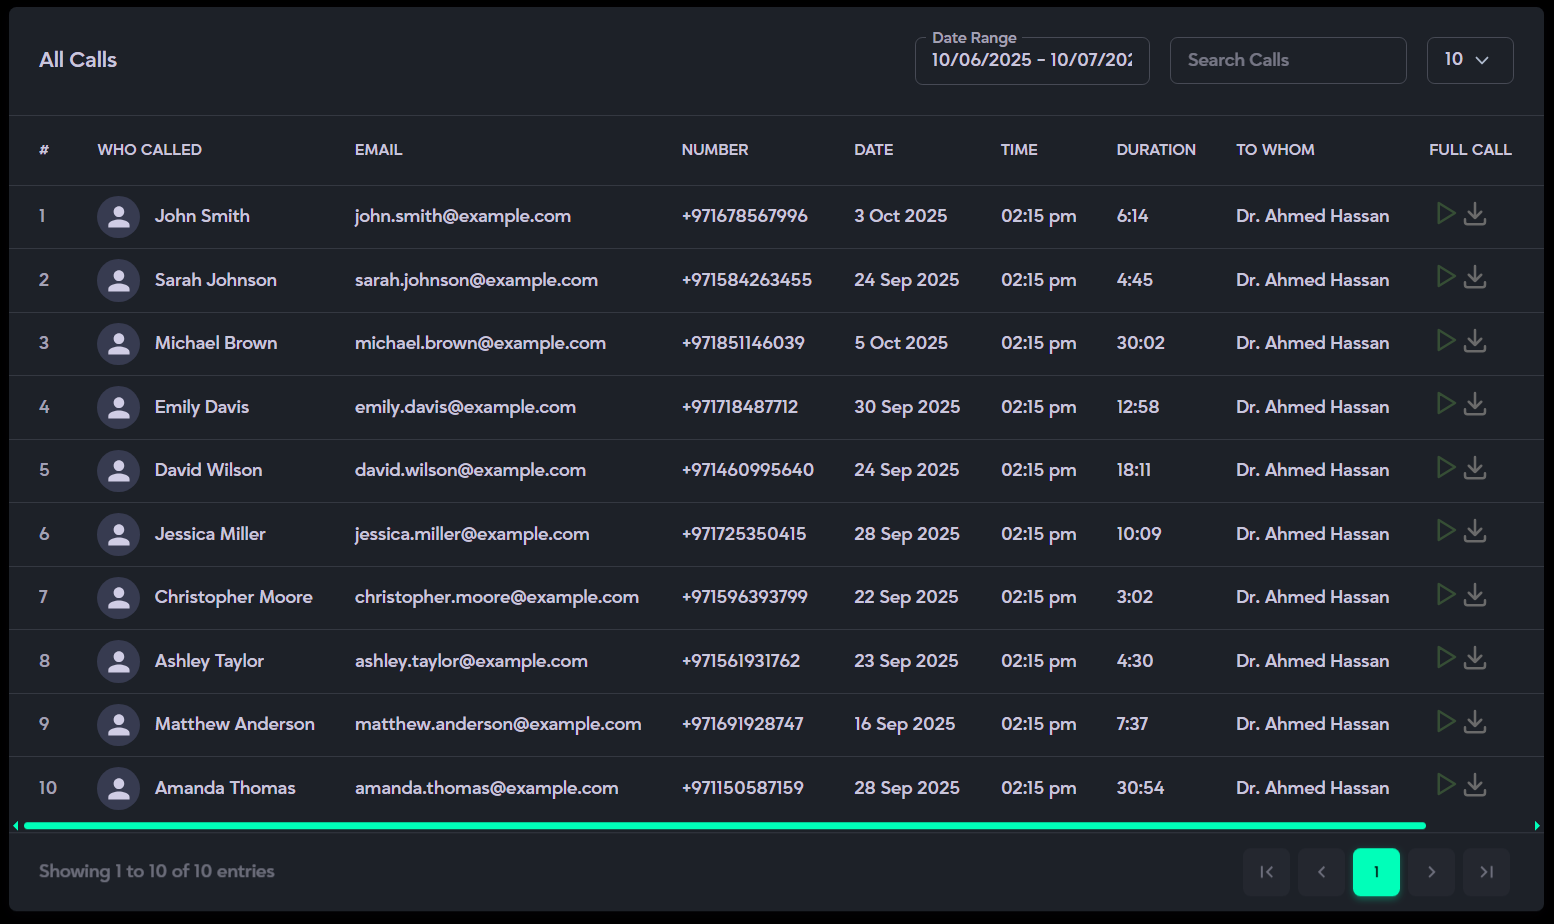
- Main Table Columns:
- # – Serial number of each entry.
- Email – Caller’s email address.
- Number – The caller number is displayed. If an appointment is reserved from the call and the patient’s contact number is later modified, the original caller number remains unchanged and unaffected.
- Date – Date of the call (formatted to match the Date Range filter).
- Time – Call start time (in the system's local timezone).
- Duration – Length of the call.
- To Whom – Displays the clinic's center number if no appointment was booked from the call. If an appointment was successfully reserved, it shows the assigned doctor's name instead.
- Full Call – Provides audio playback of the recorded call.
- You can listen to call recordings directly from the table.
- You can download recordings for review or documentation.
- Call recordings are recorded with callers’ consent.
- Contact – Action icons for reconnecting with the caller:
- Email Icon: Opens your default email client to send a message.
- WhatsApp Icon: Enables direct WhatsApp messaging with the caller.
- Message Icon: Prompts a pop-up to choose an app from your system to send a message.
- Sorting: Use the up and down arrows in the column headers to sort records.
- Pagination & Record Summary:
- Bottom-Left: Displays a summary such as “Showing 1 to 10 of 30 entries,” updating dynamically based on filters and page number.
- Bottom-Right: Contains pagination controls (First, Previous, Next, Last) to navigate through pages.
How to Use:
- Open Incoming Calls: When you open this section, it displays calls within the system’s default date range (e.g., 09/12/2025 – 09/13/2025).
- Set a Date Range: Click theDate Range control at the top-right to select your desired start and end dates. The table will automatically update to show only the calls made within that range.
- Search Calls: Use theSearch Calls bar to quickly find a caller by name, phone number, or email. Results appear instantly and support partial matches for faster lookup.
- Adjust Page Length: Use theRows per Page dropdown (options: 10, 25, 50, 100) to control how many call records are displayed on a single page.
- Sort Columns: Click on any column header (such as Date or Duration ) to sort the data in ascending or descending order. An arrow icon will indicate the current sort direction.
- Play or Download Call Recordings:In the Full Call column:
- Click the Play button to listen to a call recording directly.
- Click the Download icon to save the recording for later use.
- Contact the Caller: In the Contact column, you can reach out to the caller using:
- Email Icon: Opens your default email client to send an email.
- WhatsApp Icon: Starts a WhatsApp chat with the caller.
- Message Icon: Prompts a pop-up to choose a messaging app from your system.
- Email Icon: Opens your default email client to send an email.
- Navigate Pages: Use thepagination controls (First, Previous, Next, Last) at the bottom-right to move through pages. The summary at the bottom-left (e.g., “Showing 1 to 10 of 30 entries”) updates automatically based on filters and page selection.
Reviews
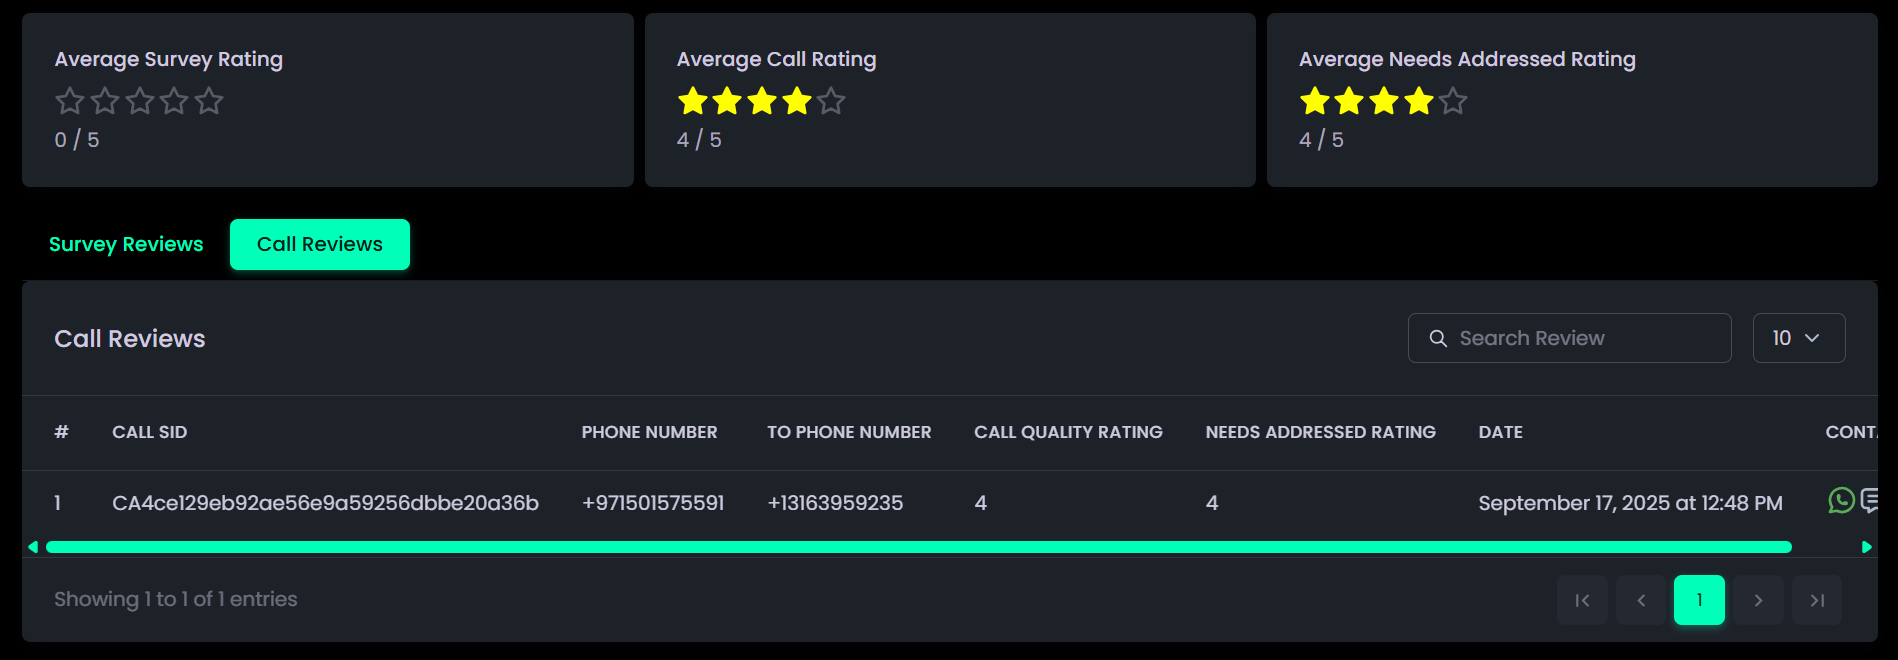
The Reviews section provides a complete overview of patient feedback, helping you assess overall service quality. It displays average ratings collected from surveys, calls, and WhatsApp polls, giving valuable insights into patient satisfaction.
This section includes two main parts:
Survey Reviews and Call Reviews where you can view detailed feedback, comments, and individual ratings. Built-in search and filter options make it easy to navigate and analyze specific responses.
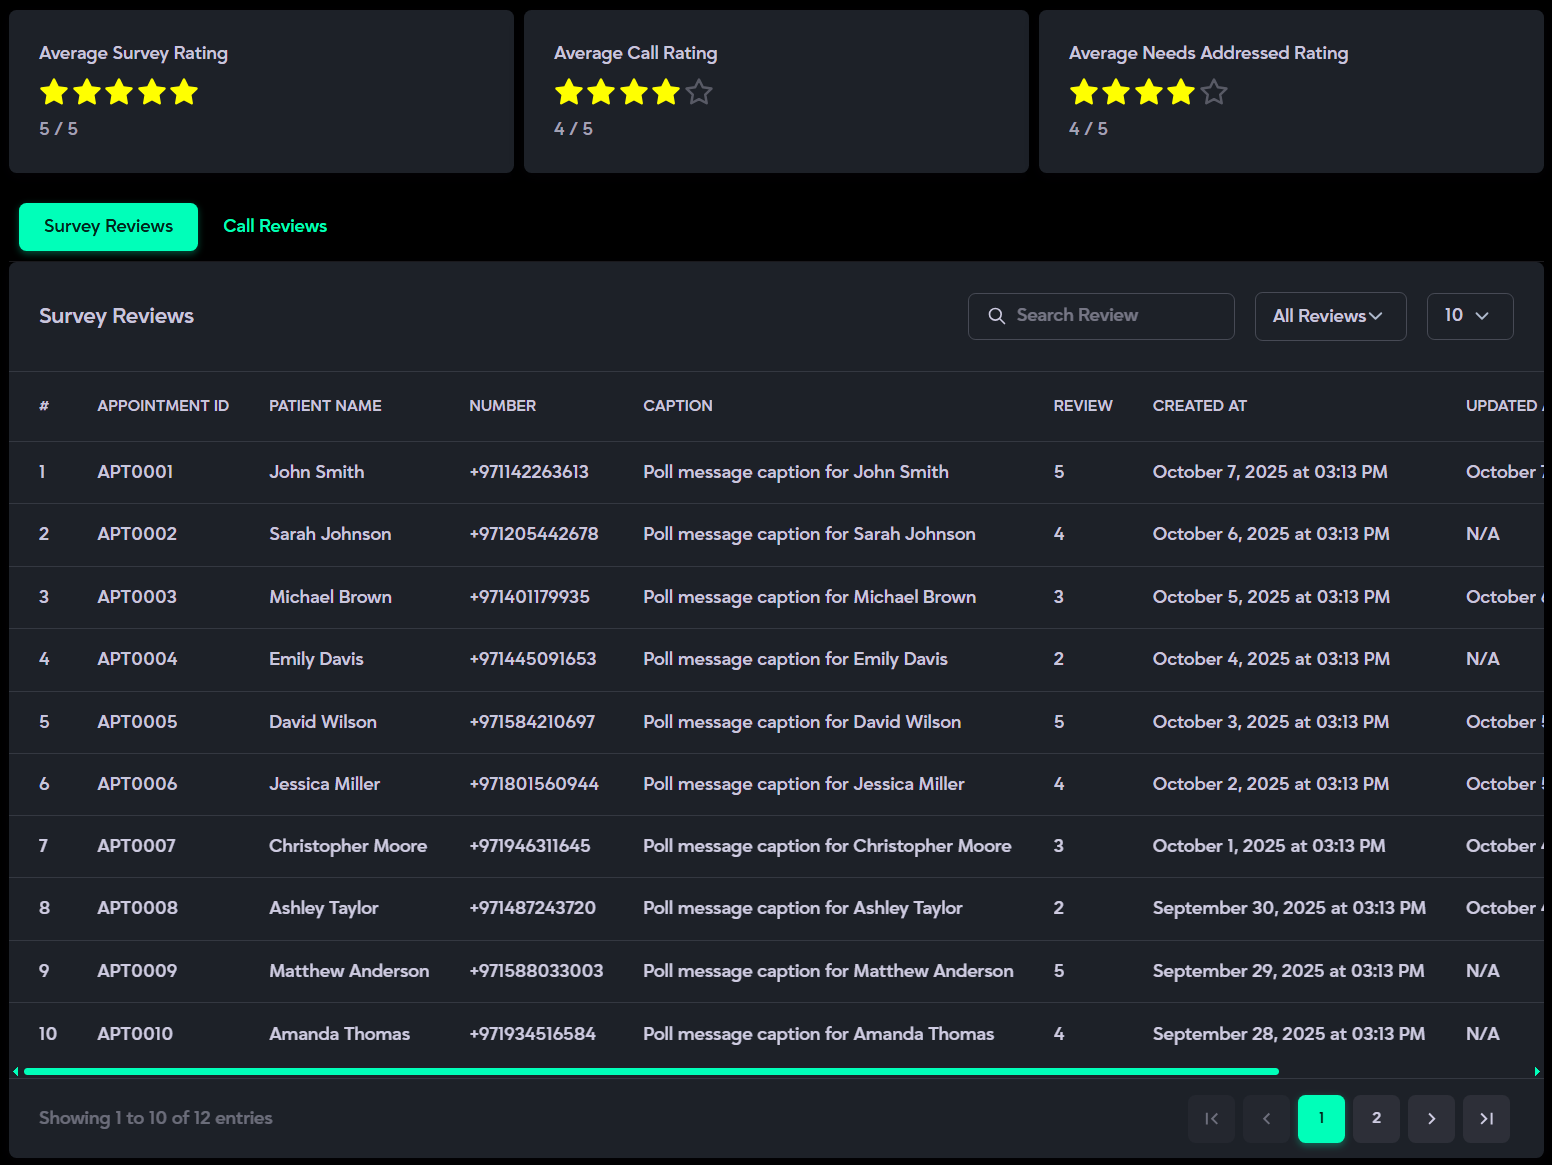
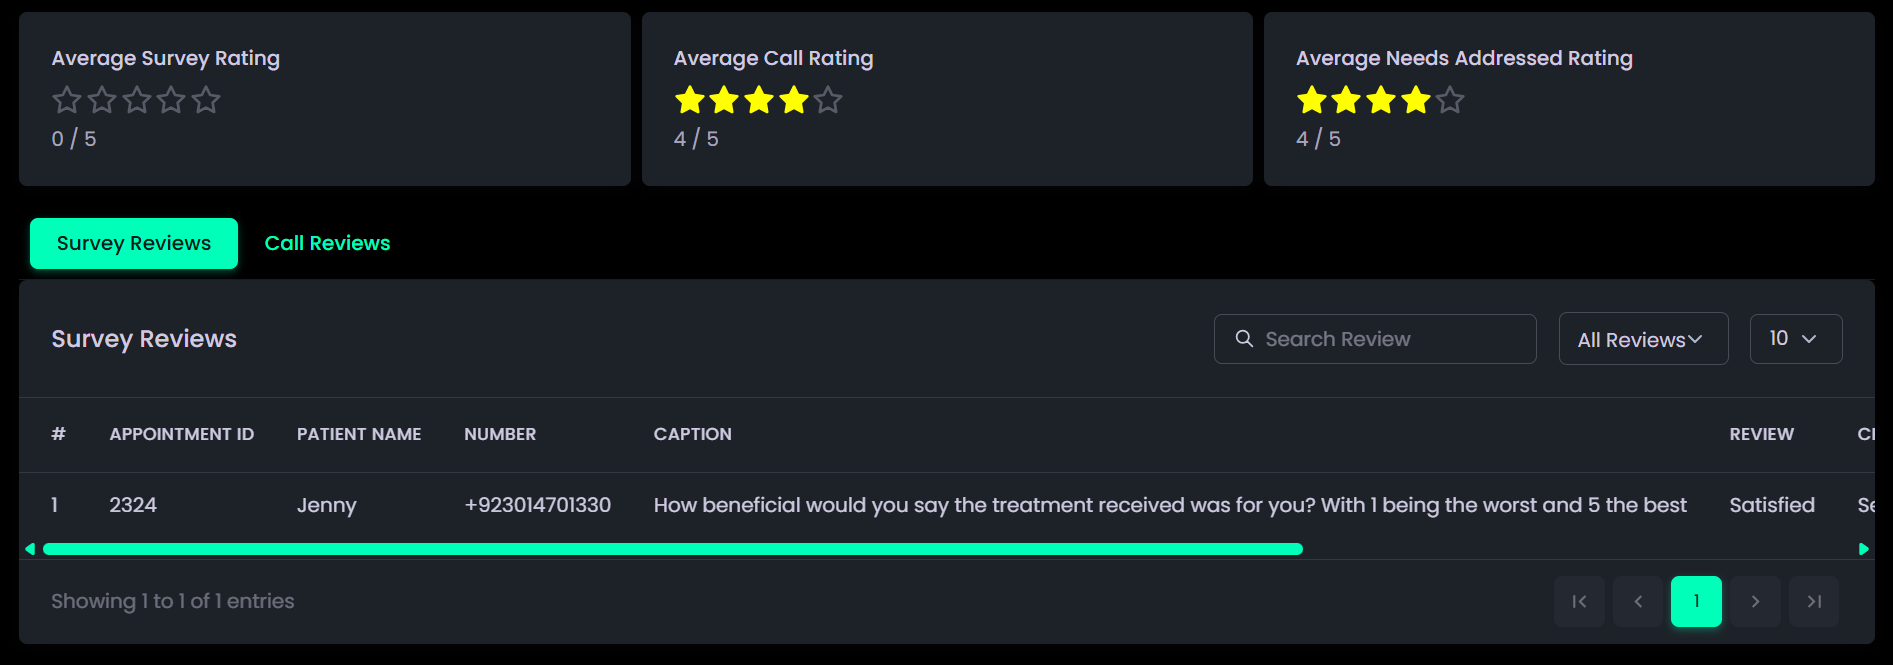
Average Ratings:
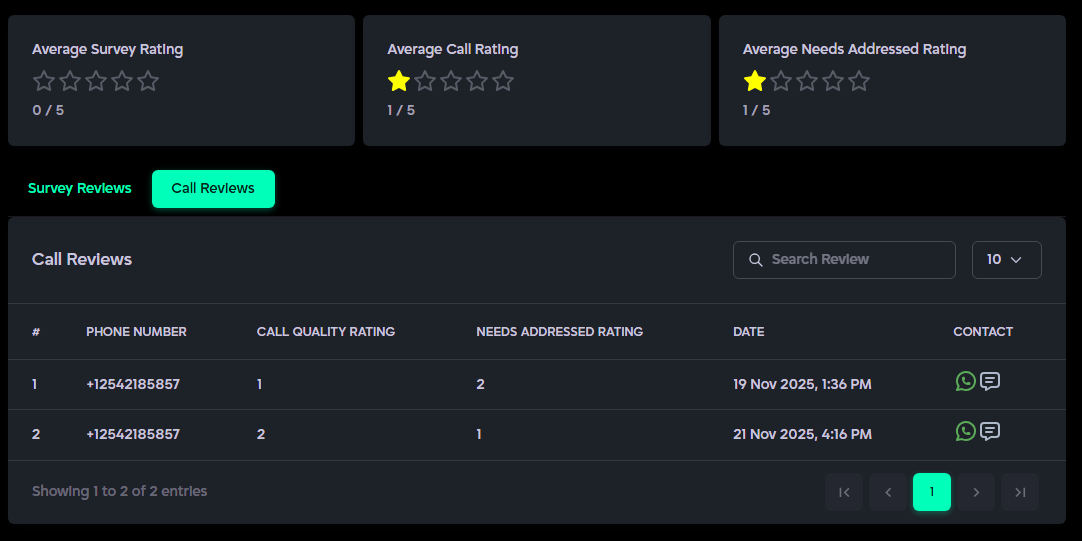
- Average Survey Rating → (e.g., 3/5) Represents the average score from all submitted survey responses.
- Average Call Rating → (e.g., 3/5) Reflects the overall rating based on patient feedback collected after calls.
- Average Needs Addressed Rating → (e.g., 3/5) Shows the average rating gathered through WhatsApp polls after a patient’s visit.
Survey Reviews
What it is:
The Survey Reviews section provides a detailed view of patient feedback collected through surveys. It helps assess satisfaction levels, call quality, and how well patient needs were addressed.
Description:
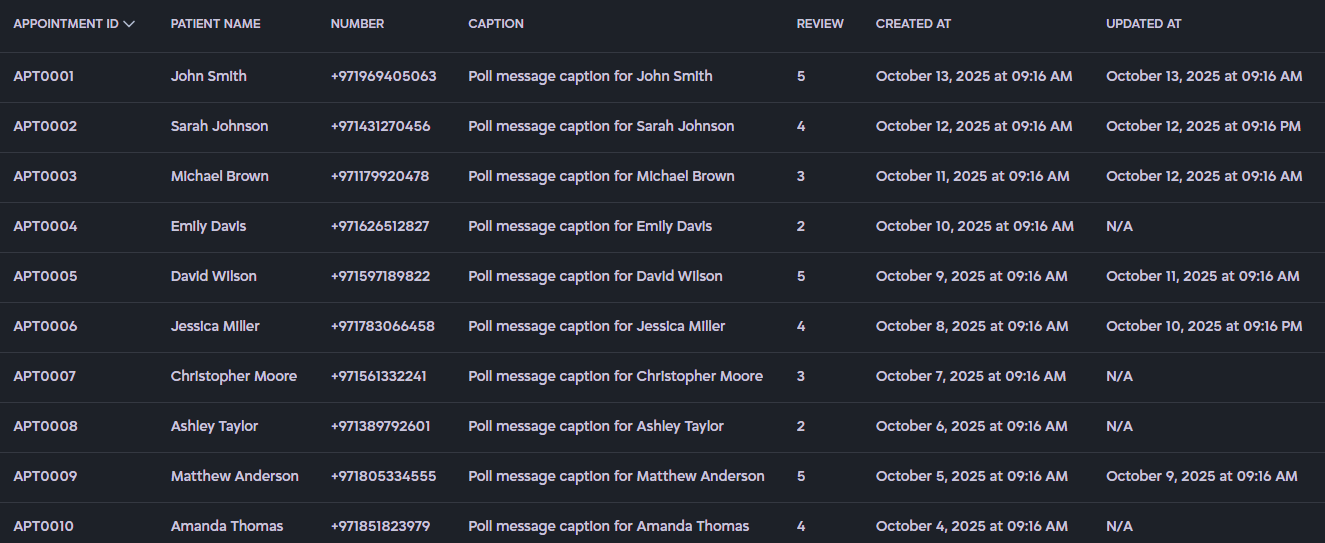
Displays Appointment Serial Number (#), Appointment ID, Patient Name, Patient Phone Number, and other relevant details along with corresponding feedback and ratings. It also shows the poll caption, time when the poll was sent, and the user’s response time (if no response is received, it is displayed as N/A).
- Search bar: Quickly find specific survey entries by keyword.
- Filter: Select how many reviews to display per page.
- Pagination: Navigate between pages and view the total number of displayed survey entries.
How to Use:
- Open the Survey Reviews tab to view all submitted survey responses.
- Scroll through the list to explore individual feedback entries.
- Review the ratings under the Review header for detailed patient insights and experiences.
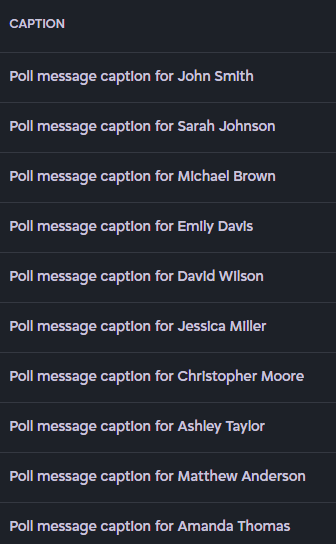
- View the Caption to find the poll message against which review is submitted.
- Check the Created At column to see when the review was sent.
- View the Updated At column to know the last time the review was responded.

- Use the search bar to quickly find a survey by patient name, date, or keyword.
- Apply filters to adjust how many reviews are displayed per page.
- Sort columns by clicking the column headers to arrange entries in ascending or descending order.
- Use the pagination controls to navigate through pages of survey entries.
Call Reviews
What it is:
The Call Reviews section provides detailed feedback on phone interactions, including ratings and comments. It helps assess communication quality and monitor staff performance based on patient feedback.
Description:
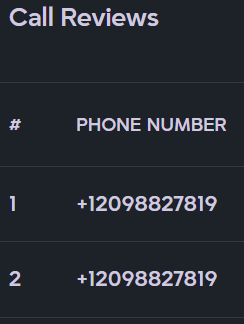
- Displays Serial Number (#), Phone Number, Call Quality Rating, Needs Addressed Rating, andContact options (WhatsApp or Message) for additional context.
- Shows complete caller information for easy reference.
- Search bar: quickly locate reviews for a specific caller.
- Pagination: indicates how many call reviews are currently visible on the screen.
How to Use:
- Open the Call Reviews tab to view all recorded call feedback.
- Scroll through the list to explore individual call review entries.
- Check the Serial Number (#) to identify each call’s position in the list.

- Review the Phone Number of the caller.
- View the Call Quality Rating to assess communication performance.
- Check the Needs Addressed Ratingto evaluate how effectively patient needs were handled.
- Click Contact to reach out patients via WhatsApp, or any other supported messaging app.
- Click on column headers (e.g., Call SID, Phone Number, Call Quality Rating,Needs Addressed Rating, Contact ) to sort data in ascending or descending order.
- Use the Search bar to quickly find a specific call review by SID or Caller Number.
- Navigate between pages using pagination controls (left and right arrows) at the bottom of the table.
Reports
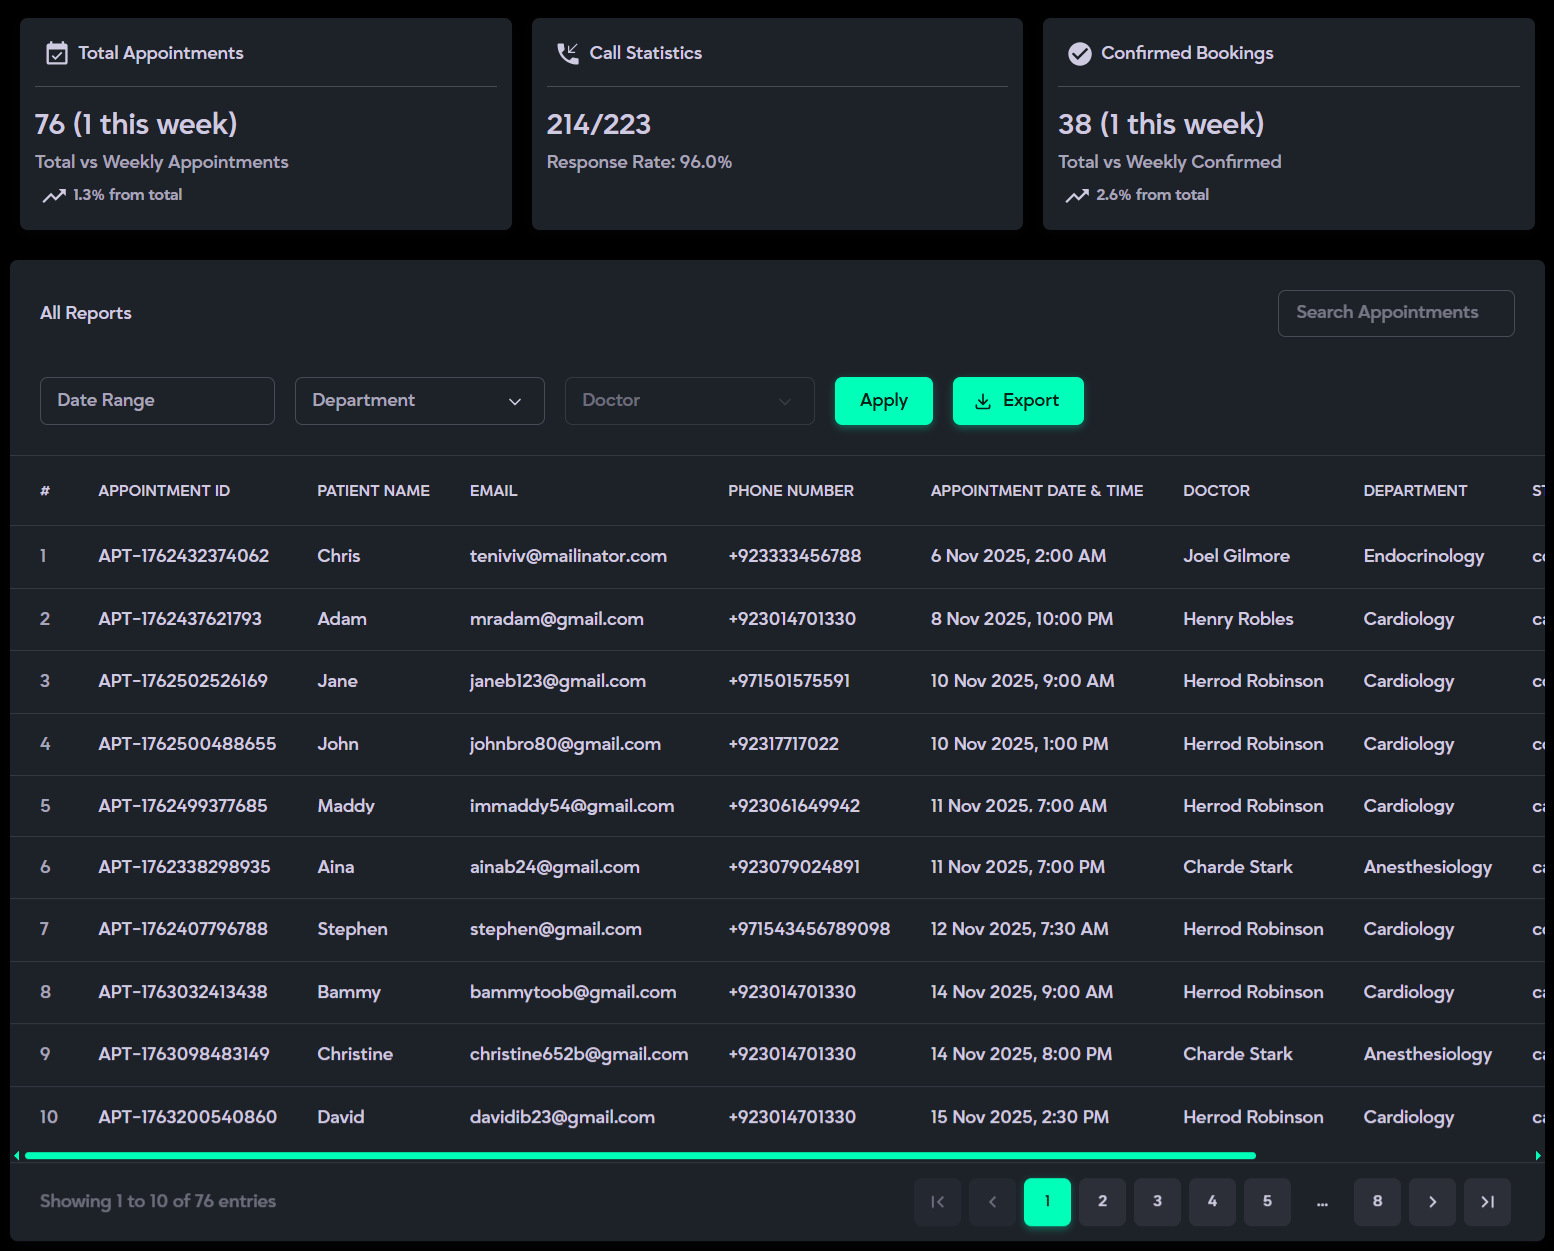
The Reports section offers a comprehensive summary of all appointments and call activities. It enables you to track total numbers, monitor weekly performance trends, measure system response rates, and review completed appointments in detail. With advanced filters, such as search, date range, department, and doctor selection, you can easily narrow down specific data. Additionally, reports can be exported for further analysis or record-keeping.
Appointments Info
- Total Appointments: Displays the total number of appointments with a weekly breakdown, including percentage trends showing increases or decreases compared to the previous week.
- Call Statistics: Shows total calls versus received calls, along with the system’s overall response rate.
- Completed Bookings: Indicates the number of confirmed appointments, supported by a weekly comparison and trend analysis.
What it is:
The Reports section provides a detailed overview of all appointments and related activities. It allows you to efficiently track patient information, apply filters, perform searches, and export customized reports as needed.
Description:
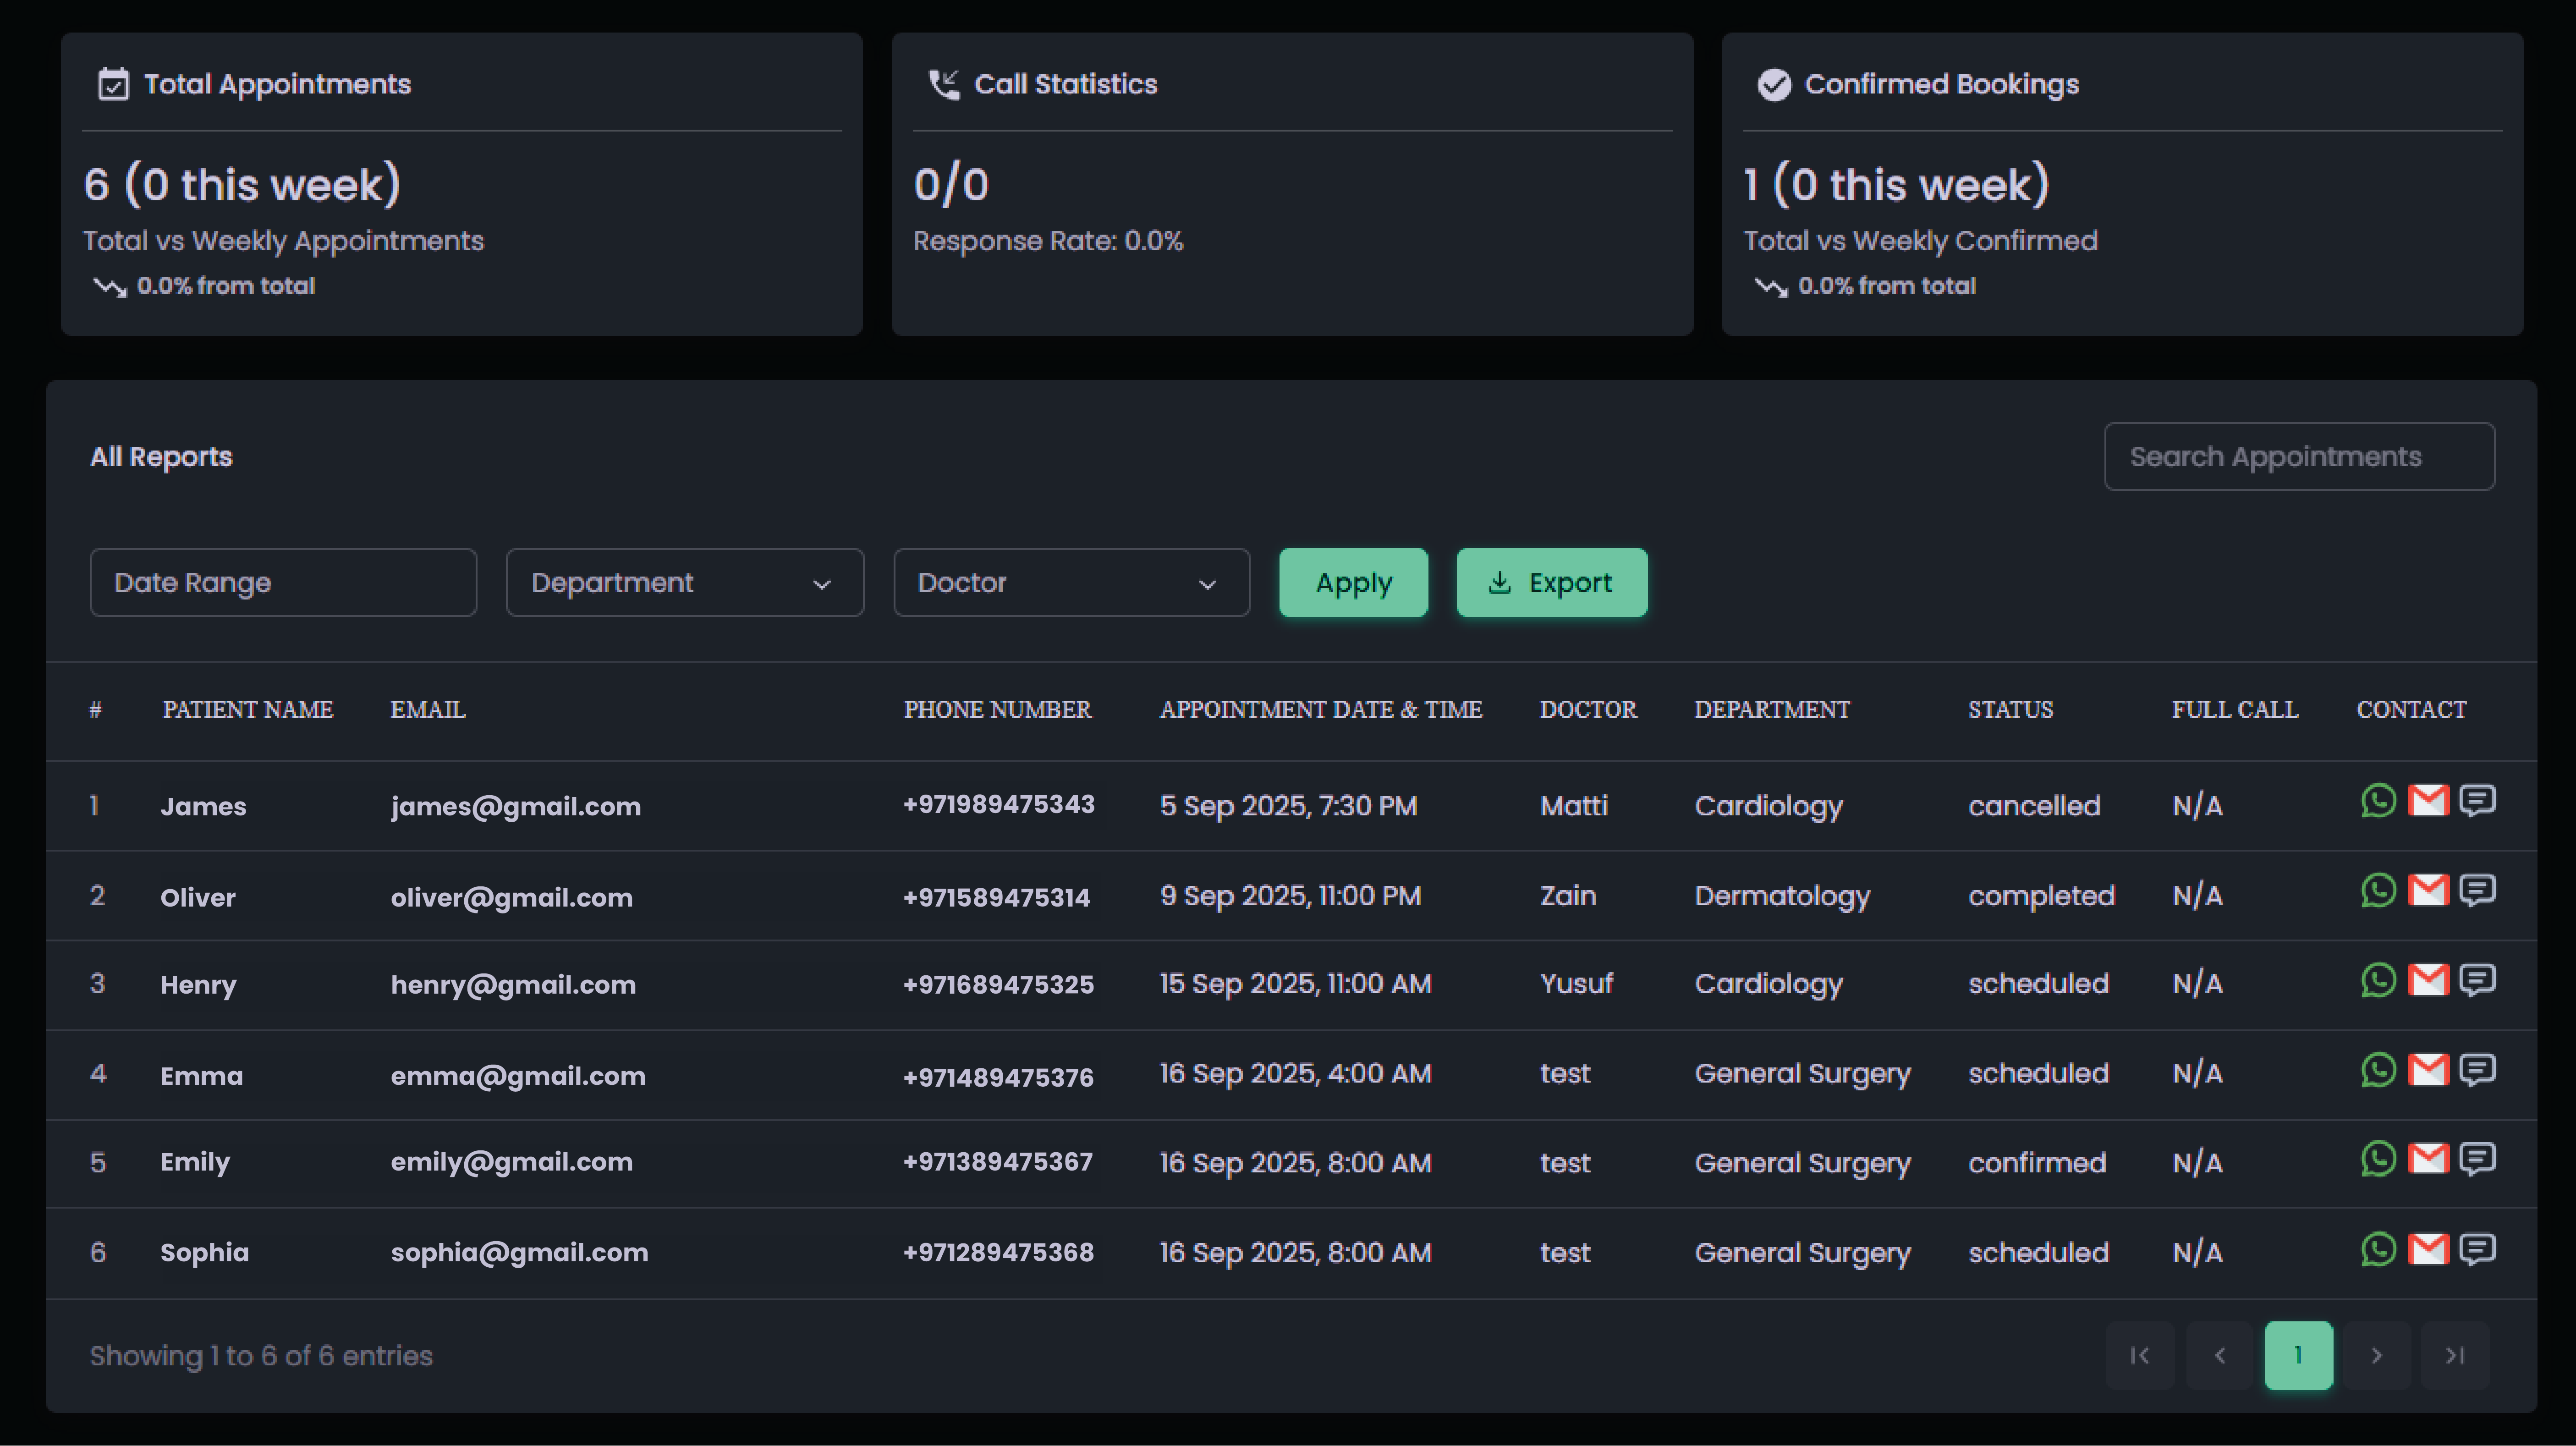
Displays Serial Number (#), Appointment ID, Patient Name, Email, Phone Number, Appointment Date & Time, Doctor, Department, Status, Call Info, and Contact options for easy reference.
- Filters: Three filters (Date Range, Doctor, andDepartment ) help refine your search results.
- Apply Button: Applies the selected filters to update and display relevant data.
- Search Bar: Quickly find reports by patient name, phone number, or email.
- Sort Option: Click on column headers (e.g., Appointment Date, Doctor, Status) to sort data in ascending or descending order.
- Export Button: Downloads reports in .xls format within an encrypted ZIP folder. A password is provided to unlock it, valid only for same day’s file.
- If any filters are applied, only the filtered data is exported.
- If no filters are active, the complete dataset is exported.
- Contact Options: Use icons to reach patients via WhatsApp, Gmail, or any other messaging app available on your system.
- Pagination: View how many reports are displayed per page, navigate between pages, and adjust the number of records shown using the pagination controls.
How to Use:
- Open the Reports tab to view all appointment records.
- Use the Search Bar to find a specific patient by name, email, or phone number.

- Select filters such as Date Range,Doctor, and Department (individually or together).

- Click the Apply button to refine and display the filtered results.

- To download reports, click theExport button, once the report is downloaded, you’ll receive apassword. Copy this password, extract the ZIP file, and enter the password to decrypt and access the exported report.

- Review key details such as Serial Number (#), Appointment ID, Patient Name, Email, Phone Number,Appointment Date & Time, Doctor,Department, and Status (Confirmed, Completed, or Canceled).
- Check Full Call Info if available for communication records.
- Use Contact Icons (WhatsApp, Email, Message) to reach out to patients directly.
- Click on column headers (Patient Name, Phone, Date, Doctor, Department) to sort records in ascending or descending order.
- Navigate through report pages usingPagination Controls (left/right arrows) or adjust how many records are displayed per page for easier management.

Doctor Management
The Doctor Management section allows you to efficiently organize hospital departments, manage doctor profiles, and monitor their availability. It is divided into three subsections (Departments, Doctors, and Doctor Leave) each designed to handle specific tasks such as department setup, doctor details, and leave scheduling with accuracy and ease.
Departments
What it is:
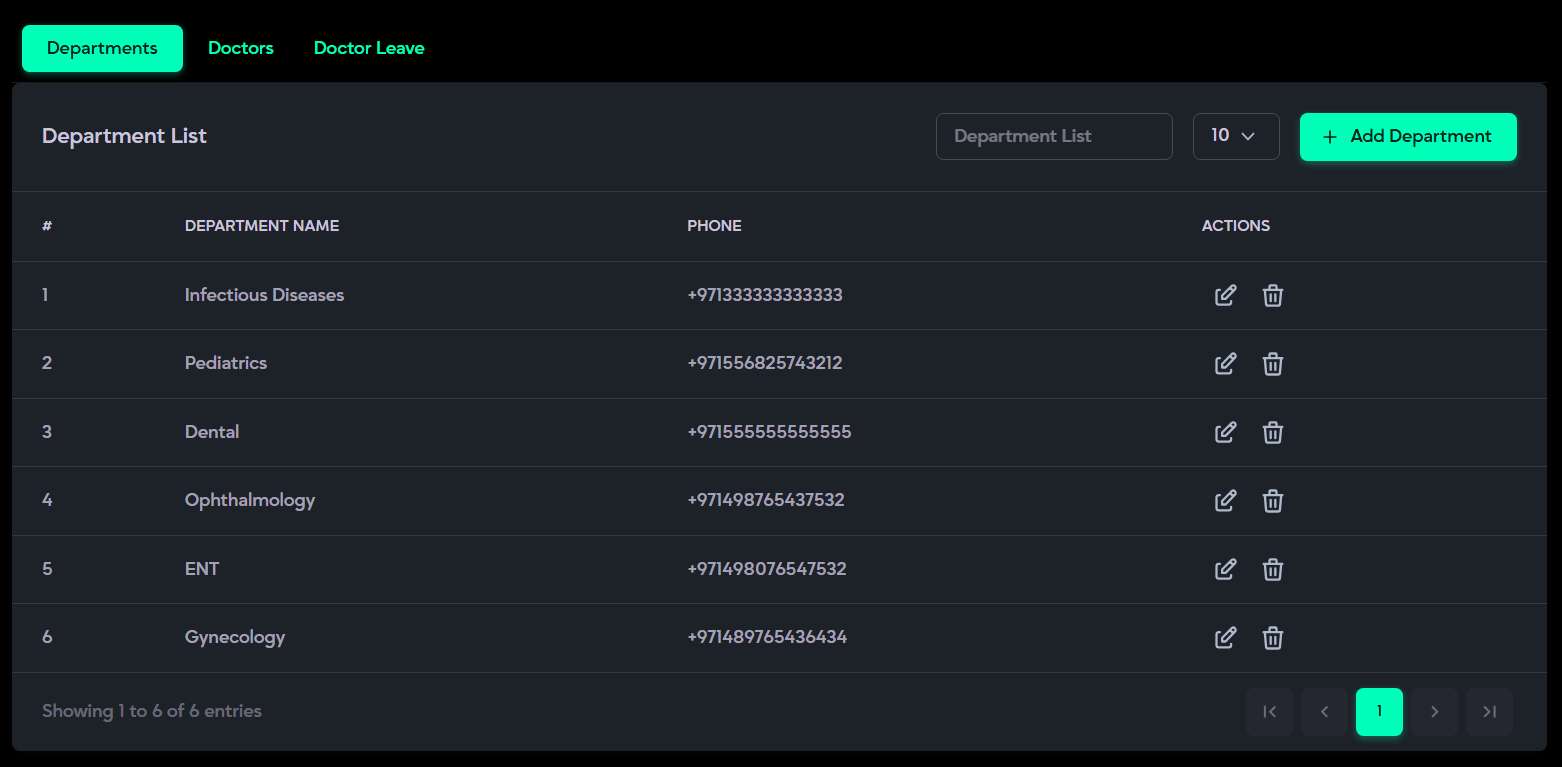
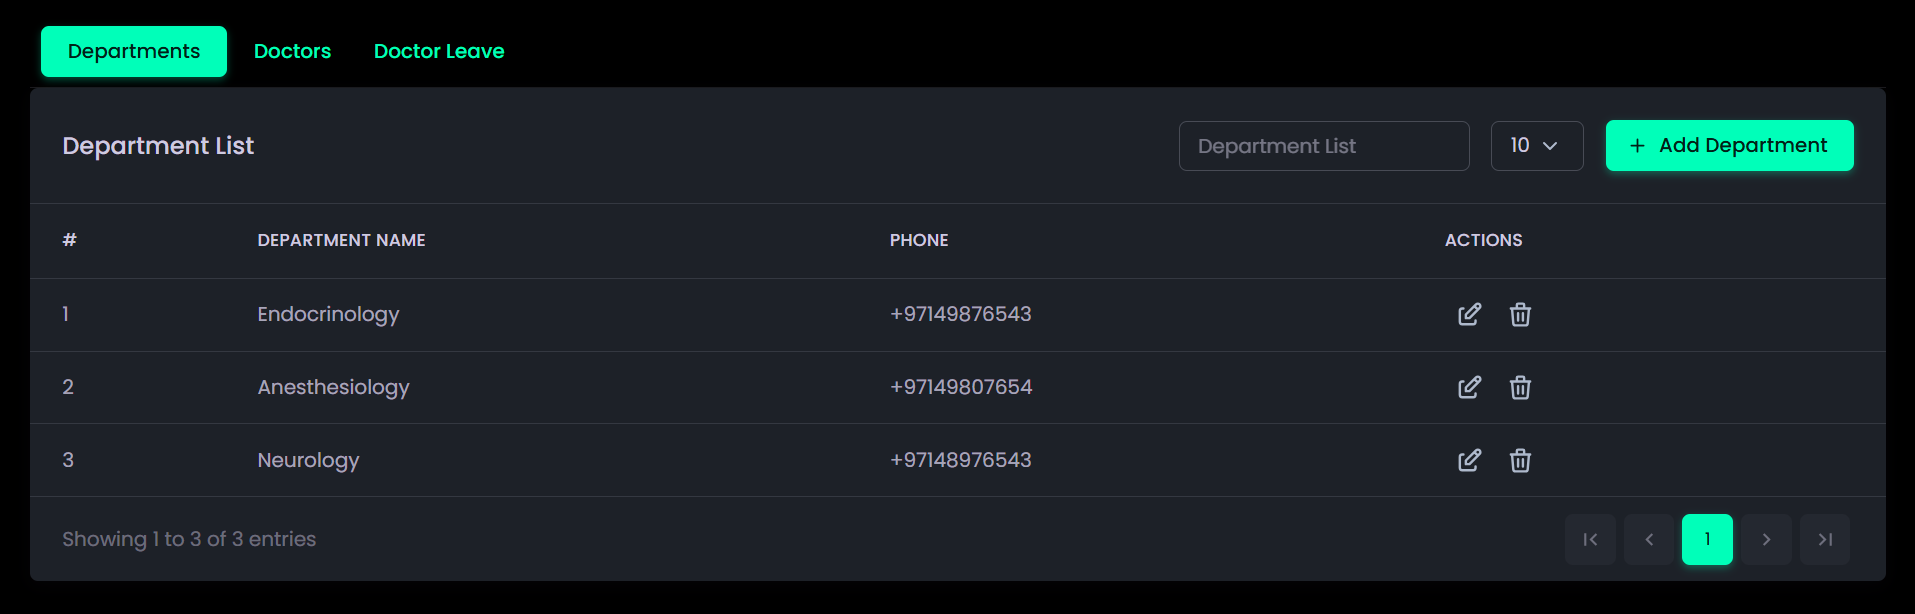
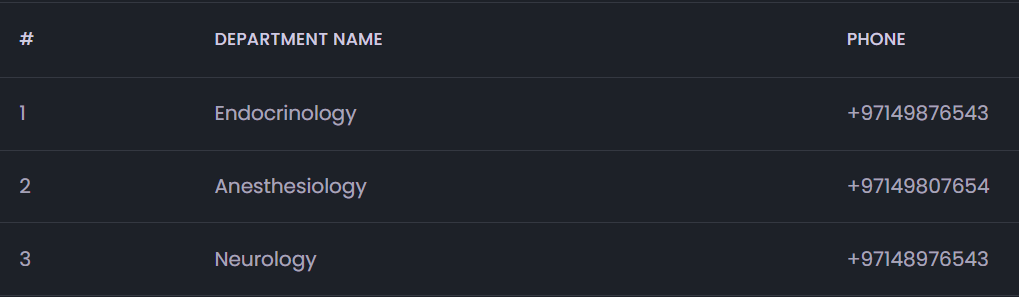
The Departments section provides a complete list of all hospital departments. It enables you to view, search, add, update, and delete department details such as the department name and contact number, ensuring efficient management of organizational structure.
Description:
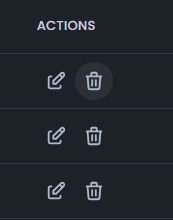
- Displays Serial Number (#), Department Name,Department Phone Number, and Actions (Edit and Delete).
- Search Bar: Quickly locate a department by name or phone number.
- Actions Menu: Edit or delete existing department details.
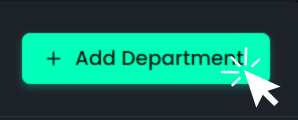
- Add Department Button: Create new department entries when required.
- Filter Option: Choose how many records to display per page (e.g., 10, 25, 50).
- Sorting: Click on column headers to sort records in ascending or descending order.
- Pagination Controls: Navigate through department records efficiently.
How to Use:
- Open the Departments tab to view the complete department list.
- Use the Search Bar to check whether a department already exists by name or phone number.
- Click the Filter Dropdown to select how many records to display per page (e.g., 10, 25, 50).
- Click the Add Department button to create a new entry by selecting a department from the dropdown or enter it manually, add the contact number, and save.

- Review the list of added departments, includingSerial Number (#), Department Name, and Phone Number.
- To modify existing details, click the Edit Icon under Actions, select or update the department name and phone number from the dropdowns, then click Update.

- To delete a department, click the Trash Icon under Actions and confirm deletion by clickingDelete in the confirmation dialog box.
- Use Pagination Controls to navigate between pages or adjust how many records are displayed per page.
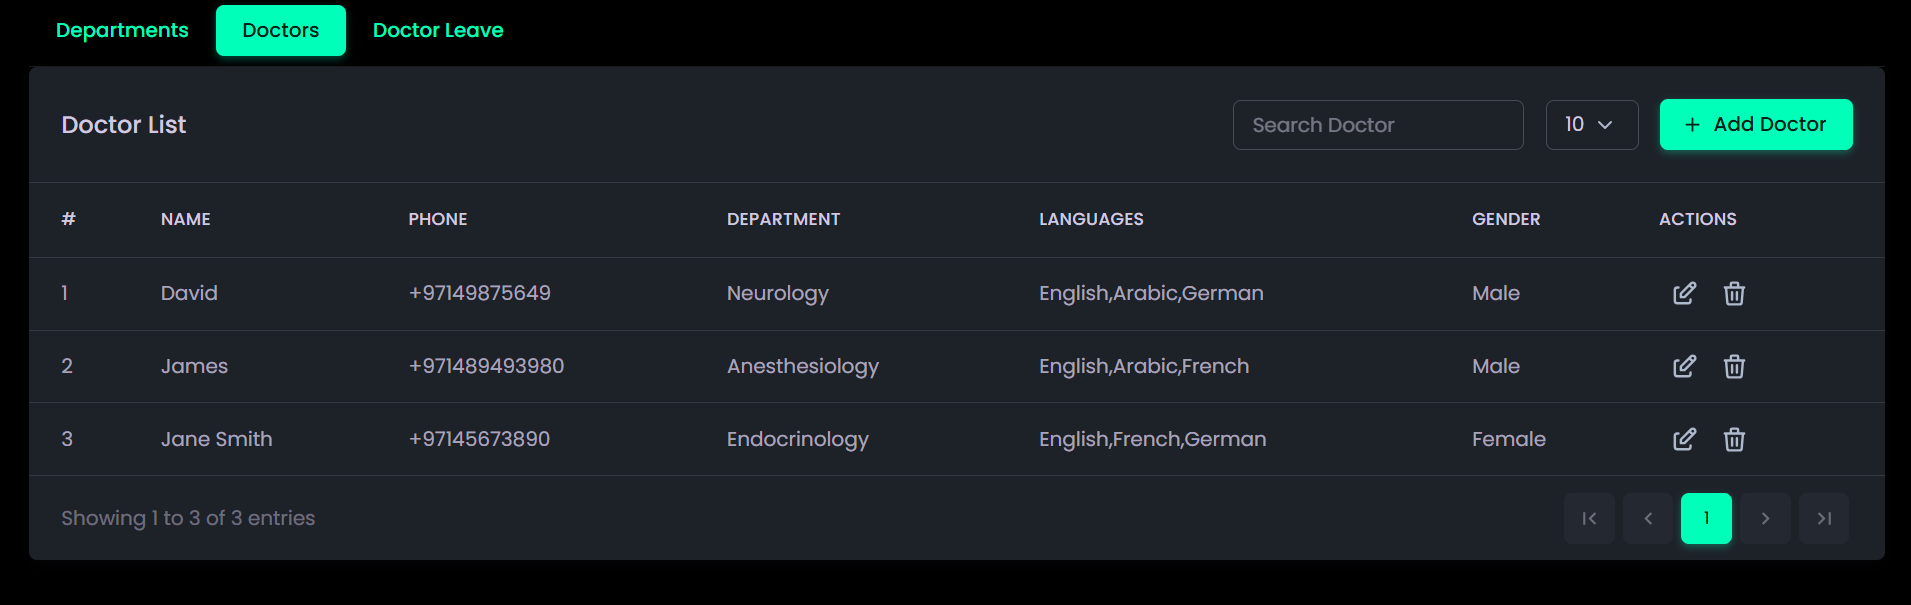
Doctors
What it is:
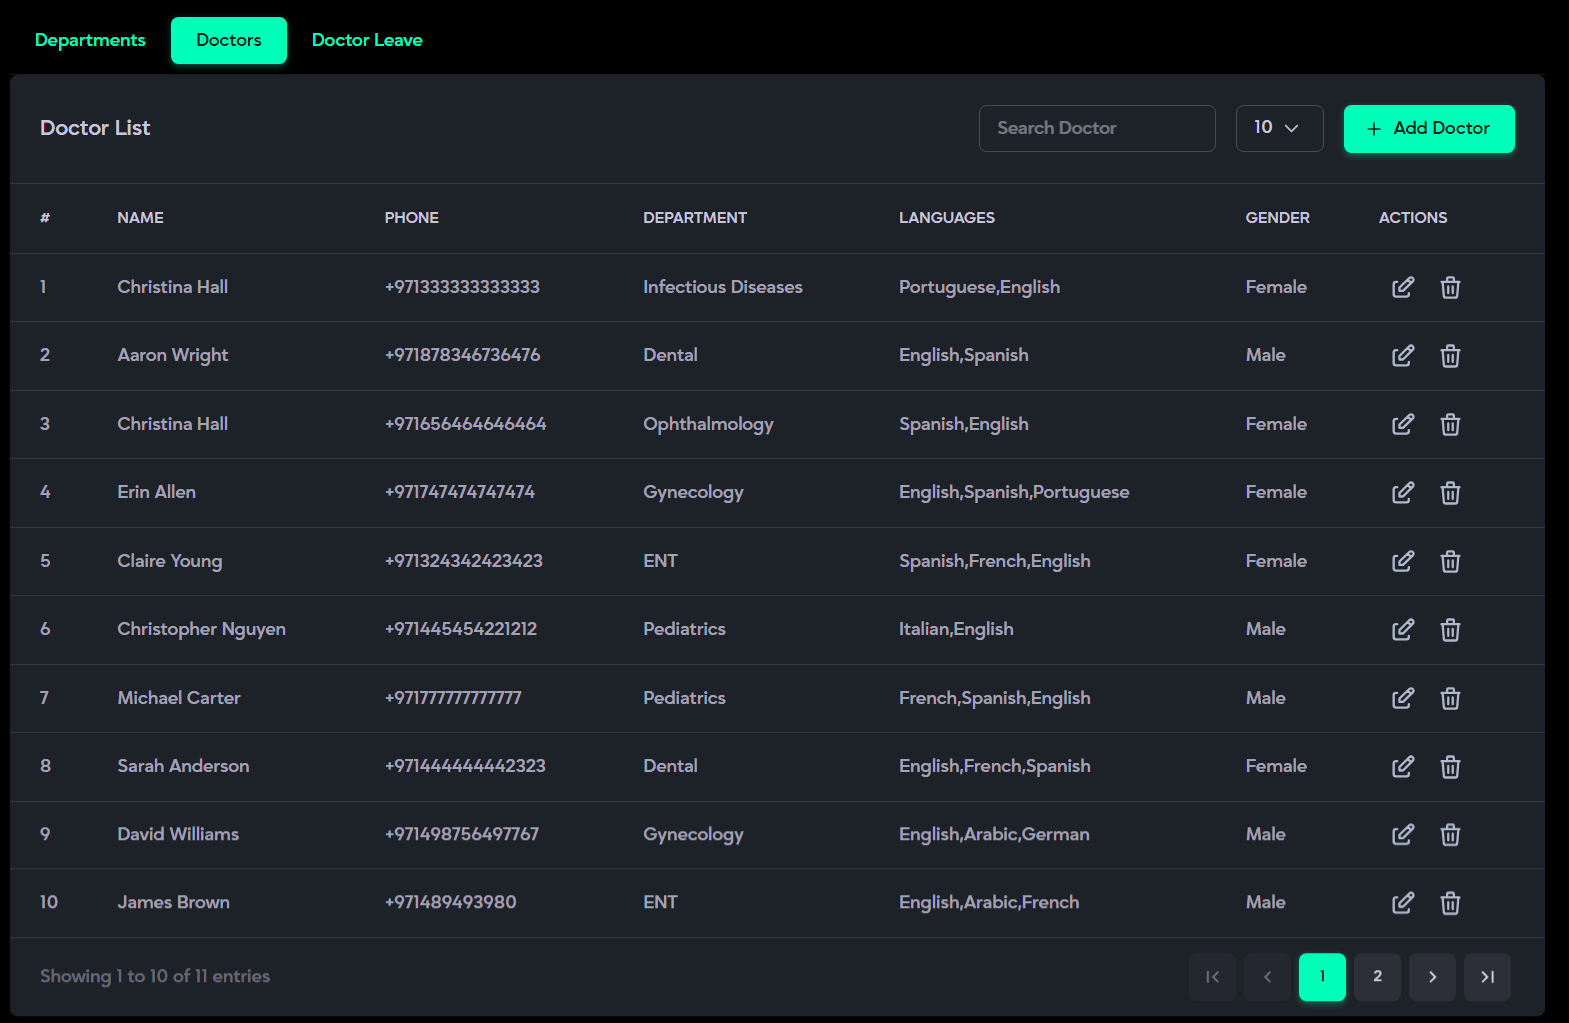
The Doctors section provides a comprehensive list of all doctors within the hospital and allows the addition of new doctors in the system. It displays key information such as their department, contact details, spoken languages, and gender, allowing staff to manage and locate doctors efficiently.
Description:
- Includes Serial Number (#), Doctor Name, Phone Number, Department, Languages, Gender, and Actions.
- Actions: Add Doctor, Update or Delete doctor records as needed.
- Search Bar: Quickly locate a doctor by name or phone number.
- Filter Option: Choose how many records to display per page (e.g., 10, 25, 50).
- Sorting: Click on column headers (e.g., Name, Department, Gender) to sort records in ascending or descending order.
- Pagination: Navigate through multiple doctor entries or adjust how many records appear per page.
How to Use:
- Open the Doctors tab to view the complete doctor list.
- Use the Search Bar to find doctors by name, phone number, or department.
- Click the Filter Dropdown to choose how many entries (e.g., 10, 25, 50) you want to display per page.
- Review the list showing Serial Number (#), Doctor Name, Phone Number, Department, Languages, and Gender.

- Click the Edit Icon under Actions to update doctor details such as department, phone number, or language, available days, timings, then click Update.
- Click the Delete Icon under Actions to remove outdated records. Confirm the action in the dialogue box.
- Use Pagination Controls to move between pages of doctor entries.
Add New Doctor:
- Click the Add Doctor button to open the Doctor Information form.

- Fill in all required fields includingDoctor Name, Phone Number, Gender, Doctor Color, Department, andLanguage.

- Under Default Time Settings, set the Default Start Time and Default End Time to define working hours, and click Apply Default Time to All Days if the same schedule applies across the week.

- In the Select Working Days section:
- Check the boxes for the days the doctor is available.
- For each selected day, enter the Start Time and End Time. If the shift timing is the same for more than one day, you can copy the shift and paste it to another day for quicker setup.

- Click Add Another Shift to add multiple working shifts for the same day.
- Use the Trash Icon to remove an unwanted shift.

- Check the boxes for the days the doctor is available.
- Once all details and shifts are configured, clickAdd Doctor to save the record.


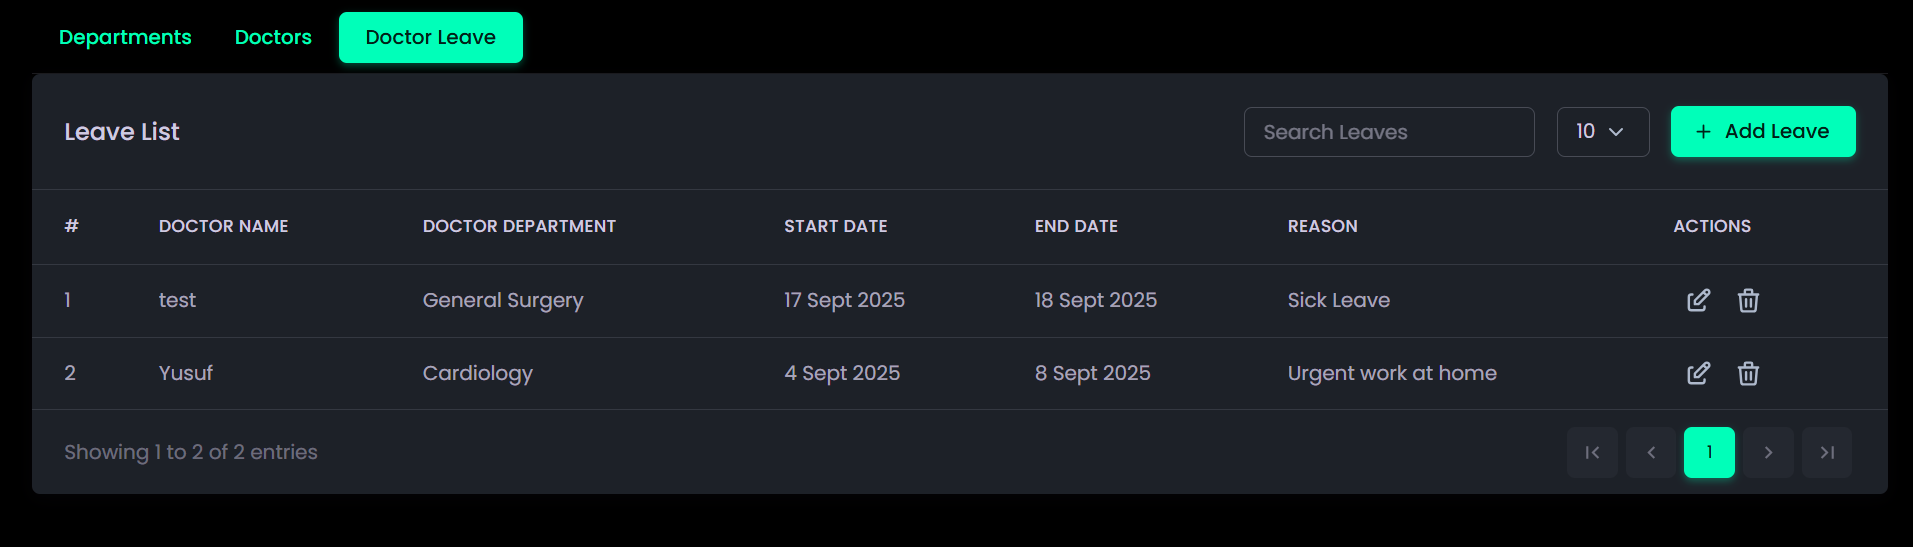
Doctor Leave
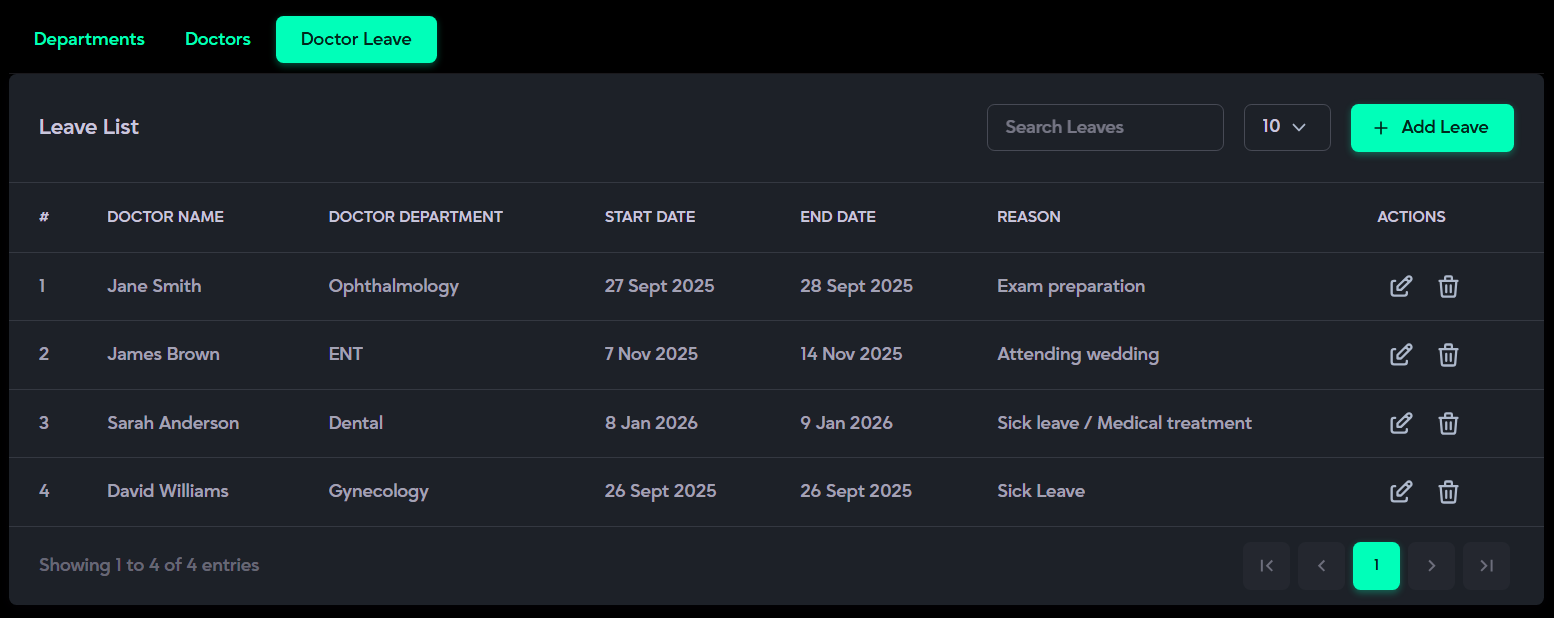
What it is:
The Doctor Leave section manages doctors’ scheduled leaves, ensuring that patients are not booked with unavailable doctors. It also helps maintain balanced staffing across all departments.
Description:
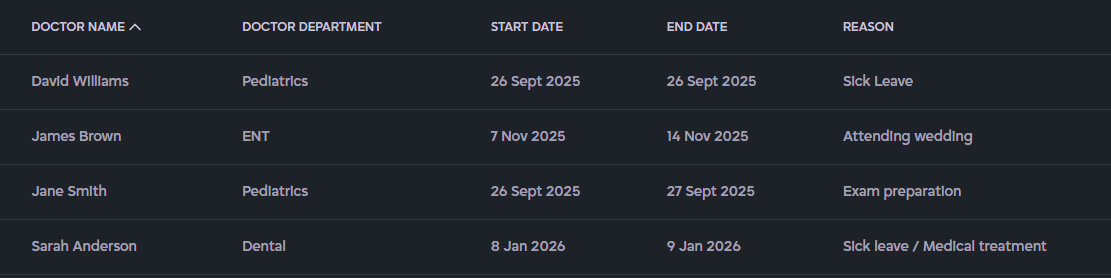
Includes Serial Number (#), Doctor Name,Department, and Leave Details (Start Date, End Date, Reason).
- Add Leave button: create a new leave entry for a doctor.
- Search bar: quickly find leave records by doctor name or department.
- Filter option: choose how many entries to display (e.g., 10, 25, 50).
- Actions menu: update or delete leave records.
- Sorting: click on column headers (e.g., Doctor Name, Department, Start Date) to sort data in ascending or descending order.
- Pagination: navigate through leave records and view total entries (e.g., Showing 1 to 10 of 30 entries).
How to Use:
- Open the Doctor Leave tab to view all existing leave records.
- Use the Search bar to find a leave entry by doctor name or department.
- Click the Filter dropdown to select how many entries (e.g., 10, 25, 50) you want displayed.
- Review the list showing Serial Number (#), Doctor Name, Department, and Leave Details (Start Date, End Date, Reason).

- To add a new leave, click the AddLeave button → select the Department, choose theDoctor, set Start Date and End Date, and enter the Reason for Leave, then click Save (see reference image).
- Click the Edit icon underActions to update leave information.
- Click the Delete icon underActions to remove outdated or incorrect leave records.
- Use Sorting by clicking on column headers (e.g., Doctor Name, Department, Start Date) to arrange records in ascending or descending order.

- Use Pagination controls(left/right arrows) to navigate between pages of leave entries (e.g., Showing 1 to 10 of 30 entries).
Clinic Management
The Clinic Management section allows administrators to manage clinic-related operations. It includes clinic timings, where available working days and start and end times can be defined to ensure appointments are scheduled only within operational hours. Clinics can also manage permanent and random day-offs to reflect actual availability. This section supports efficient scheduling and helps maintain smooth day-to-day clinic operations.
Clinic Timing
What it is:
The Clinic Timing section allows you to define the clinic’s working schedule by setting available days along with their opening and closing times. This ensures appointments are booked only within approved operating hours and prevents scheduling on unavailable days.
Description:
- Allows users to add clinic timings by selecting a day and specifying the opening and closing time.
- Each day can be added only once; duplicate days are not allowed.
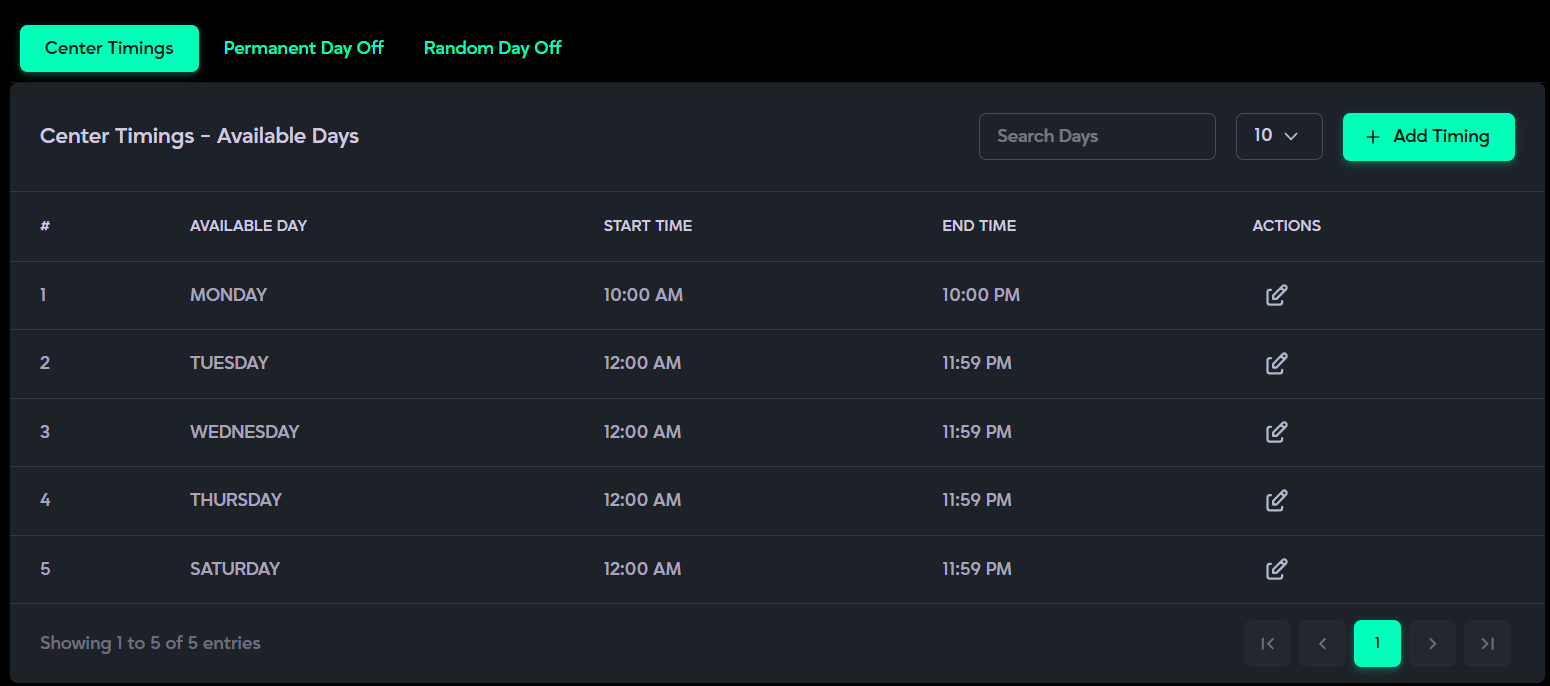
- All configured days and their timings are displayed under Center Timings for easy reference.
- Users can view all available days and their respective timings in a structured list.
- Supports searching based on available day and time.
- Enables sorting by Serial Number (#), Available Day, Start Time, and End Time.
- Provides edit functionality to update the timing of any available day as required.
- Pagination appears automatically when multiple records are available.
How to Use:
- Open the Clinic Timing tab under Clinic Management.

- Click the Add Timing button to select an available day.

- Enter the Start Time and End Time for the selected day and save it.
- The selected day and its timings will appear under Center Timings.
- Use the Edit (pencil icon) to update the timing of any available day if required.

- Use the Search bar to quickly find timings based on day or time.

- Use the Sorting options to arrange records by Serial Number (#), Available Day, Start Time, or End Time in ascending or descending order.
- Use Pagination controls to navigate through additional entries when multiple records exist.

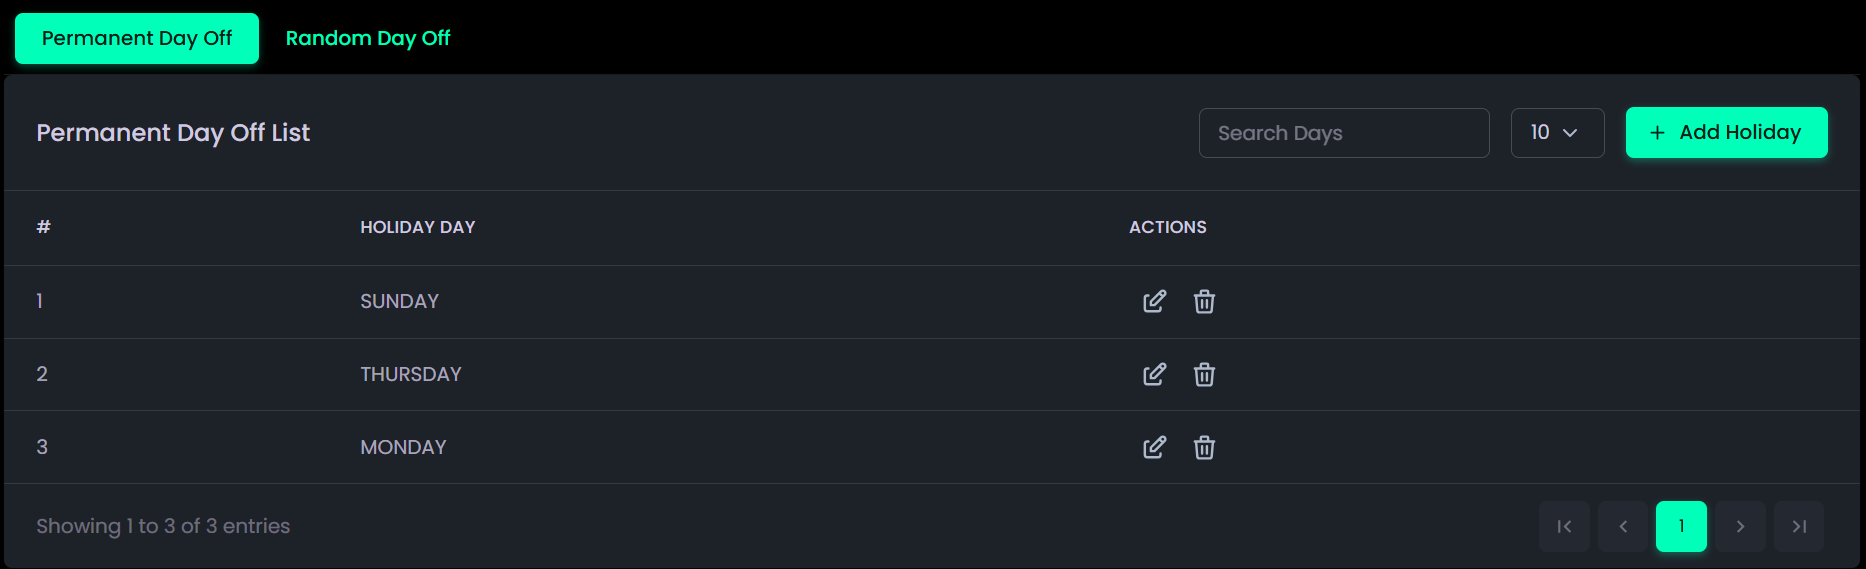
Permanent Day-Off
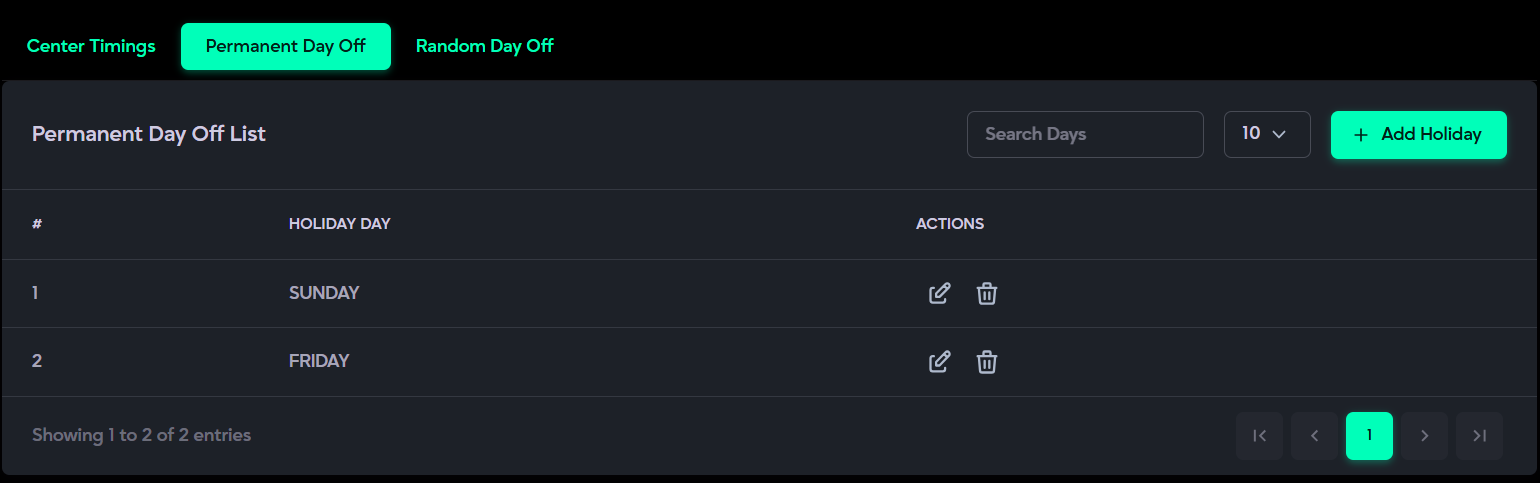
What it is:
The Permanent Day-Off section allows you to assign fixed weekly off days for the clinic, such as Sundays. These days automatically recur each week, ensuring consistent scheduling and preventing bookings on closed days.
Description:
- Displays Serial Number (#), Holiday Day (e.g., Sunday), andAction buttons (Edit and Delete ).
- Each selected day is automatically applied as a recurring weekly closure.
- Admins can easily edit or remove permanent holidays as needed.
- A search bar allows quick lookup of specific days.
- Pagination appears when multiple records are listed.
How to Use:
- Open the Permanent Day-Offtab under Clinic Management.
- Click the Add Holiday button to select a fixed weekly off day (e.g., Sunday) and save it.
- The selected day and its timings will appear under Center Timings.
- Use the Edit (pencil icon) to modify a day if required.
- Use the Delete (trash icon)to remove any permanent day off.
- Use the Search bar to quickly find specific holidays.
- Use the Sorting option to arrange days in ascending or descending order.

- Use Pagination controls to navigate through additional entries when multiple records exist.
Random Day-Off
What it is:
The Random Day-Off section is used to record one-time or occasional clinic closures, such as public holidays, staff events, or maintenance days. These are non-recurring and can be added, modified, or deleted as needed.
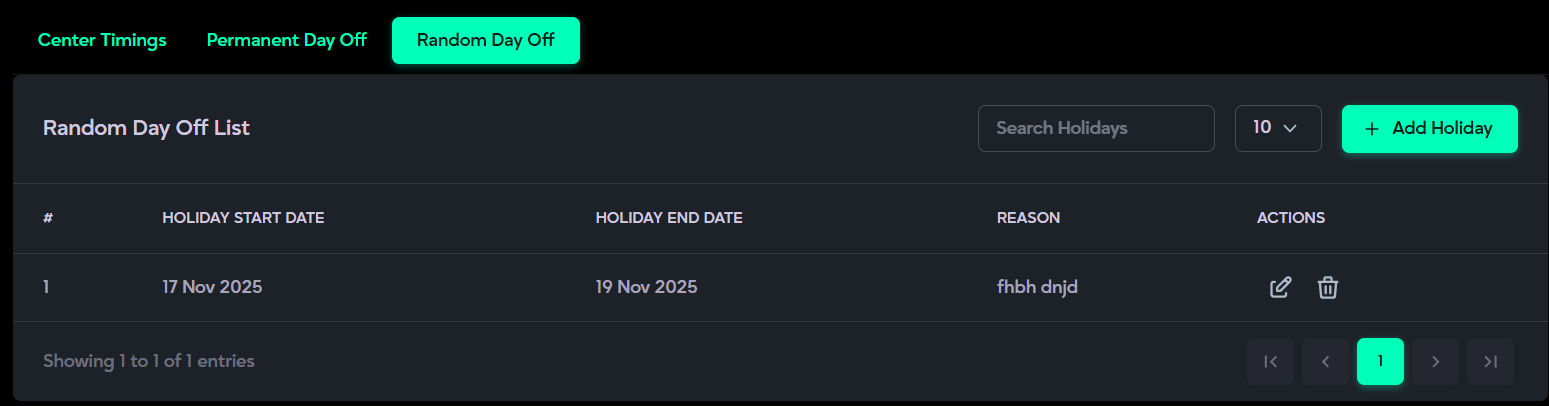
Description:
- Displays Serial Number (#), Start Date, End Date, Reason for Leave, and Action Buttons (Edit and Delete).
- Ideal for managing temporary or unplanned closures (e.g., training sessions, holidays, maintenance).
- Search Bar allows quick access to specific entries.
- Sort Option lets you organize records in ascending or descending order.
- Pagination helps navigate through multiple records and allows setting how many entries to display per page.
How to Use:
- Navigate to the Random Day-Off section in Clinic Management.
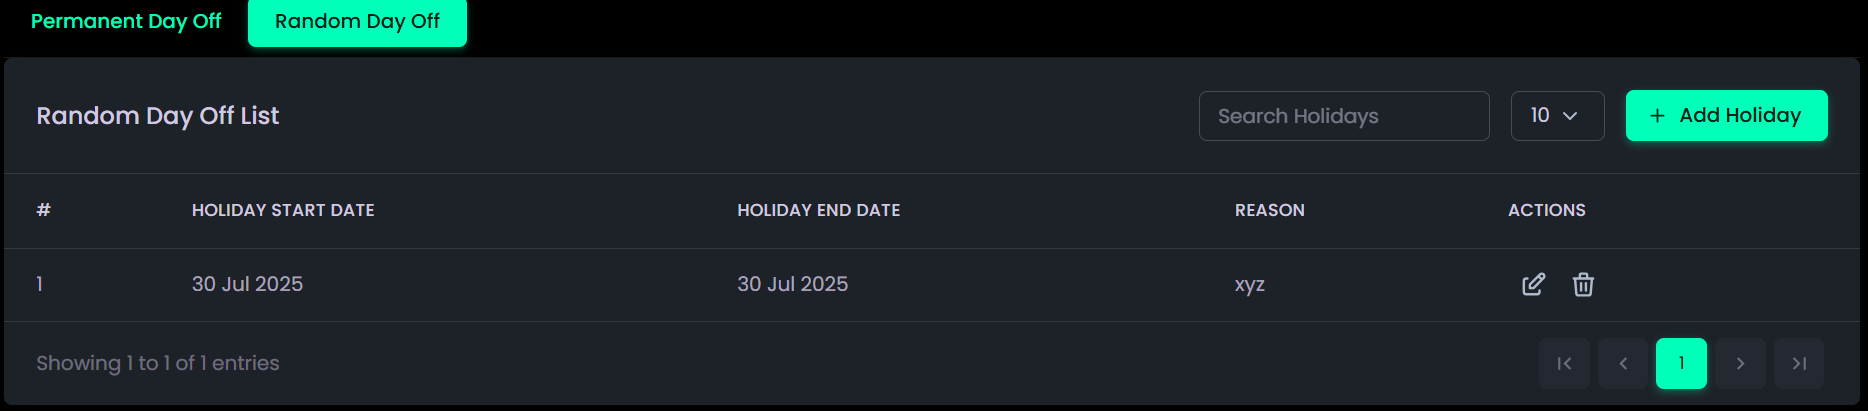
- Click Add Holiday button and choose start and end dates for the leave.
- Enter the reason (e.g., "Staff Training or Workshop").

- Save the entry to confirm the day off.

- Use the Edit (pencil icon) to modify the entry anytime.
- Use the Delete (trash icon) to remove the leave entry.
- Use the search bar to quickly find specific holiday entries.
- Navigate between pages if more than one entry is listed using pagination.
Billing
The Billing section provides a complete view of all user-subscribed subscriptions. It allows you to easily search, subscribe, upgrade, or cancel subscription as needed, ensuring your billing information stays accurate and transparent. When purchasing a subscription for the first time, you’ll need to select an available Twilio number according to your chose country before completing the process.
What it is:
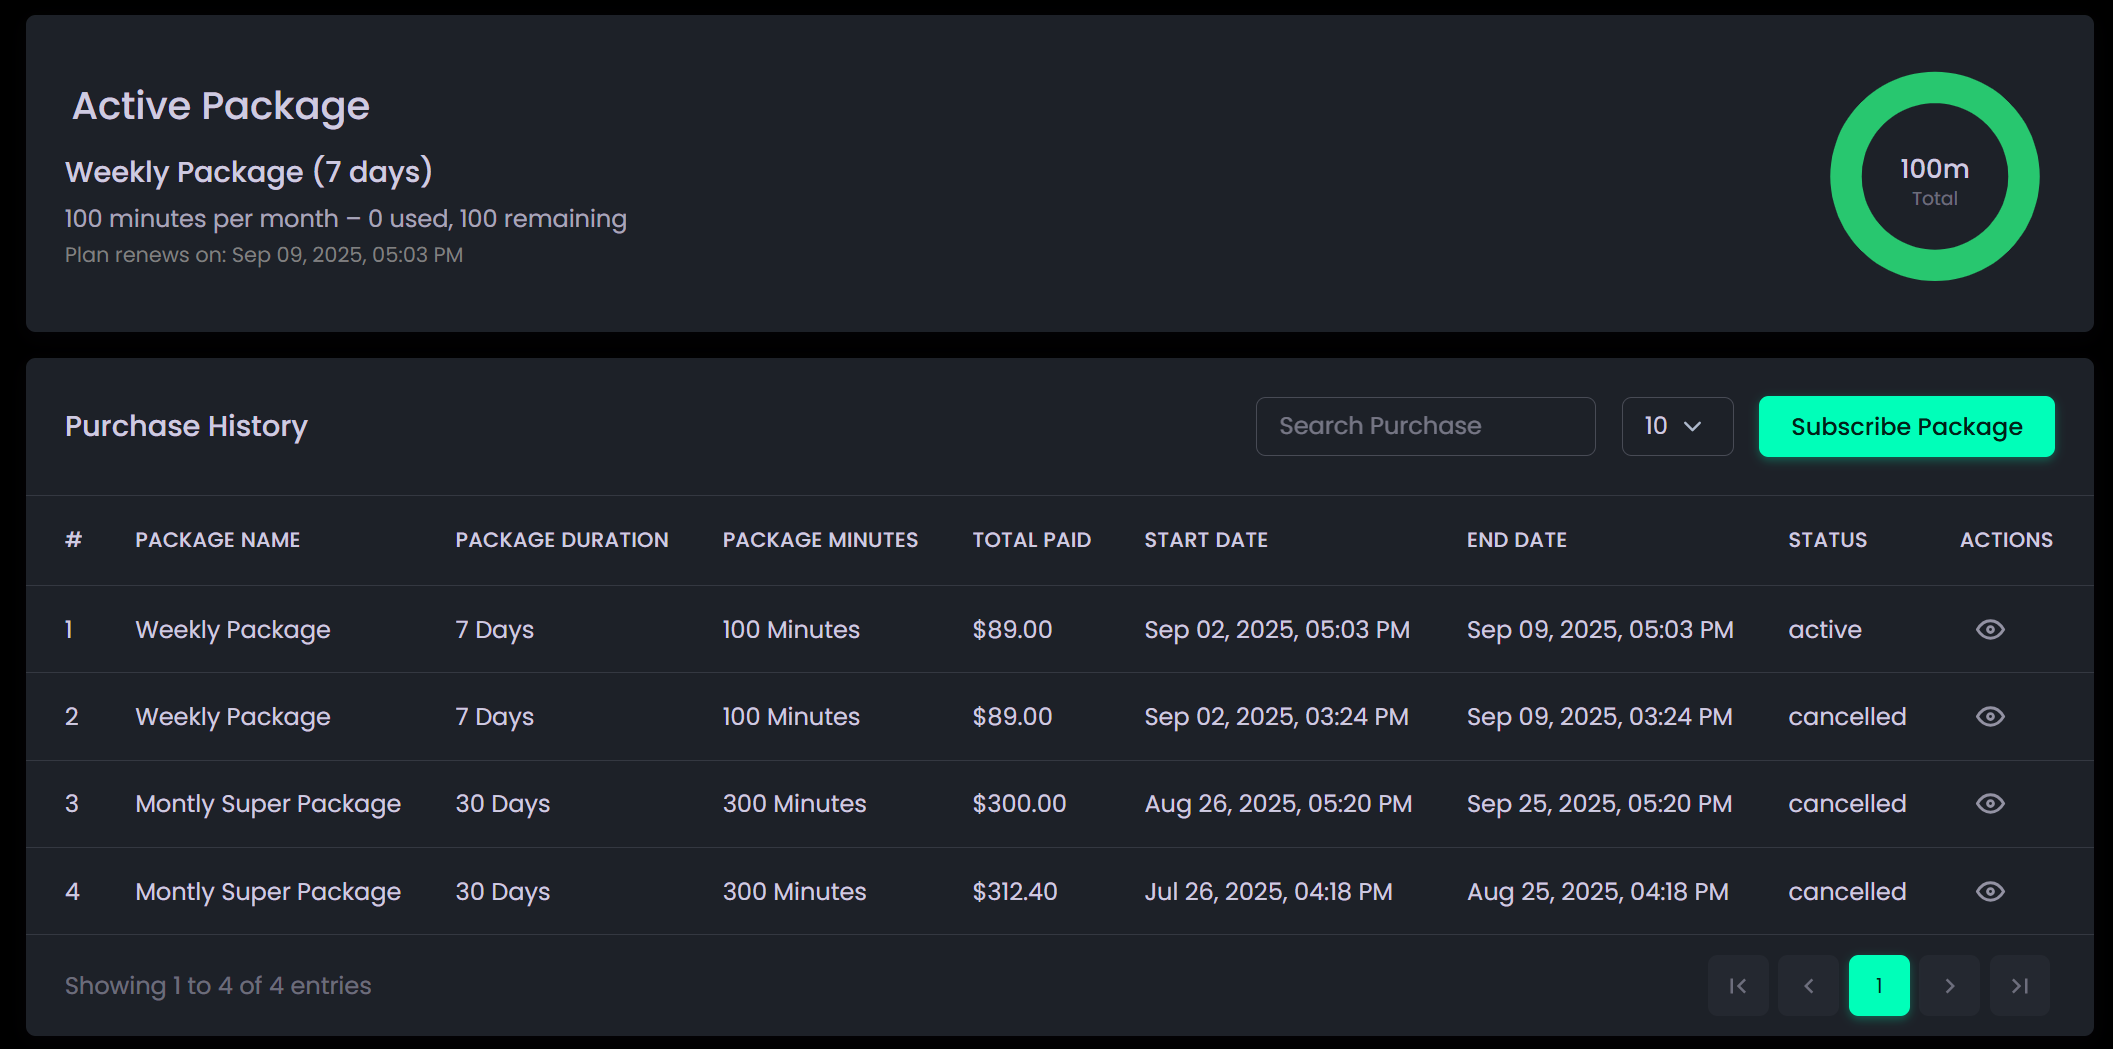
The Billing section helps you efficiently manage your calling packages. It displays details of your active subscription, including usage, renewal information, and complete purchase history.
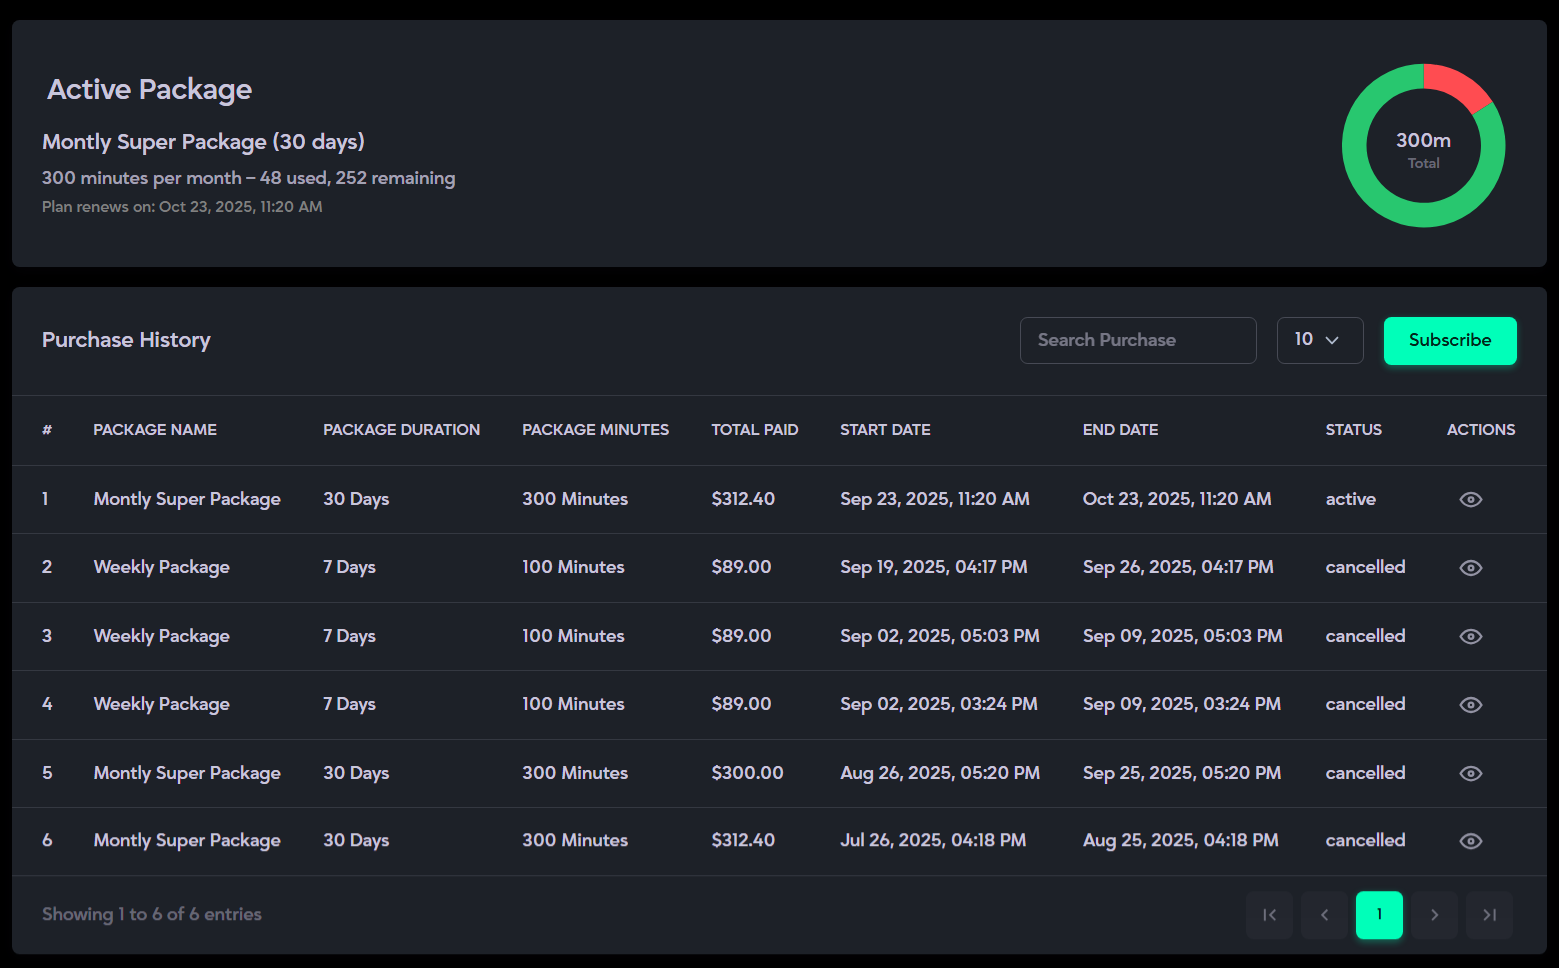
Description:
- Shows the Active Package with total minutes, used minutes, and subscription validity.
- Displays the renewal date and time for the current package.
- Includes a donut chart to visually represent remaining minutes.
- Purchase History lists all previous packages with details like package name, duration, total minutes, amount paid, start/end date, and subscription status.
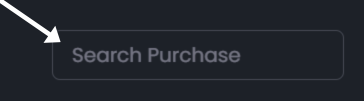
- The Search bar allows you to filter purchase history by package name, validity period, & status.
- Pagination lets you move through multiple purchase records.
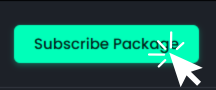
- The Subscribe Package button opens the package selection screen to purchase or renew a plan.
How to Use:
- Open the Billing tab from the sidebar menu.
- Review your Active Package, which displays:
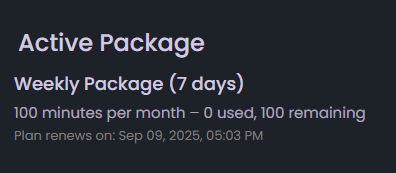
- Package name and duration
- Used and remaining minutes
- Next renewal date and time
- Scroll to the Purchase Historysection to view all previous subscriptions, including:

- Package name
- Duration and total minutes
- Price paid
- Start and end dates
- Use the Search Purchase bar to quickly find past packages.
- Click the Subscribe Packagebutton to add a new subscription.
- In the subscription screen:
- For the first time, select yourCountry from the dropdown.

- Choose a Twilio Numberassigned to your selected region.

- Review and compare available packages:

- Monthly Package: 30 days, 100 minutes
- Monthly Super Package: 30 days, 300 minutes
- Weekly Package: 7 days, 100 minutes
- For the first time, select yourCountry from the dropdown.
- If you already have an active package, you cancancel or upgrade by subscribing to a new one.
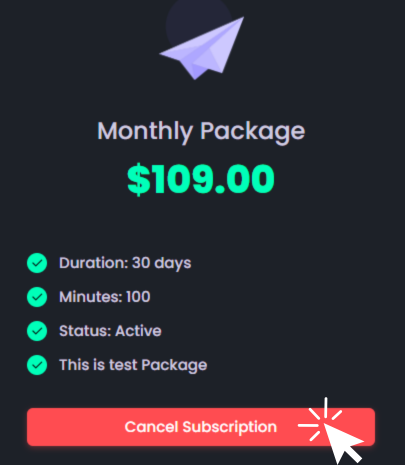
- Once subscribed, the new package activates immediately, replacing the previous one & can’t be downgraded.
Template Management
The Template Management section helps you efficiently organize and customize communication templates used across Email, WhatsApp, and Polls. Each subsection includes built-in search, edit, andsort options to ensure templates remain current and consistent.
These templates are used for appointment confirmations,rescheduling, cancellations, reminders, and patient feedback collection, ensuring smooth and professional communication throughout the patient journey.
Email Template
What it is:
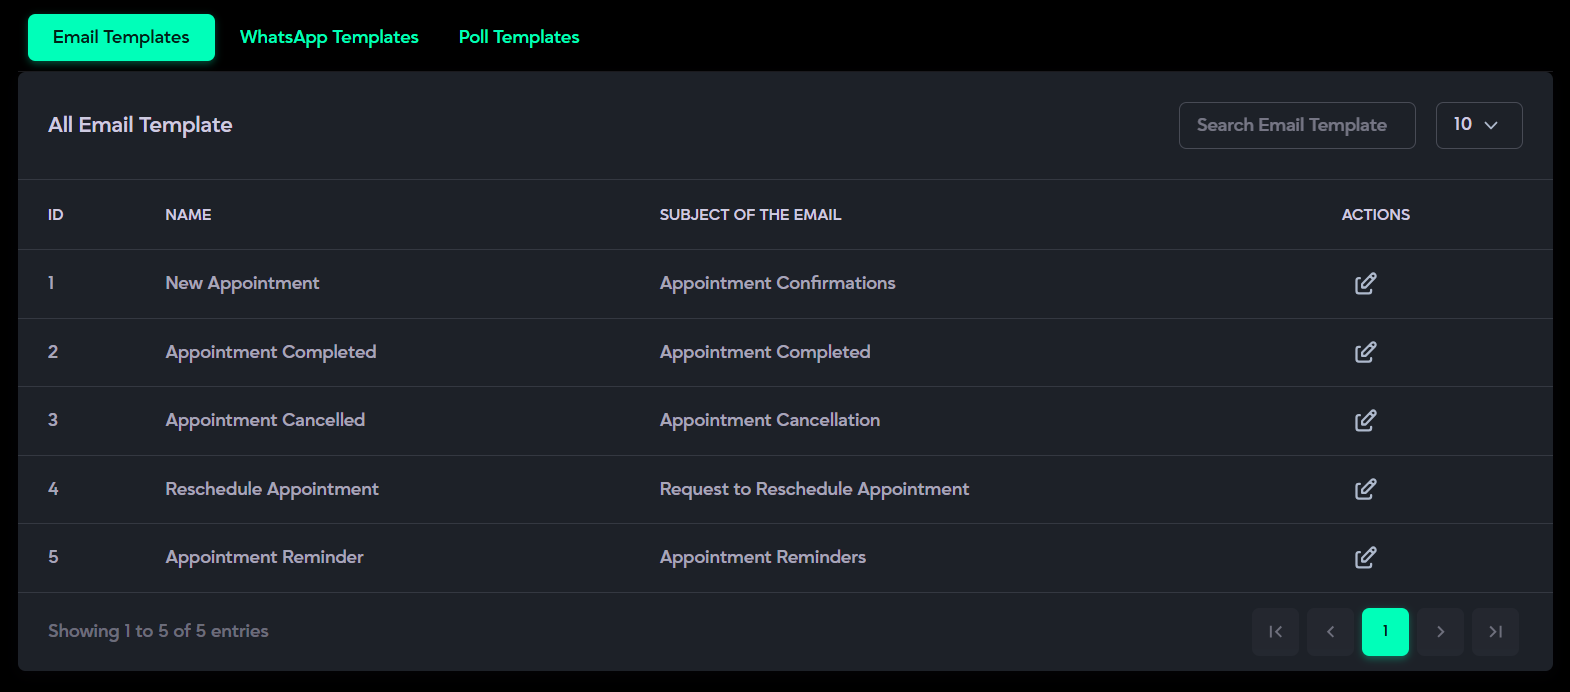
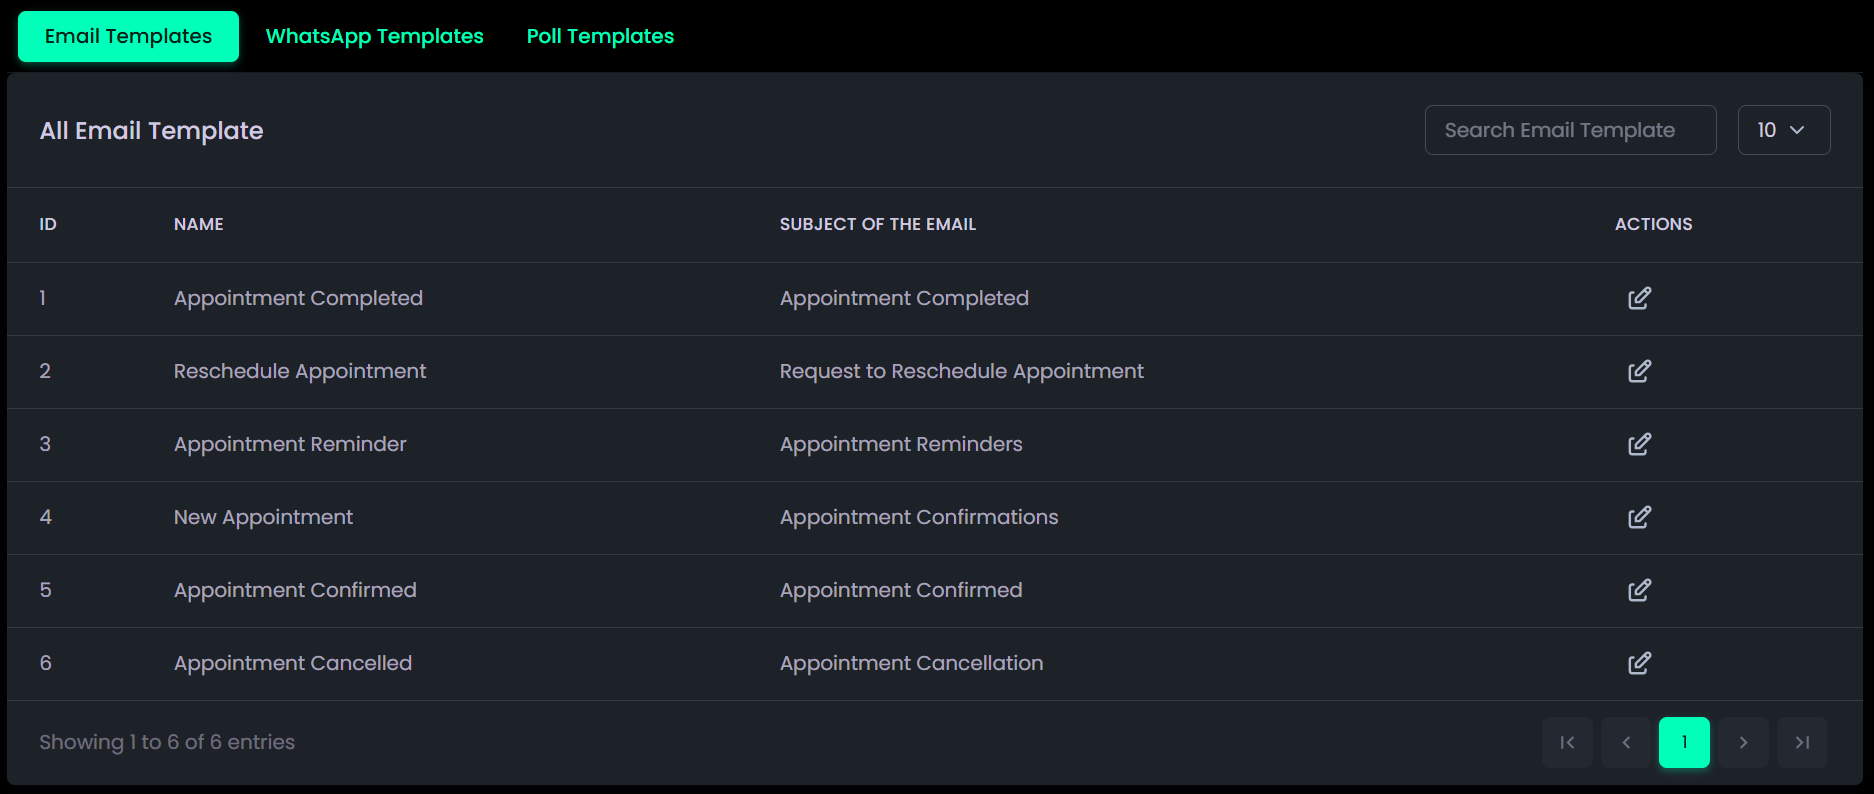
The Email Templates section contains predefined email messages automatically sent to patients for various events, such as appointment confirmations, cancellations, reminders, or completions.
Description:
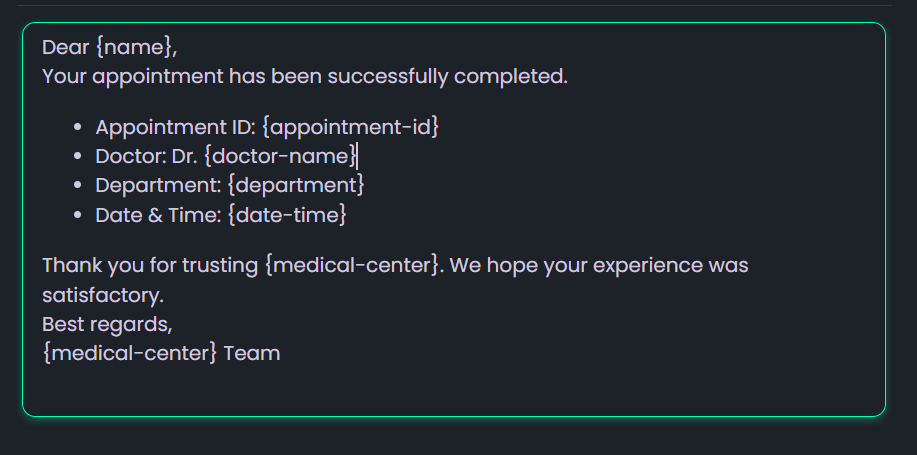
- Each template includes a Name, Subject, and a customizable Body that supports dynamic placeholders like {name}, {doctor-name}, and others for personalization.
- Templates are organized by different appointment-related scenarios—confirmation, reschedule,reminder, and completion.
- All templates can be easily edited using the Action (Edit) pencil icon to update content as needed.
How to Use It:
- Open the Email Templatessection from the menu.
- Use the Search bar to find a specific template or scroll through the list to browse all available ones.
- Click the Edit icon under the Actions column to modify the template’s Subject orBody.

- Insert dynamic placeholders from the right panel (e.g., {name}, {date-time}, {doctor-name}) to personalize messages.
- Click Preview & Save to review and confirm your updates.

WhatsApp Template
What it is:
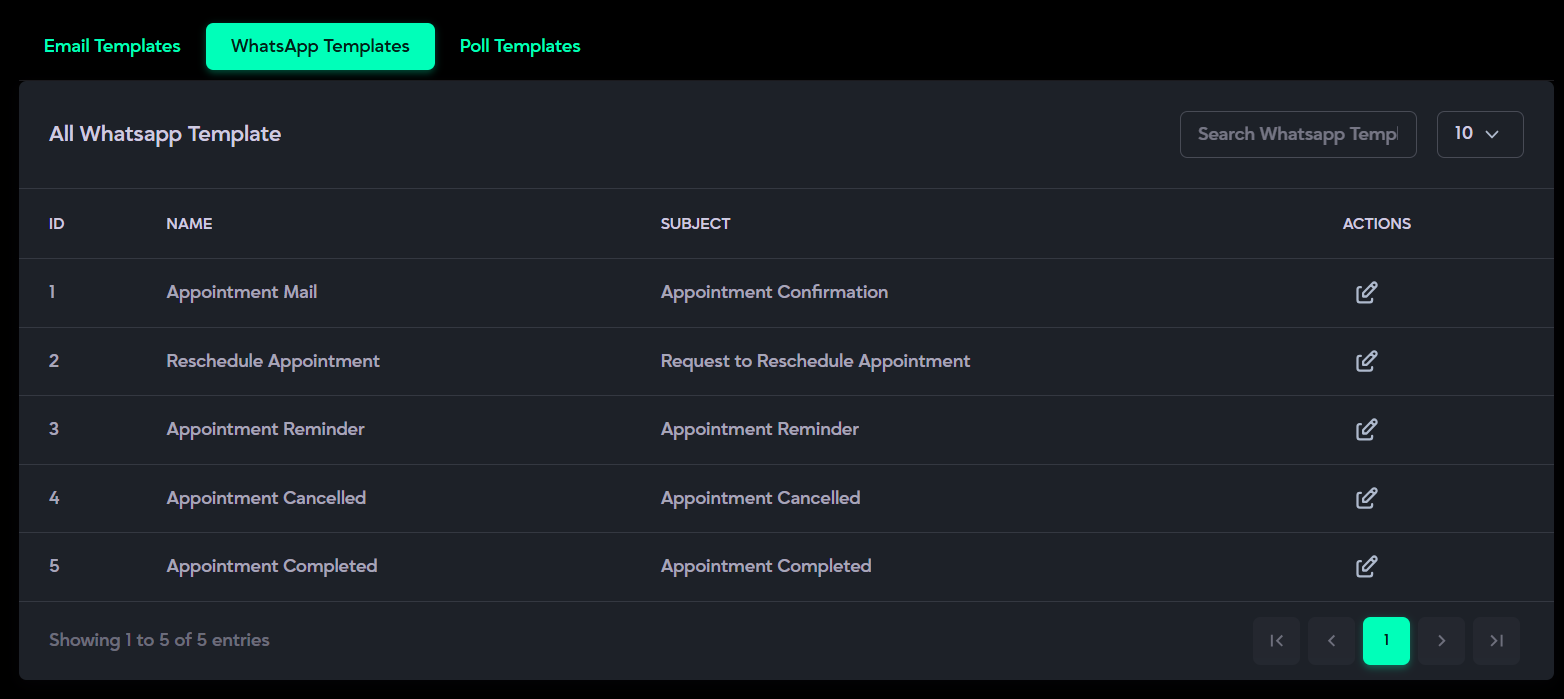
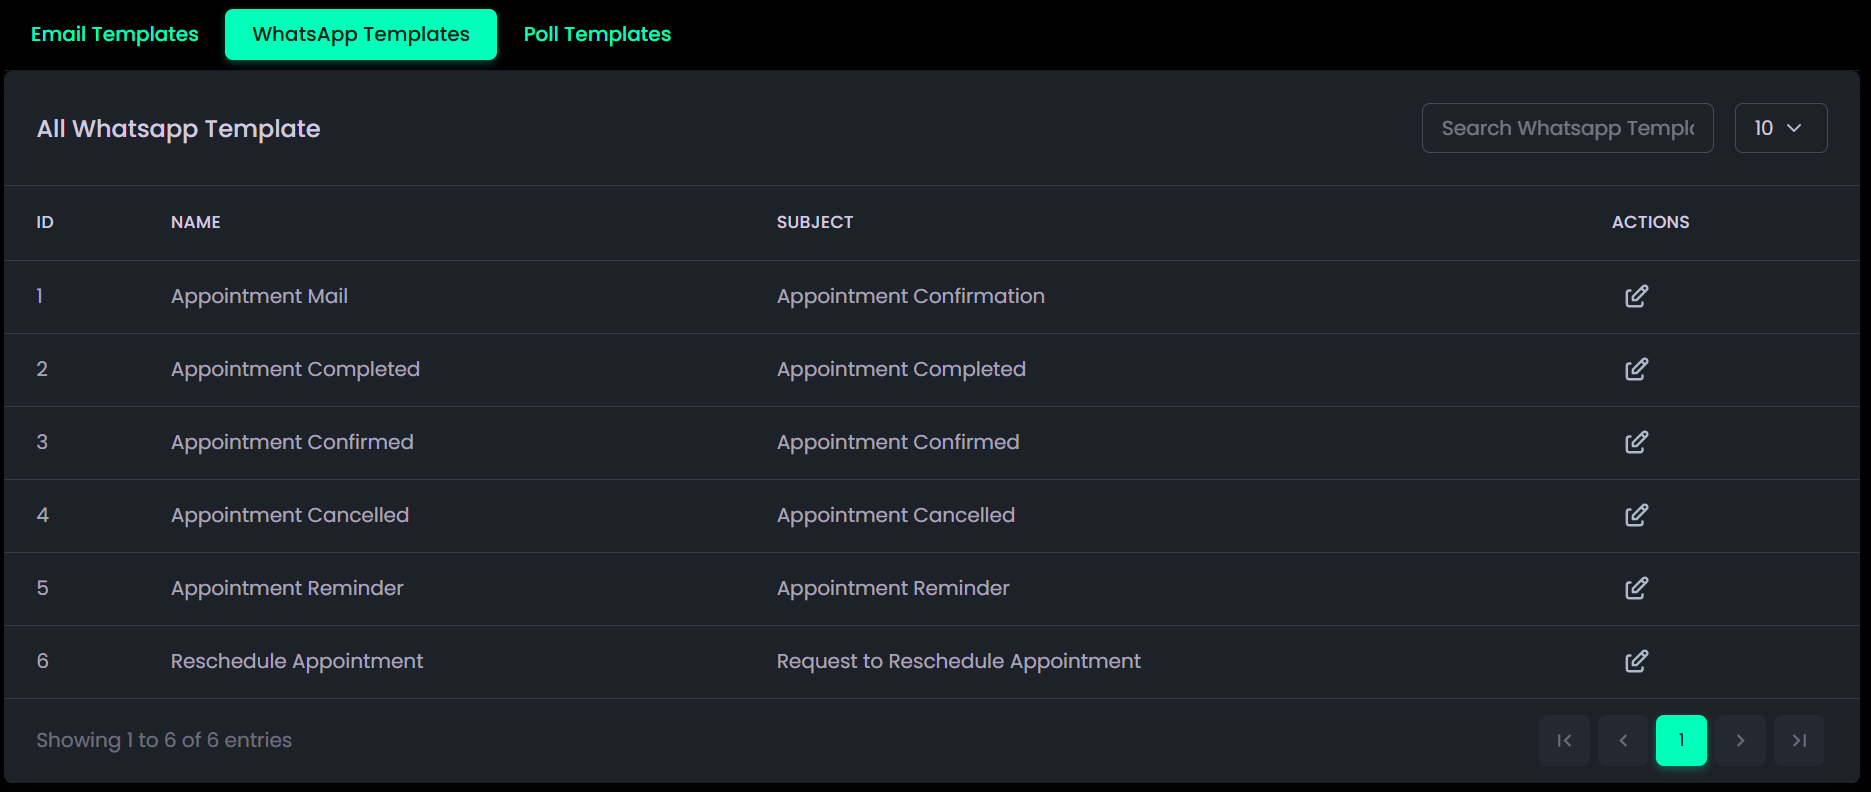
The WhatsApp Templates section contains pre-written message formats used for communicating with patients through WhatsApp. These templates are designed for appointment confirmations, reminders, cancellations, and other important notifications.
Description:
- Ensures quick, consistent, and professional communication with patients.
- Supports dynamic placeholders (e.g., {name}, {doctor-name},{appointment-date}) for personalized messages.
- Use the Action icons to edit templates based on need.
How to Use It:
- Open the WhatsApp Templatessection.
- Use the Search bar to quickly locate a specific template.
- Click the Edit icon under Actions to modify the message content.
- Insert dynamic placeholders(e.g., {name}, {appointment-date}) where needed and click Save.
- Click Preview & Save to review and confirm your updates.

Poll Template
What it is:
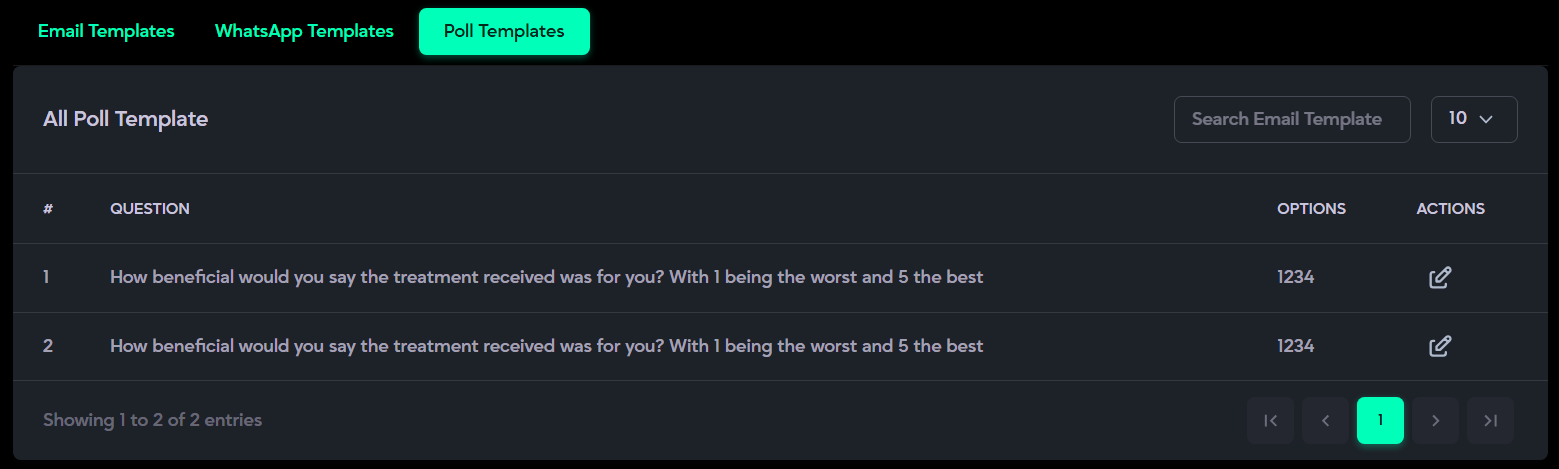
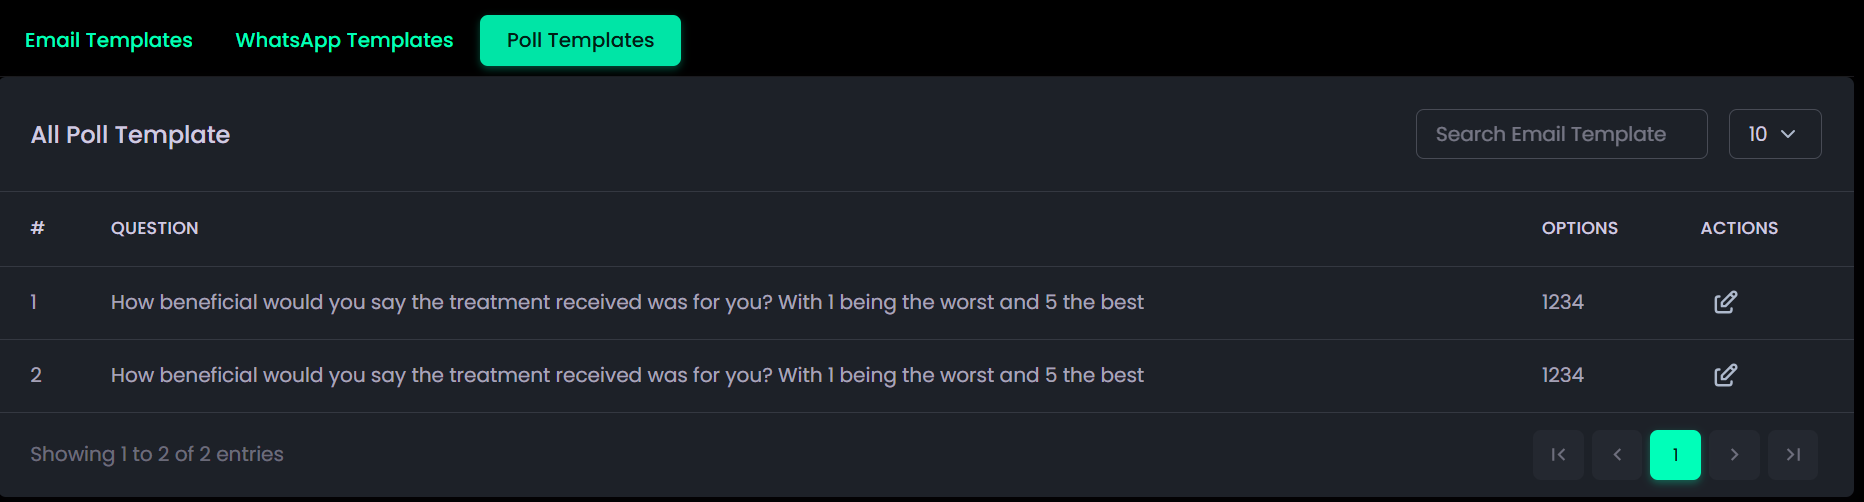
The Poll Templates section is designed to gather structured patient feedback through survey-style questions, such as satisfaction ratings or service evaluations.
Description:
- Each poll includes a question with predefined answeroptions (e.g., ratings from 1 to 5).
- Polls can be edited or updated anytime to align with changing feedback needs.
- Primarily used post-consultation or treatment to measure patient satisfaction and service quality.
How to Use It:
- Navigate to the Poll Templates section.

- Browse the list or use the Search bar to quickly find a specific poll.
- Click the Edit icon under Actions to modify a poll’s question or answer options.

- Use Add Option to include additional response choices.

- Use Remove Icon to remove extra options.

- Click Submit to save your updates.


System Settings
The System Settings section allows you to manage key configurations that control how the application operates. It includes options for setting notification intervals, configuring WhatsApp integration, and updating logo settings. Each setting ensures smooth system performance and allows customization according to organizational preferences.
Notification Interval
What it is:
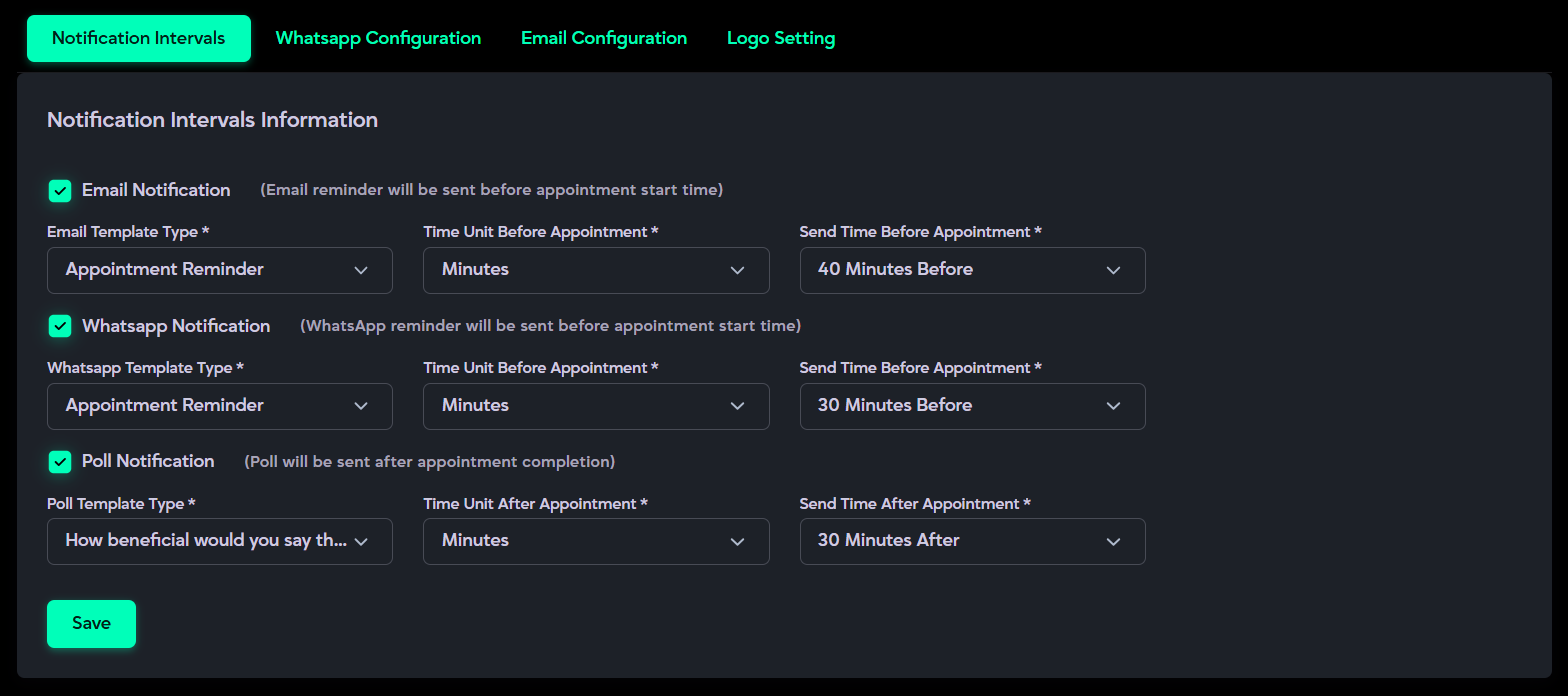
The Automated Reminders section enables administrators to set up and control when reminders are automatically sent through Email, WhatsApp, and Polls.
Description:
- Allows configuration of Email Notifications with ON/OFF toggle, template selection, and customizable intervals (e.g., “30 Minutes Before Appointment”).
- Provides WhatsApp Notifications with similar options for toggling, template selection, and timing.
- Includes Poll Notifications, which are automatically sent after an appointment is completed to collect patient feedback.
- Reminder scheduling and delivery are handled through cron jobs, ensuring timely and automated message dispatch.
How to Use It:
- Open the Automated Reminderssubsection.

- Turn ON the reminder type you want to activate (Email, WhatsApp, or Poll).

- Select the appropriate reminder template from the list.
- Choose the time unit (e.g., minutes, hours, or days).
- Set the time interval based on the selected unit (e.g., “30 Minutes Before”).
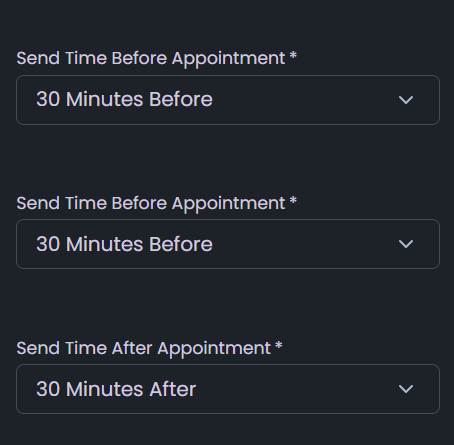
- For Polls, choose the poll template, set the time unit, and define the delay (e.g., “30 Minutes After”).

- Click Save Settings, reminders and polls will now be triggered automatically based on your configurations.
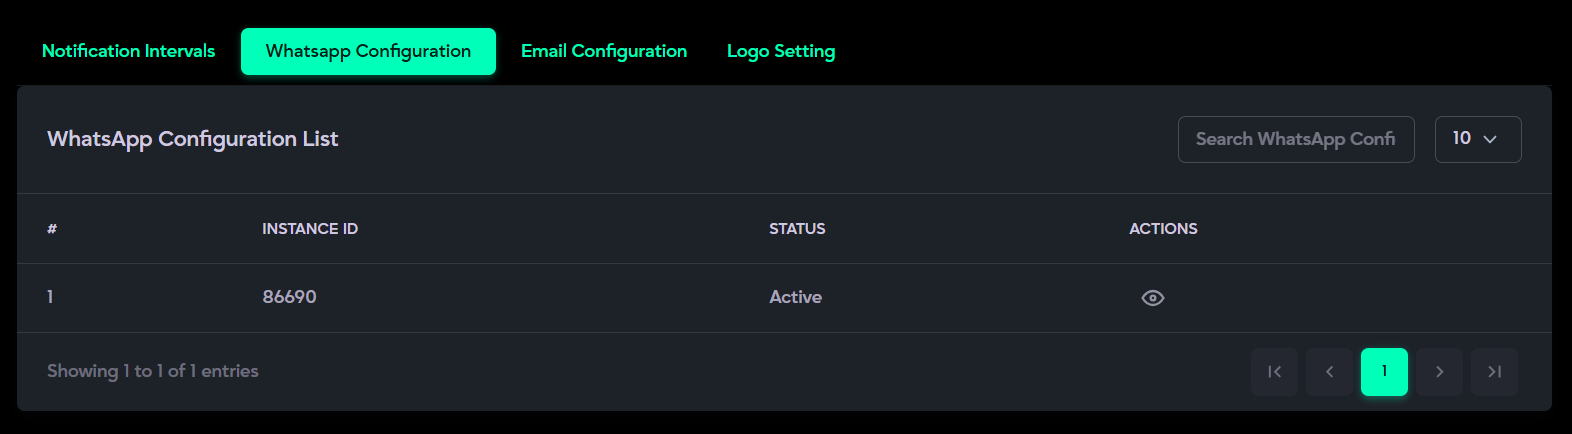
WhatsApp Configuration
What it is:
The WhatsApp Configuration section connects your system with WhatsApp to automate patient communication, including appointment confirmations, reminders, follow-ups, and feedback polls. It ensures smooth message delivery and stable integration with your WhatsApp API setup.
Description:
- Displays all existing configurations with details such as Instance ID, Status, and Actions (View Details).
- Allows adding a new configuration using the Add New Config button (only once per setup).
- Requires entering WhatsApp API credentials such asInstance ID, Webhook URL, and Webhook Event to activate WhatsApp-based reminders and notifications.
- To configure WhatsApp for AI messaging or automated notifications, the user must be subscribed to any active package. Without an active subscription, WhatsApp configuration cannot be completed.
- If the user disconnects their WhatsApp from the panel, all automated WhatsApp chat, AI messaging, and WhatsApp notifications will be immediately disabled.
How to Use It:
- Open the WhatsApp Configuration subsection from System Settings.
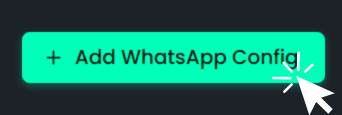
- Click Add WhatsApp Config to create a new configuration.
- After clicking Get Instance ID, the required WhatsApp API credentials (Instance ID, Webhook URL, Webhook Event) will be generated.

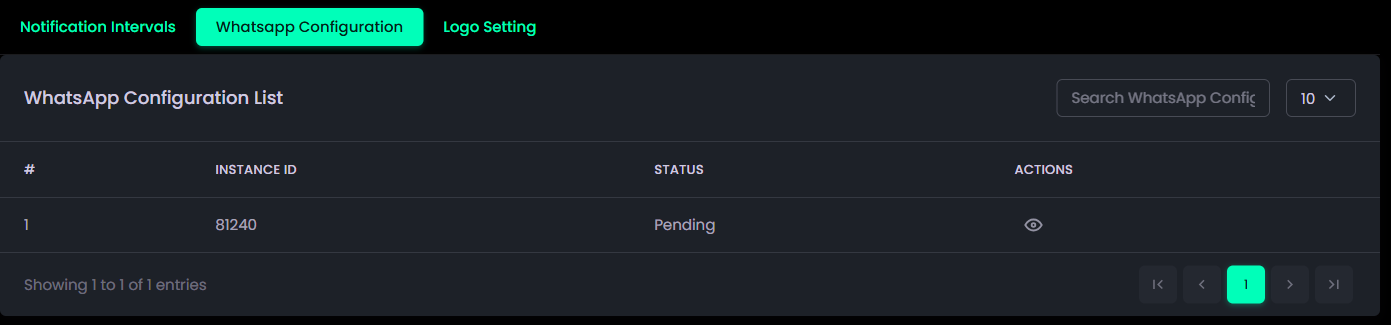
- On the main page, the configuration status will show as Pending, click View Icon to open the detail page.

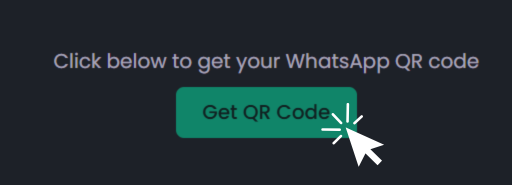
- Click Get QR Code and scan it using your WhatsApp to link the account.
- Once linked, all reminders and notifications will be sent automatically via WhatsApp
Email Configuration
What it is:
The Email Configuration section allows the system to send emails using the user’s own email address. It enables automated email communication such as appointment confirmations, reminders, follow-ups, and system notifications, ensuring reliable and personalized email delivery.
Description:
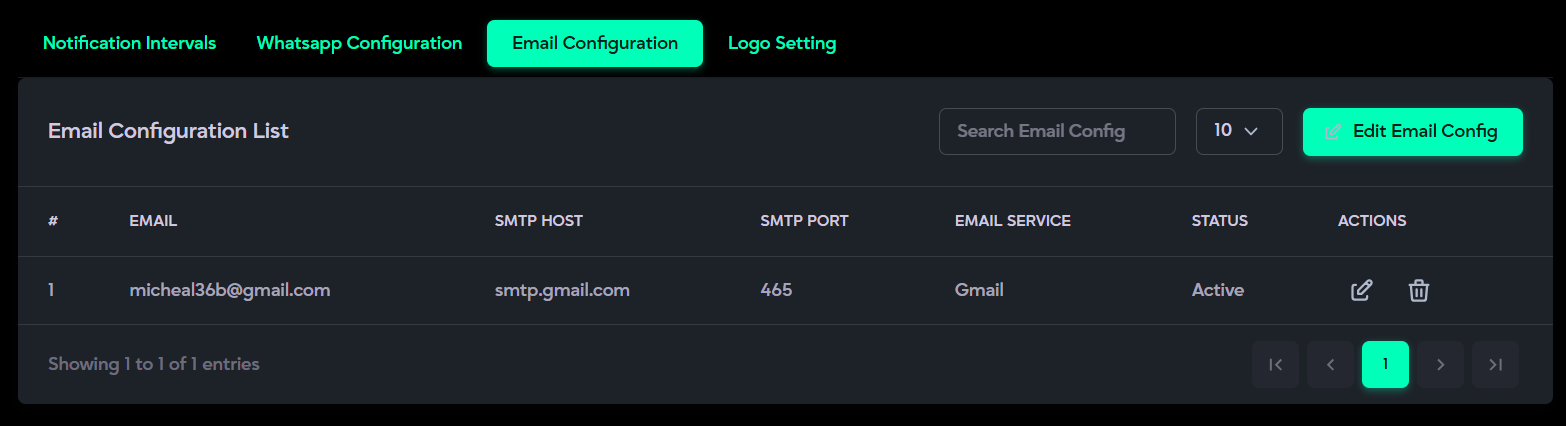
- Displays all existing email configurations with key details such as Email Address, Status, and available Actions.
- Allows the user to add a new configuration using the Add Email Config button.
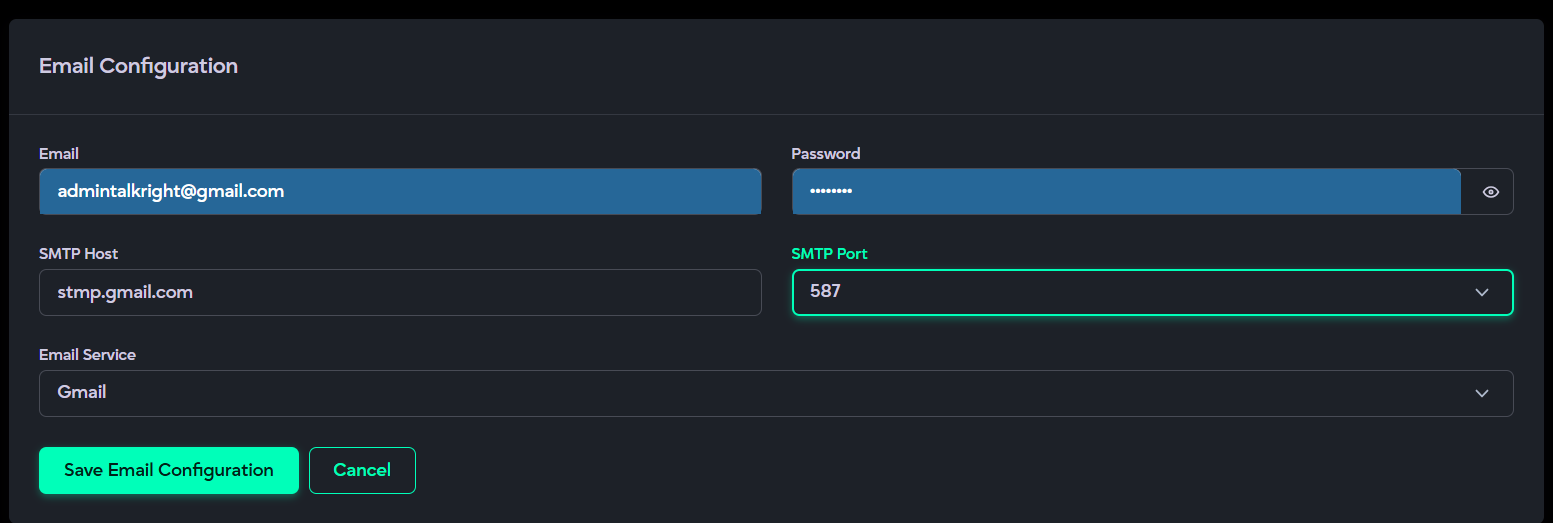
- Requires entering valid email credentials, including the email address, App Password, SMTP host, port, and email service provider.
- For Gmail users, 2-Step Verification must be enabled, and an App Password must be generated from Manage Your Google Account →Security → App Passwords.
- Once configured, all system emails will be sent from the user’s own email address.
- f the email configuration is removed or disabled, automated emails will no longer be sent from the user’s email address and will instead be sent from TalkRight’s default email.
How to Use It:
- Click Add Email Config to create a new configuration.

- Enter your email address in the email field.

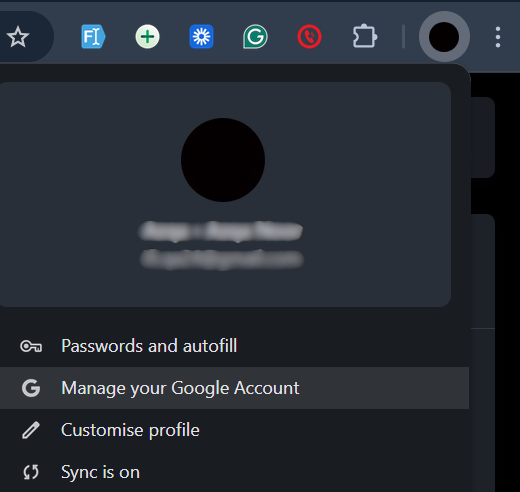
- Click your profile icon (top right) and open Manage Your Google Account.
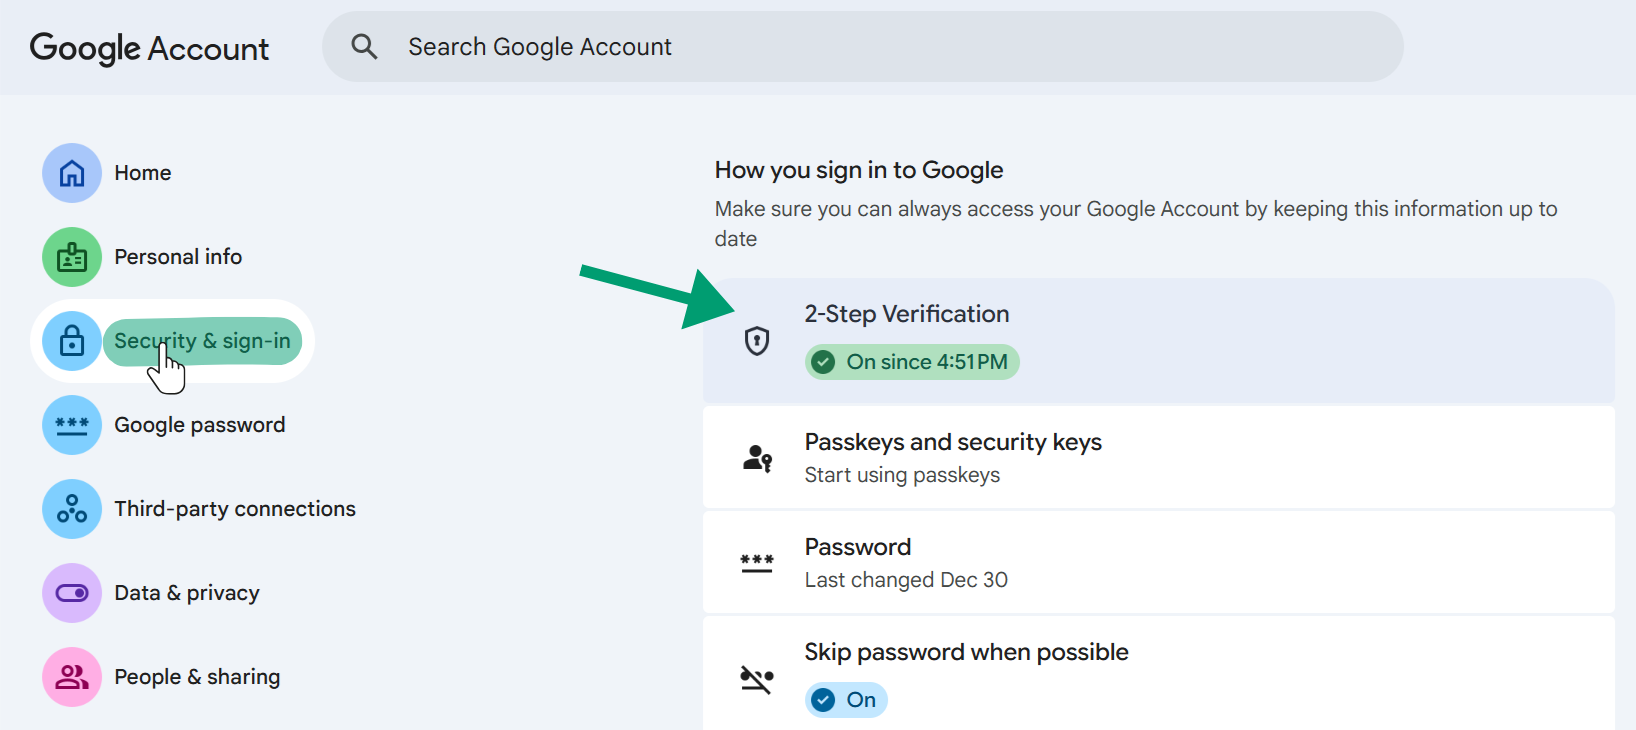
- Go to Security and enable 2-Step Verification.
- Search App Passwords, add your app name, and generate the password.
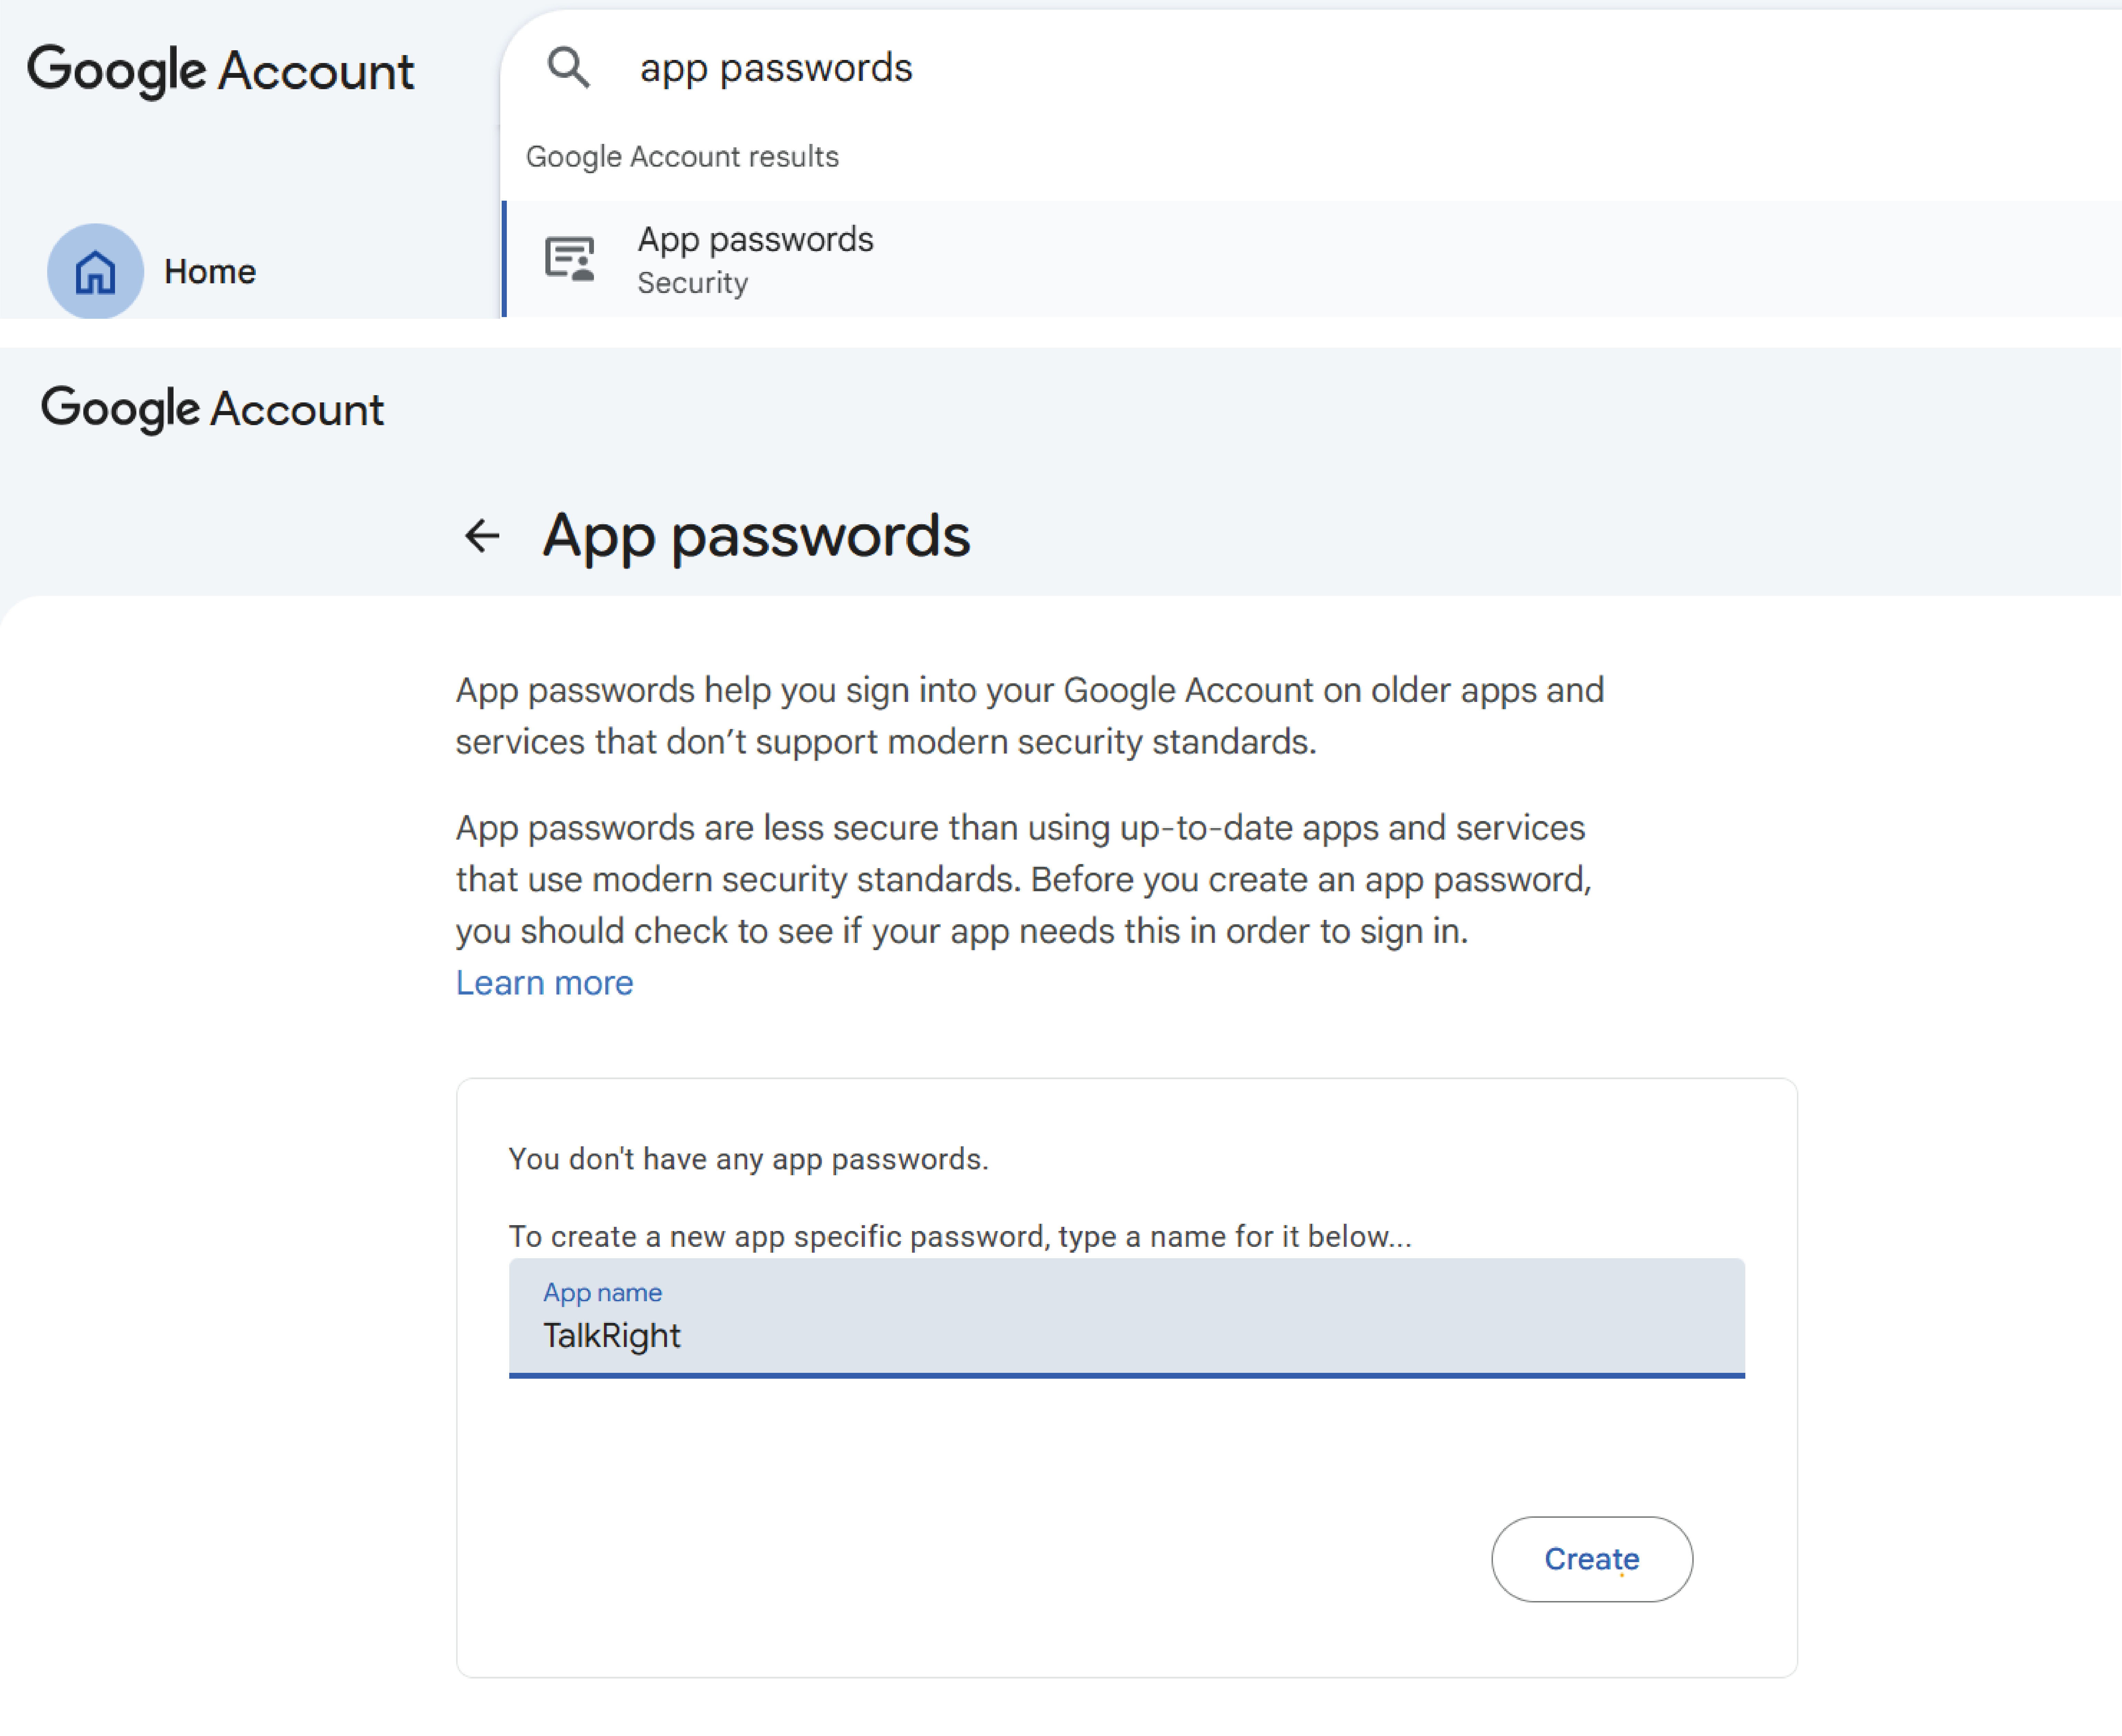
- Copy the generated App Password before confirming.
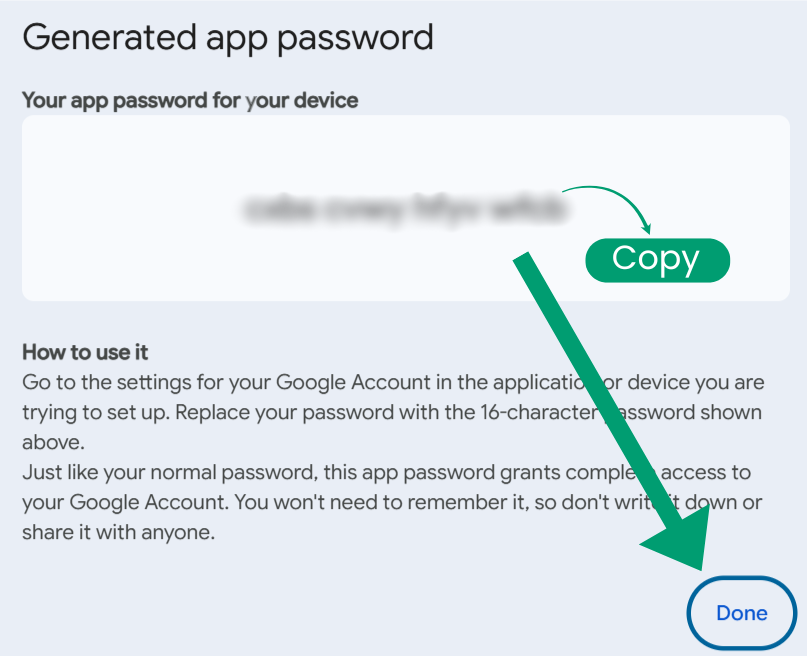
- Search App Passwords, add your app name, and generate the password.
- Paste the App Password into the password field.

- Add the SMTP host, select the Port, and choose your Email Service Provider.

- Click Save to complete the setup.

- Once configured, all email notifications and reminders will be sent from your email address.
Google App Password Setup (Gmail Users):
Complete Email Configuration:


Logo Settings
What it is:
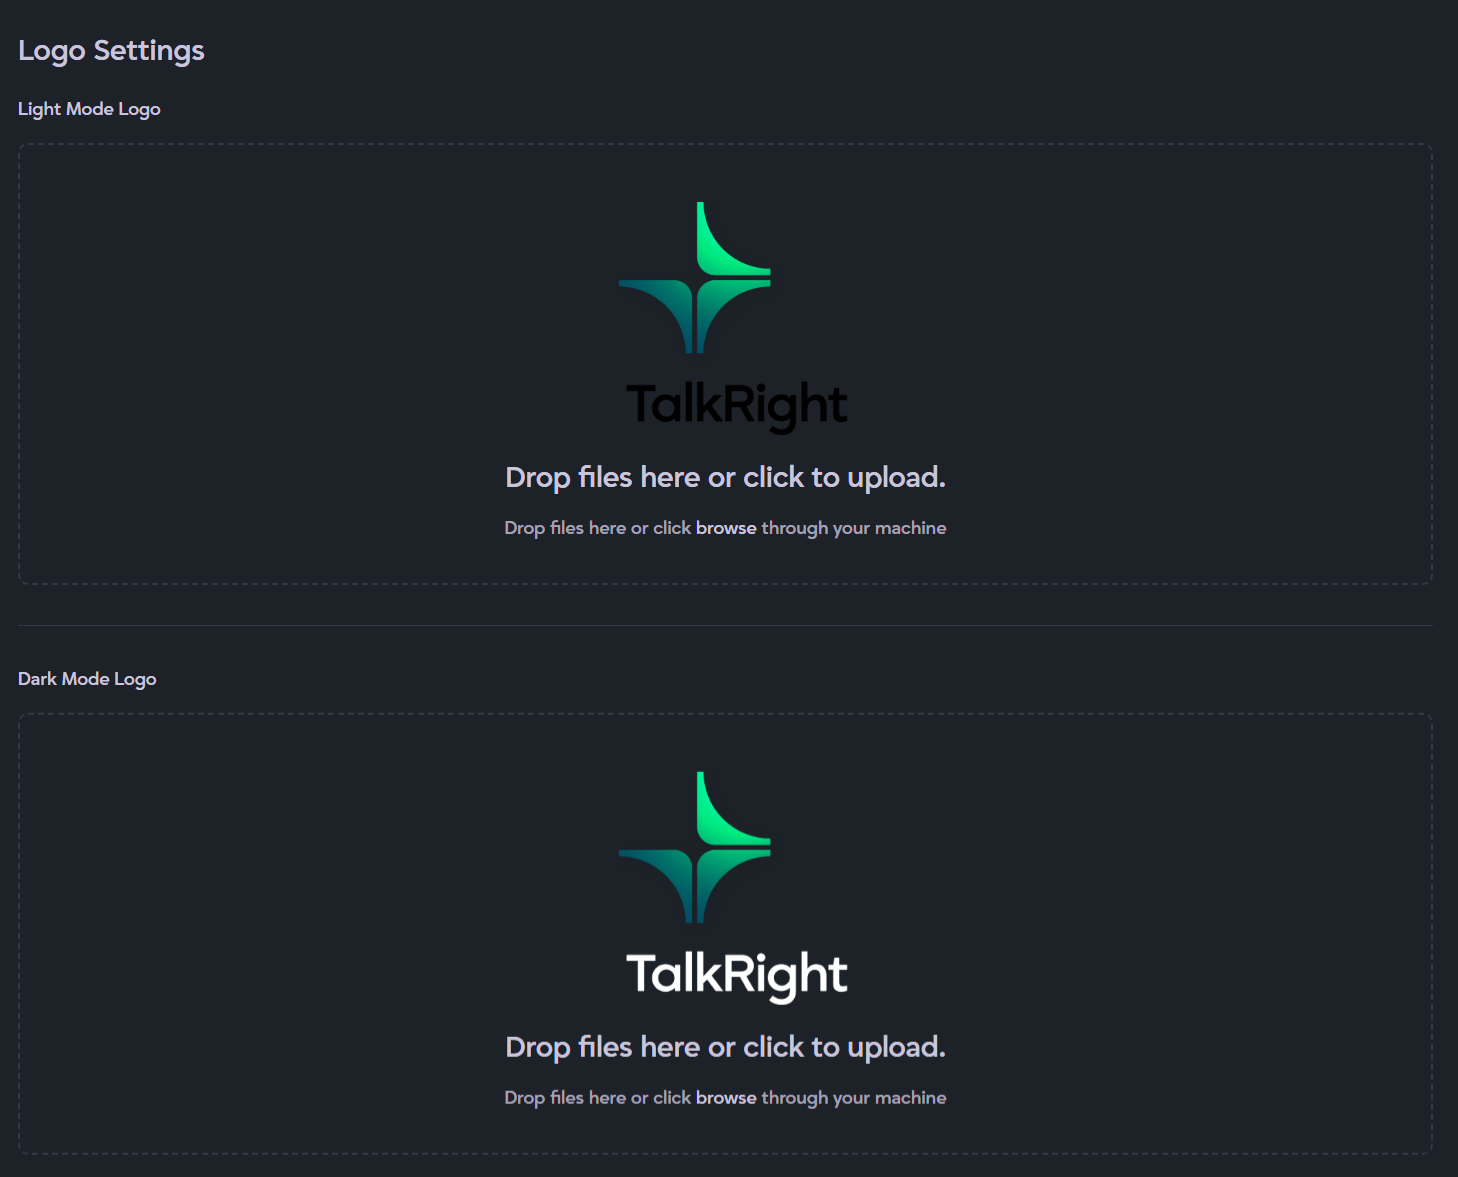
The Logo Settings section allows you to manage your system’s branding by uploading logos for both Light Mode and Dark Mode. Your uploaded logo will be displayed above the sidebar menu for consistent brand visibility.
Description:
- Upload different logos for Light Mode and Dark Mode to match the system theme.
- Supports drag-and-drop or click-to-upload functionality for easy logo management.
- Helps maintain consistent and professional brandingacross the entire application interface.
How to Use It:
- Open the Logo Settings subsection.
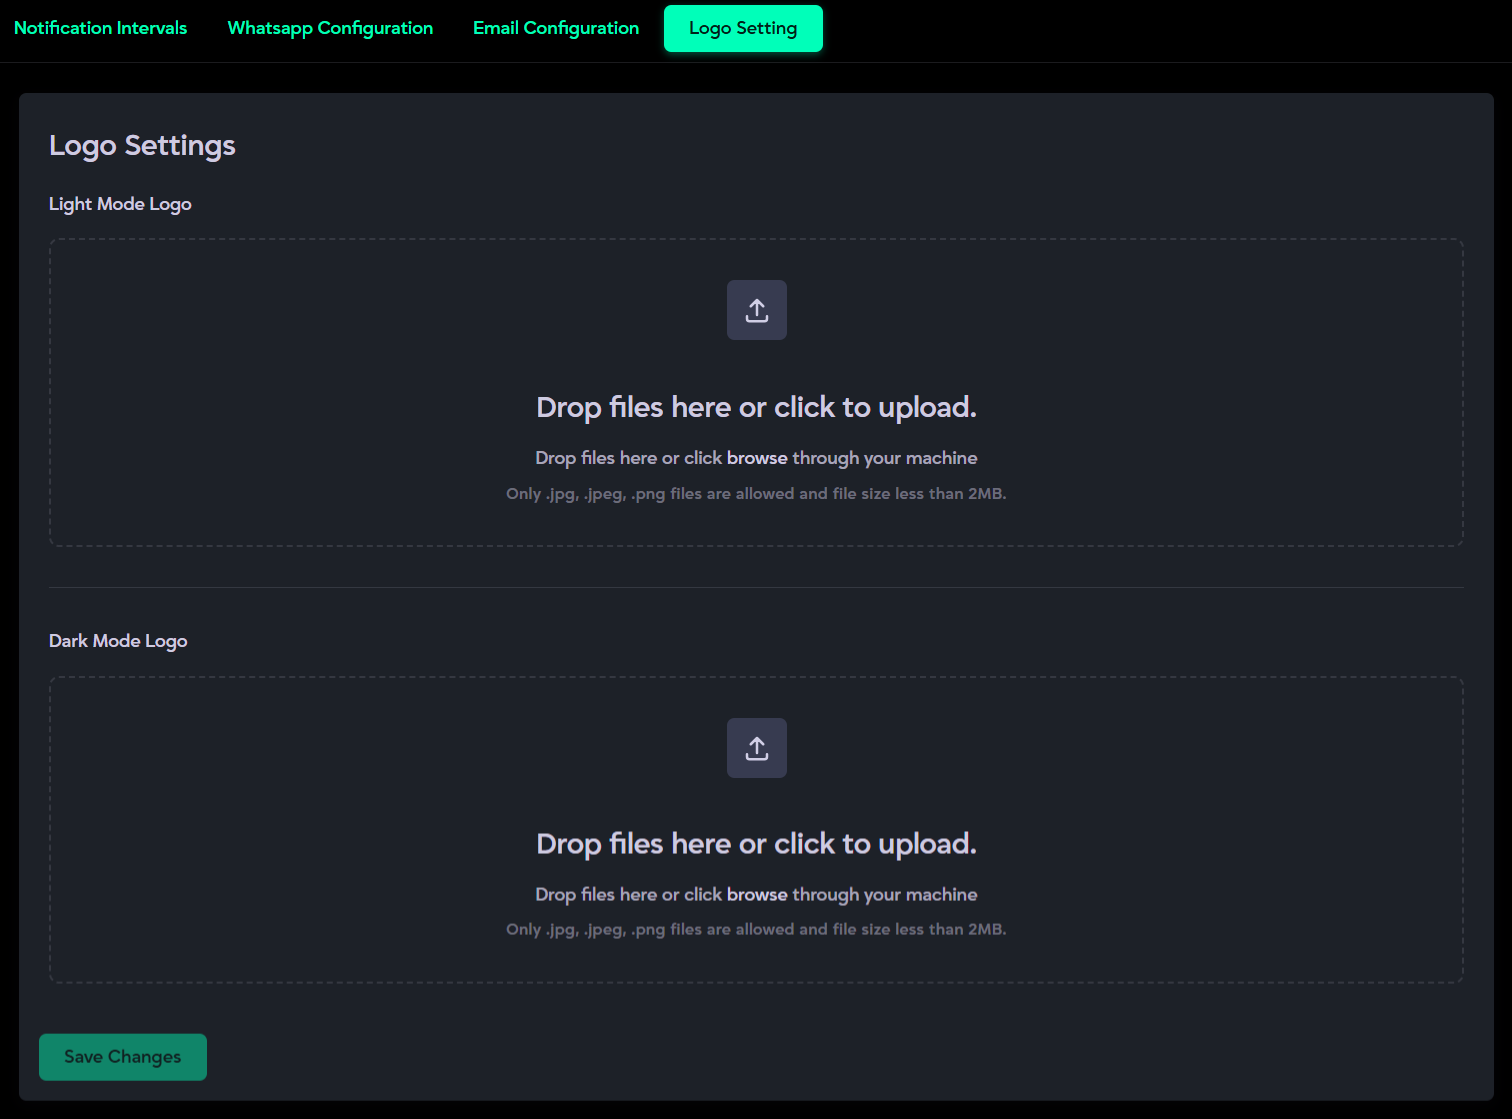
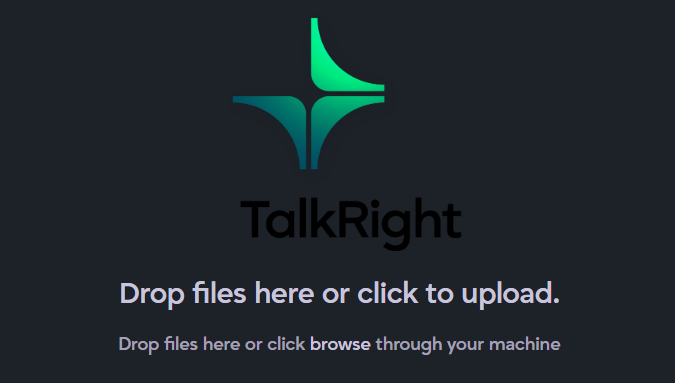
- Click inside the upload box to select a logo from your device or drag and drop it directly.
- Upload separate logos for Light Mode and Dark Mode.
- Click Save Changes to apply your logos across the system interface.
Profile Menu:
The Profile Menu gives you quick access to your account details and management options. It displays your name and email, and provides options to view your profile, update account settings, change your password, or log out.
My Profile:
What it is:
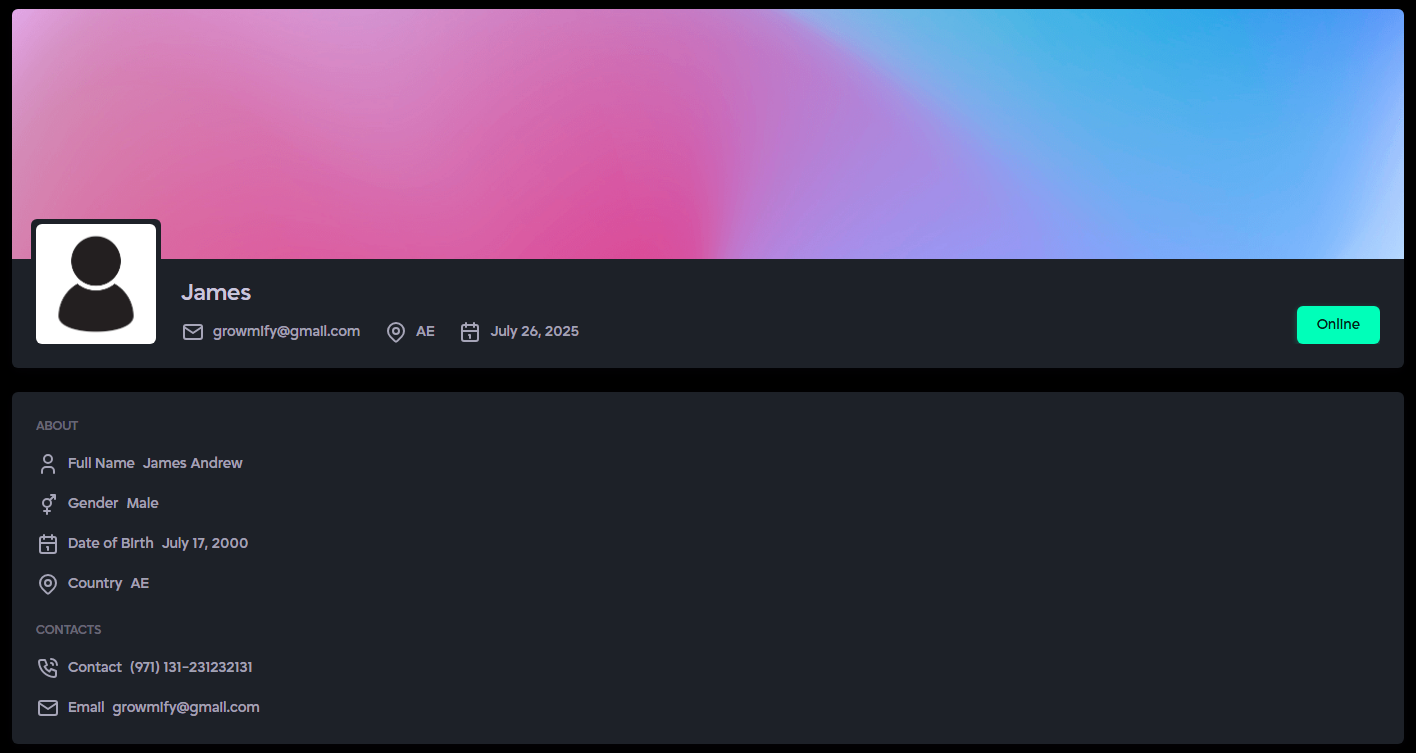
The My Profile section lets you easily view all your personal account information in one place. It helps you verify and access your profile details, including contact information, location, and platform activity.
Description:
- Profile Overview: Shows your profile picture, first name, email, location, and the date you joined the platform.
- About Section: Displays your full name, gender, date of birth, and country.
- Contact Section: Lists your contact number and email address for quick reference.
Account Settings:

What it is:
The Account Settings section allows you to view and update both your personal and business account information. It helps you manage profile details, business information, uploaded documents, and account removal in a single location.
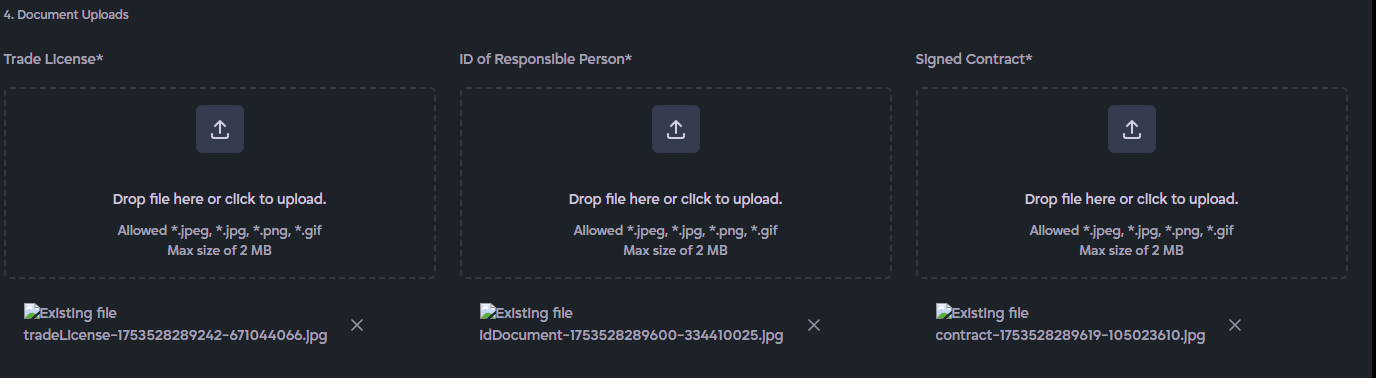
Description:
- Personal Information: Edit profile image, first name, last name, email, country, gender, date of birth, and contact number.
- Business Details: Update center name, physical address, business trade name, business address, business country and city, primary email, and primary contact number.
- Delete Account: Permanently remove your account and all associated data from the platform.
How to Use It:
- Open the Account Settings section from the Profile Menu.

- Update Profile Image
- Click Upload New Image to change your profile picture.

- If you uploaded the wrong image, click Reset to revert to the previous image.

- You can also add a new image if none was added during profile creation.
- Click Upload New Image to change your profile picture.
- Edit Personal or Business Details
- Click on any field you want to update and enter the correct information.

- If you make a mistake or want to discard changes before saving, clickReset next to the Save button.
- Once all changes are correct, click Save to update your profile.
Ensure that no required field is left blank, as the system will not save incomplete updates. - Click on any field you want to update and enter the correct information.
- Delete Account Permanently
- Click Delete My Account.
- A confirmation box will appear asking for your password,confirm password, and for you to typeDELETE_MY_DATA in all caps.
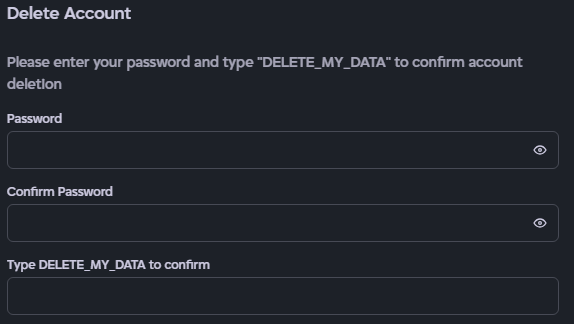
- Click Delete Account to permanently remove your account and all associated data.
- If you change your mind, clickCancel to exit without deleting your account.

- Click Delete My Account.

Change Password:
What it is:
The Change Password section allows you to securely update the password associated with your account. It helps protect your account by ensuring only you can access it.
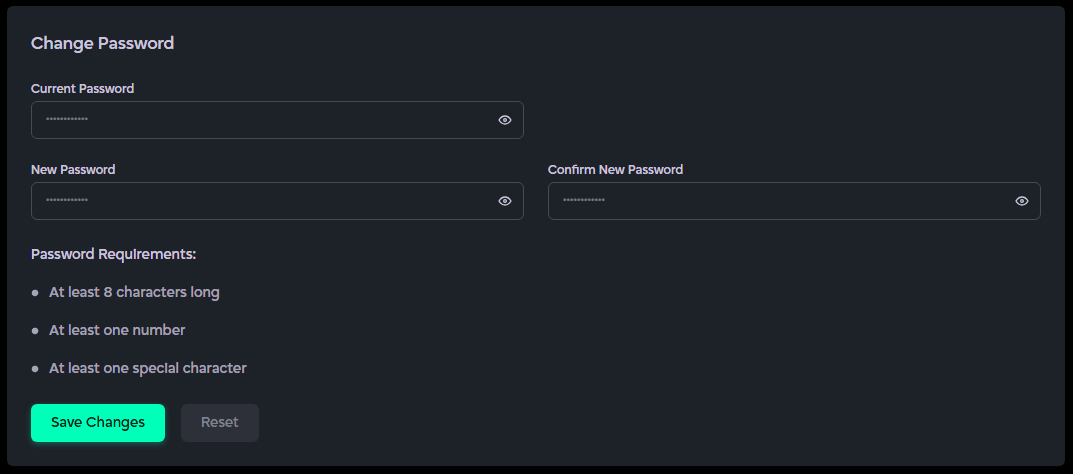
Description:
- Current Password: Enter your existing password to verify your identity.
- New Password: Set a new password for your account.
- Confirm Password: Re-enter the new password to confirm accuracy.
- Save Changes: Apply the new password to your account securely.
How to Use It:
- Open the Change Password section from the Profile Menu.

- Enter Current Password: Type your existing password to verify your identity.

- Set New Password:Enter your desired new password. Make sure it meets the platform’s security requirements (minimum length of 8 characters, combination of small n capital letters, numbers, or symbols).

- Confirm New Password:Re-enter the new password to ensure it matches exactly.

- Save Changes: Click Save Changes to update your password. Your account will now be secured with the new password.
- Reset: If you made a mistake or changed your mind, click Reset to clear the fields or exit without updating your password.